To avoid these ads, REGISTER NOW!

E-tek Restorations: PROJECT THREAD

OP
E

e-tek

Well-known member
Joined
Dec 19, 2007
Messages
10,690
Location
Saskatoon, SK
If you lived round the corner you would see me on a regular basis. Interesting to note we both joined the forum the same year. :beer:

I wish you - and a few others - lived around the corner Simon! But I wonder how much we'd get done, other than chatting and drinking that is! I'm glad we both found the place - and it's been a pleasure getting to know you. :beer:
 
To avoid these ads, REGISTER NOW!

HOTFR8

Banned
Joined
Mar 2, 2007
Messages
24,498
Location
Castlemaine, Victoria. The Hot Rod Centre of Austr
I wish you - and a few others - lived around the corner Simon! But I wonder how much we'd get done, other than chatting and drinking that is! I'm glad we both found the place - and it's been a pleasure getting to know you. :beer:

Thanks Ed. I think we would get plenty done and still enjoy a cold one. :beer:
This forum to me is "The" forum to belong to. I find now I am more of a Shed or Garage person liking more the building of a project than a get out and drive it. Although It is good to see something finished and driven (shown) after it is all done. Still getting into another workshop, shed or garage is great fun for me seeing how some one like yourself works and that often can only be done here. :thumbup:
 
OP
E

e-tek

Well-known member
Joined
Dec 19, 2007
Messages
10,690
Location
Saskatoon, SK
Time to attack the rusty, dirty details....:sad:

119_6396.JPG


119_6398.JPG


The air chisel makes quick work of thick undercoating:

119_6399.JPG


119_6400.JPG


Sometimes it's like an archaeological dig. That's fiberglass matting:

119_6402.JPG


A few of these holes shouldn't be here....:eyecrazy:

119_6403.JPG


This car was either build on a Friday, or by GM's head panel-fitment ***-hat. The lower flange was pushed back on itself, never being welded to the quarter panel:

119_6404.JPG


...and this is how they left the original gap between floor and inner fender:

119_6406.JPG


After using the air chisel, I used my new needle scaler, which made quick work of any undercoating the chisel didn't get, plus it cleaned the seams really well:

119_6411.JPG


I got these radio-headphones for Christmas - and they're AWESOME!

119_6413.JPG


Once all the undercoating was removed I found a few more rust spots that will need to be addressed before the new panels can be attached. This one went into part of the floor, near the shock mounts:

119_6420.JPG


119_6422.JPG


119_6425.JPG


Found the plug that started this rust hole:

119_6419.JPG


OK, time for some test fits -

119_6427.JPG


119_6426.JPG


BAM! Ready to go....LOL!!

119_6429.JPG


119_6430.JPG


Tomorrow I'll make pieces to repair all those rusted bits, then fit the new panels over top. Thanks for looking!
 

Responder

Well-known member
Joined
Nov 1, 2009
Messages
368
Location
Saskatoon, SK
Actually neither! Rust Bullet sent me a bunch of product to review and so far so good, so I'll be using that. It's very similar to POR15 and performed well in short-term testing I've done (see my blog). I also have a side by side long-term test going on - having painted both POR15 and Rust Bullet onto a rusty panel, then strapped it to the bottom of my van. It's currently minus 35C here - and has been for weeks - so it's getting a workout!!

The Eastwood product didn't hold up as well as the POR15, but I do use their Chassis Black it to paint black pieces as it's tough and shin, but not a perfect rust paint.

Hope that answers your question!

Thanks, yes it did. Let us know how the testing goes with the panel!
 

ambenz

Well-known member
Joined
Dec 12, 2010
Messages
4,236
Location
NW Chicago Suburbs
Thanks for keeping the posts coming and "CONGRAT's" on 10K.
This is a favorite thread, though I may not post much, I catch it often!
A reality show should pick up your posts and pay you for documenting your builds...I bet it would be a hit!
Thanks for the... "Free Ride!"
 
Last edited:
OP
E

e-tek

Well-known member
Joined
Dec 19, 2007
Messages
10,690
Location
Saskatoon, SK
An entire day spent making patches, working on edges and finding more rust....

106_6436.JPG


Snip snip...

106_6431.JPG


Bend...

106_6432.JPG


106_6433.JPG


106_6435.JPG


The trunk-quarter fillers where both bent to **** for some reason...

106_6438.JPG


Better now -

106_6446.JPG


Drilled spot weld holes -

106_6442.JPG


Yikes more rust...:sad:

106_6443.JPG


Looks like nothing got done....but were THAT MUCH closer to attachment!:rocker:

106_6445.JPG
 
OP
E

e-tek

Well-known member
Joined
Dec 19, 2007
Messages
10,690
Location
Saskatoon, SK
Patches....patches....

Inner floor flange:

106_6449.JPG


106_6450.JPG


Wheelhouse:

106_6456.JPG


106_6457.JPG


RustBullet, a product similar in nature to POR15, sent me a bunch of their product to test and I've been very happy with the results of testing I've done, so I'm confident it will protect the inners of this Camaro for years to come:

106_6463.JPG


106_6464.JPG


106_6465.JPG
 

Kevin54

MEMBER EMERITUS
Joined
Jan 12, 2005
Messages
29,341
Location
Urbana, Ohio
106_6449.JPG


Ed.....what am I looking at in this picture? Is the bottom piece welded and missed the top piece? :dunno: It looks like a gap between the weld and the original panel.

Do you use an auto darkening helmet? I have one and really like it, but I have strayed off the weld path a few times. I thought I was good until I could see what I was doing :lol:
 

MP&C

Well-known member
Joined
Oct 21, 2009
Messages
4,397
Location
Leonardtown, MD
Kevin, I think he has two layers there he's working on. Cutting the outer back a bit more would give better access to see/ prep the area/ dress the welds afterward on the inner layer.

On the helmet, sometimes when the lens get dirty or in poor lighting conditions it does become hard to see....unless Ed has one of the old school flip downs, which is another challenge.. Regardless, if you find it hard to see where the joint is between the two panels, I have found you can touch the panel with the end of the mig wire protruding, drag it to the side until you feel the joint between the panels, then use your other hand to support/lift the torch up off the panel slightly. Then a quick zap, and the weld is on the joint, no more straying to the side.
 
Last edited:

Kevin54

MEMBER EMERITUS
Joined
Jan 12, 2005
Messages
29,341
Location
Urbana, Ohio
I've tried the regular helmets and I had a real bad time staying on the path, but then again, I can't weld. I do have a hand held shield that came with the welder and I use it to weld spots. I can line everything up then put the shield in front of my face and pull the trigger.

I do need to get some metal to practice on because I have two patch panels on my POS rusty Ram to fix before long. So I will be asking a lot of questions. The last thing I want to do is screw up the bedsides and have to use a quart of mud on each just to bring them back in shape.

So be prepared people....I will be bombarding you guys with questions. And I will have a thread documenting the process also.
 
OP
E

e-tek

Well-known member
Joined
Dec 19, 2007
Messages
10,690
Location
Saskatoon, SK
It's as Robert described - an inner and outer panel. I don't like to cut out any more origianl metal than is absolutely necessary - and in reality there was plenty of room not only to see, but to work on the two panels separately. I was able to get the welder and grinders in there - no problem:

Here's the inner panel (trunk/shock tower edge) about 80% finished:

106_6450.JPG


As for helmets - auto-darkening is definitely the way to go. You do have to play with the settings, based on surrounding light perfusion, which you sometimes forget! For example, if you're welding on a top panel vs. under a fender, or if you have a strong light (eg halogen) nearby - these factors will all affect how much and how fast the darkening occurs. Better helmets have better controls, so watch for that when you buy one!
 

Kevin54

MEMBER EMERITUS
Joined
Jan 12, 2005
Messages
29,341
Location
Urbana, Ohio
It's as Robert described - an inner and outer panel. I don't like to cut out any more origianl metal than is absolutely necessary - and in reality there was plenty of room not only to see, but to work on the two panels separately. I was able to get the welder and grinders in there - no problem:

Here's the inner panel (trunk/shock tower edge) about 80% finished:

106_6450.JPG


As for helmets - auto-darkening is definitely the way to go. You do have to play with the settings, based on surrounding light perfusion, which you sometimes forget! For example, if you're welding on a top panel vs. under a fender, or if you have a strong light (eg halogen) nearby - these factors will all affect how much and how fast the darkening occurs. Better helmets have better controls, so watch for that when you buy one!

I see what it is now. The picture was throwing me off. I thought there was no way that you could miss a gap like that, but I see where the wheelhousing has the rectangle cut out of it, showing what is in behind.

I'll be alright :tard:
 
OP
E

e-tek

Well-known member
Joined
Dec 19, 2007
Messages
10,690
Location
Saskatoon, SK
Still working on the last couple areas required before being able to fit the quarter panel, including this area around the roof and rear glass opening. "PIN" marks the spot that a molding clip anchor pin goes:

119_6480.JPG


Before welding the piece in, I'll reach in as far as possible with a brush to apply RustBullet paint, then I'll use the long, flexible sprayer nozzle (from Eastwood) to get rust-proofing as far as possible into the roof space:

119_6484.JPG


But first, I'll make the piece that goes here beginning with the Shrinker-Stretcher machine. Here I'm using the shrinker side to pull the metal together, causing it to arc:

119_6485.JPG


119_6487.JPG


119_6490.JPG


Tools of the trade...Although there's an equal number of pneumatic and electric tools in the photo, I've found myself using more electric tools - especially grinders - which are generally stronger, more convenient and less finicky than pneumatic tools.

119_6478.JPG


The inner fender is now welded SOLID, awaiting final rust-proofing and sealer before I finalize the fitment of the quarter panel over top:

119_6481.JPG
 
To avoid these ads, REGISTER NOW!

mdkingsley

Well-known member
Joined
Nov 18, 2012
Messages
371
Location
Chickamauga Ga
Finally had the time this morning to sit down and catch up about 20 pages. All the projects are looking great. And thanks for the patience to document what you do, I think about it after I am done.
 
OP
E

e-tek

Well-known member
Joined
Dec 19, 2007
Messages
10,690
Location
Saskatoon, SK
Finally had the time this morning to sit down and catch up about 20 pages. All the projects are looking great. And thanks for the patience to document what you do, I think about it after I am done.

Glad to have you along! I use these posts as a record of the work I do in the shop, to show the owners what has been done to their cars, to entertain fellow GJ's :beer:...and....because TV *****! :lol_hitti

Today I applied a coat of RustBullet over any seams and welds from yesterday, as well as a second coat to the undersides of everything that will be hidden by the quarter panel installation. Just prior to installation I'll run black Pro-foam seam sealer anywhere required as well.

119_6492.JPG


119_6494.JPG


119_6495.JPG


119_6496.JPG


119_6497.JPG
 
OP
E

e-tek

Well-known member
Joined
Dec 19, 2007
Messages
10,690
Location
Saskatoon, SK
Quarter panel on.....and only 5 hours of fitting, drilling and welding!

photo%25201.JPG


When I had to crawl into the trunk I thought it would never end....

photo%25202.JPG


But slowly, painfully, I got 'er sorted out :)

photo%25202.JPG


photo%25204.JPG


photo%25203.JPG


photo%25201.JPG
 
Last edited:

MP&C

Well-known member
Joined
Oct 21, 2009
Messages
4,397
Location
Leonardtown, MD
Ed, in all the tests you've conducted with the POR, Rustbullet, etc paints, have you done anything to test how impervious they are to heat from welding? I had some POR that was in the vicinity of welding on cowl panels, and it put off fumes so noxious I had to open all the shop doors and let it clear. It also contaminated the weld where it would balloon up to a porous weld, similar as it does in rust contamination.

My experience with the POR is one of the reasons I use the epoxy between panels as it tended to be resistant to the effects of heat. It would be interesting to see how the POR types stacked up against each other in heat resistance during welding. How did the Rust Bullet do when you welded on the quarter to the trunk surround?

Camaro panels look like they are fitting up pretty well. Did the Cougar ever find a painter/ get finished assembly or did I miss that? You've got so much going through it's hard to keep track! :lol_hitti
 
Last edited:
OP
E

e-tek

Well-known member
Joined
Dec 19, 2007
Messages
10,690
Location
Saskatoon, SK
Thanks guys - lots of work re-skinning a car for sure! As for the plug-stick, I had considered putting a box on my welding cart (a la Roberts), but the cords are generally so short I want to be able to plug them in right next to my work area - so that seemed like a good alternative.

Robert - good questions on the rust paints and welding. As you are likely aware, POR and RB are "Single Stage Humidity-Cured Epoxy" coatings, making them extremely easy to apply (no mixing) and - of course - they are formulated and tested to be superior to automotive primers in how they de-humidify, convert and encapsulate rust.

I've spent a LOT of time and effort to find and use the correct, best-made and highest quality coatings in the correct applications and 'basic' epoxy primers just can't compare as a rust inhibitive coating like POR15 or RustBullet, so I'm just not comfortable spraying an epoxy primer over rust, or in areas prone to rust - and then hoping for the best. Now, "some" epoxy primers are rust-specific (Sher-Wills Epolon II Rust Inhibitive Epoxy Primer), but usually they are not.

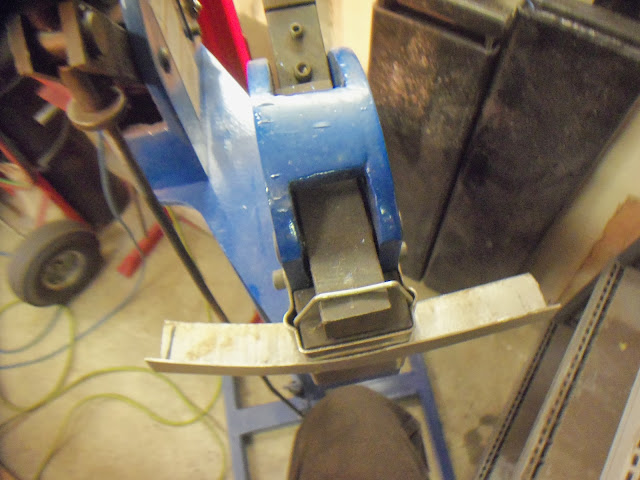
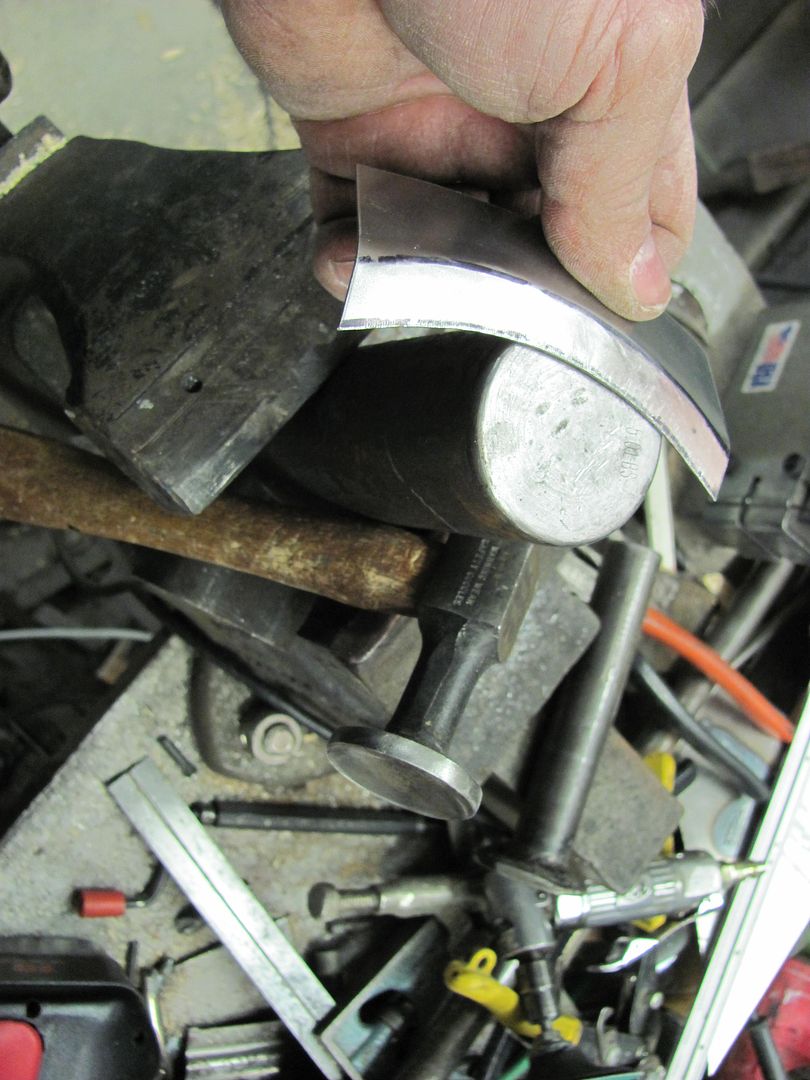
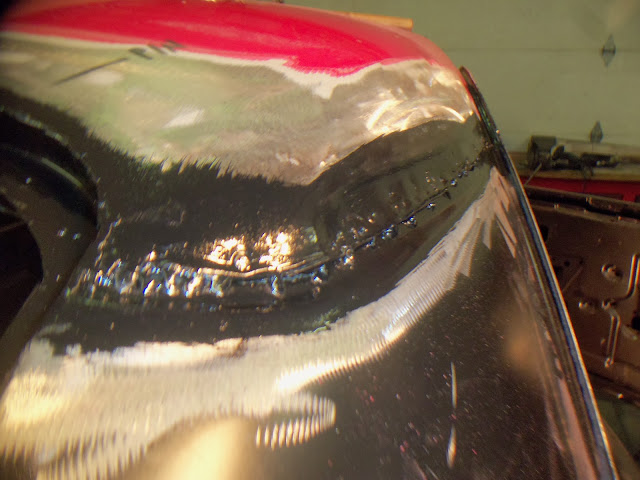
As for welding around these coatings, we all know welding has to be done on clean metal and any contaminants, from rust to e-coatings, to epoxy primers and paints have to be removed from the welding surface, but of course anytime you weld you'll burn any primers or paints nearby as well, and yes - the rust paints do put off quite a bit of noxious smoke! Usually whatever precautions I've taken to avoid the welding fumes also suffices for the burnt primer or paints nearby. I generally wear a welding mask when welding more than a few spots and also have an exhaust fan running to remove the welding fumes and smoke from the shop.

After the welding has cooled I just brush on a second application of the rust paint. With POR15 you can just touch up the spots that were welded/burned through, but RustBullet requires a second complete coat, so I did that after I finished the welding in the area.

As for the Cougar - it's back in bodyshop purgatory....I feel bad for the owner, as I suggested the shop, but he says he's not in a rush and at least we know this particular shop will give him a show-quality paint job when they finally get it done. However, it's just another reminder why I do what I do, why there is always work for people like us ;) and why I've found other places to get paint work done since...
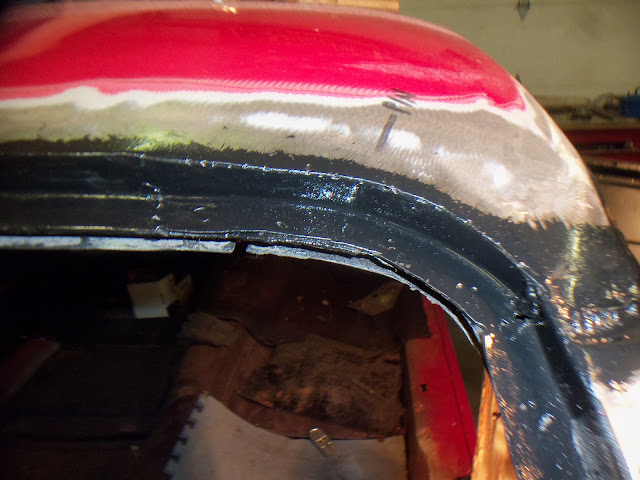
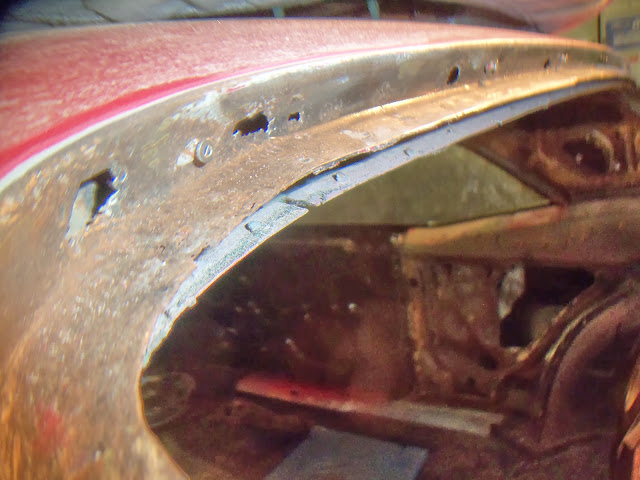
 
Last edited:
OP
E

e-tek

Well-known member
Joined
Dec 19, 2007
Messages
10,690
Location
Saskatoon, SK
Look what came in the mail today....:thumbup:

106_6509.JPG


Won't help for the drivetrain, HVAC, wiper system, etc., but at least I know I'll be getting it right when it comes to body re-assembly....

Worked on welding the quarter to inner fender today. Always more work than you'd think....

106_6511.JPG


"Overhead":

106_6501.JPG


Sidetracked! I went to move the 40 Ford back and something 'popped' when I put it into neutral.... :eek7:

106_6500.JPG


When I pulled it out, here's what I found....:eyecrazy:

106_6502.JPG


Not too suprising it broke, but I'm glad I found it now -

106_6504.JPG


Cleaned for welding -

106_6505.JPG


Welded and ground:

106_6506.JPG


Re-installed:

106_6510.JPG


Now if we only had wheels.....:willy_nil
 
OP
E

e-tek

Well-known member
Joined
Dec 19, 2007
Messages
10,690
Location
Saskatoon, SK
Makes ya wonder what else was jury rigged before you got it?????

Hopefully it was just temporarily 'tacked' some time before it got to me, but never removed and final-welded... :dunno: Oh well, done now :thumbup:

Thanks IGO2XS - high praise indeed!
 
Last edited:
OP
E

e-tek

Well-known member
Joined
Dec 19, 2007
Messages
10,690
Location
Saskatoon, SK
Finalizing some welding on this side:

106_6515.JPG


106_6516.JPG


106_6517.JPG


106_6518.JPG


106_6519.JPG


Sealed it all again with more RustBullet:

106_6521.JPG


106_6522.JPG


All done with that side for now....At least until I can get it on the lift, at which time I'll be able to get to the undersides. I'll get the major metalwork done on the left side before going back over it all and tweaking what needs to be tweaked. The quarter to roof seams will get All-Metal filler and the welds will get a skiff of Evercoat prior to spraying high-build primer for blocking.

106_6523.JPG


YIKES!:willy_nil

106_6524.JPG


Remember how they did the quarters last time:

106_6525.JPG


And how they are done now!:rocker:

106_6528.JPG
 
Last edited:

MP&C

Well-known member
Joined
Oct 21, 2009
Messages
4,397
Location
Leonardtown, MD
106_6524.JPG


Looking at the damage there, do they make a roof skin for it? Undoubtedly you'll have more hiding, ready to come through... Time for an ice pick test... :thumbup:
 

morehead

Active member
Joined
Dec 21, 2007
Messages
32
Location
southwestern ontario
This thread is awesome!! SO much information,Thank You for the time you take to inform everybody!! I have recently started working on my project-66 Belair . The rear window has the same issue as the Camaro only much worse. No replacement panels are available (Impala only) , what gauge metal do you use for this type of repair? Will you use All Metal filler over the RB or Por15 on the welds on the edge of the window frame ?

Keep up the great work!
Thanks,
John
 
OP
E

e-tek

Well-known member
Joined
Dec 19, 2007
Messages
10,690
Location
Saskatoon, SK
MP&C said:
Looking at the damage there, do they make a roof skin for it? Undoubtedly you'll have more hiding, ready to come through... Time for an ice pick test... :thumbup:

I was just considering a roof skin today Robert - lots more rust up front unfortunately.....
 
Last edited:
OP
E

e-tek

Well-known member
Joined
Dec 19, 2007
Messages
10,690
Location
Saskatoon, SK
This thread is awesome!! SO much information,Thank You for the time you take to inform everybody!! I have recently started working on my project-66 Belair . The rear window has the same issue as the Camaro only much worse. No replacement panels are available (Impala only) , what gauge metal do you use for this type of repair? Will you use All Metal filler over the RB or Por15 on the welds on the edge of the window frame ?

Keep up the great work!
Thanks,
John

Thanks, I try! I use 18 gauge for most stuff. I buy 2 x 4 sheets when necessary, but I also use parts of panels I've saved from other restorations for little pieces. I generally only use All-Metal on the roof to quarter seam and Evercoat elsewhere to smooth welds/grinding spots.
 

Kevin54

MEMBER EMERITUS
Joined
Jan 12, 2005
Messages
29,341
Location
Urbana, Ohio
106_6521.JPG


Ed......does the moulding fit correctly in this area? It looks like the patch is too far into the roof area or there is a bulge where the two vertical seams came together. Or do you still have to dress this area off with some All-Metal or Rage?
 
To avoid these ads, REGISTER NOW!
Top Bottom