Nolift911
Well-known member
I vote white!! And we are waiting on a welding master class on those rear quarters 

We'll see if I get to it this summer. It's not super high on the priority list, and I hate rust repair.I vote white!! And we are waiting on a welding master class on those rear quarters
A vote for bronze here. Also I have the Grabber AT/X's on my F150. They have been a great tire very good in the snow and wet conditions, they make a lil bit of road noise but not to bad,
Thank you for the feedback on the tires guys.Grabber AT/X and Cooper Discoverer AT/X are both readily available in that size and I have used and liked both. Are you using Black Hills Powder Coating?


I used to work with Justin before I left SD. Small worldNo, I've worked with Justin at BH Powder Coating in the past, but when I called him about doing the wheels for the Expedition he said that he doesn't do wheels anymore. He recommended I go to Anderson Powder Coating, which I did and Jesse did an excellent job for me. I'll be going back to him again for these wheels.


Is it clear coated? Or just single stage?I'm sort of on the fence with what to do about the paint oxidation. I know I want to address it to make the truck overall more presentable to potential buyers (yes, I know this is probably silly given the rust issues) and I also don't want to spend a lot of money and time to get it there. There are a couple of avenues. The cheap and easy would be the Zep floor wax/VGG Shine Juice/Sweet Patina Sauce simple wipe on solution. The more expensive and time consuming method would be to buff the oxidized paint with some compound and a wool pad, then wax the whole truck.
I'm conflicted, because I know the cheap and easy method wouldn't give me really great results, but it would be something easy to do to quickly transform the looks of the paint. @D.F.B is the angel sitting on my shoulder telling me that this is the perfect opportunity to finally try buffing some automotive paint with my Harbor Freight DA. I can't really hurt the paint, and I don't need perfection here. I think it would be fun to buff it, but it would absolutely be more time consuming.
I'll leave it at that for now. Later this week I will look closer at the fuel pump and make the decision whether or not to buff the paint.

 www.obsessedgarage.com
 www.carpro-us.com
...I would leave that patina.
I don't know what Mike will think of this idea but I like it!Do it Mike! Drive the motorhome up there, bring a hitch to flat tow it home… after you go to Mt Rushmore and the Black Hills. You could even drive the K10 around while up there, cuz it is a Chevy, it will run! And then we all get to follow along while you build it up for Little Z’s 16 birthday present! DO IT!!!

Thank you for chiming in! It was repainted at some point with a base/clear paintjob. There are also some areas that I painted with a spray can years ago. I'm not super concerned with the fragility of the paint, even some burn through would add to the "patina". I mainly just want to get the oxidation off and bring some shine back so that the truck doesn't look like it's been sitting in a pasture neglected for years and years. I want it to present as well as it can. As for the sap, I planned on trying some of the Stoner Tarminator on it. I also have a brand new bottle of Carpro Lift (bought on your recommendation), but I figure that probably wouldn't cut the sap. I think a test section on the paint is the perfect way of proceeding.Is it clear coated? Or just single stage?
If its failing clear coat, you won't see much benifit, but you might bring some of the shine back to single stage. In any case, do a test section and see what you get. This would be a good opportunity to have a play around with that machine, I'd probably start with a foam pad considering the fragility of the paint.
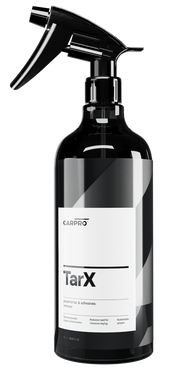
For the tree sap, I'd be using something like Carpro TarX, but apparently hand sanitizer can dissolve tree sap as well.
CARPRO Tar X Powerful Tar Remover Essential for Automotive Decontamination and Adhesive Removal
OG's CARPRO Tar X, an essential tar remover perfect for spot-treating tar, sap, and adhesive residues. Ideal for use after paint decontamination, this powerful solution ensures effective removal without damaging plastic or rubber surfaces.
CARPRO TarX 1 Liter (34 oz)
Removing tar from a vehicle improperly can result in harmful scratches. Sky’s The Limit Car Care makes cleaning easier with its CARPRO TarX 1 Liter (34 oz).
Mike, if I could choose one person in this world to be the next owner of my truck, it would be you. If you're at all serious about owning it, send me a message.I'd love to have that sitting in my shop as a restoration project Austin.
Hope you get it sold to someone who will do it justice.
I agree with you. Unfortunately my brain doesn't accept that logic haha. I can't help but to want the truck to be as presentable as possible to potential buyers. Take my word for it, the truck doesn't have what I would consider patina. It looks like neglect. I really believe that bringing some shine back to it would really make it pop and help with the sale. Plus, I'm really curious if I can bring it back somewhat and I think it would be a lot of fun - and a learning opportunity.I agree. I don't think you need to do anything in regards to the paint...
Buyer 1 wants to do a full restoration. He won't care what the paint looks like because he knows he's going to have it resprayed.
Buyer 2 is going to keep it as a survivor and drive it as is. They may not want a patina preservation applied to the truck. Let them decide if they want to put some shine juice on there or not.
If a potential buyer can't look past the paint, then they have no business owning that beautiful truck.
)if I had the room...
Wish I was in a position to be a potential buyer for it.
DO WANT, but already have a project truck occupying space with 2 other cars in the driveway. Shame.

Mike, if I could choose one person in this world to be the next owner of my truck, it would be you.
Thanks Austin. Great, now I have some thinking to do.
not that my opinion matters, but man, a 4x4 resto-mod, in my mind is WAY cool in todays sea of bagged 2wd everything!

Unfortunately, I have too much going on right now, but this one is the first one that has actually gotten me to stop and think lately.


Those new wheels look fantastic! Just wait to you wash them next, the effort put into the coating will make cleaning so simple.Couple of vehicle related updates:
First, I threw a new battery and fuel pump in the old '72 Chevy and have been putting some miles on driving around the neighborhood with my family. It's running great! I also found a good deal on a set of hubcaps on eBay, and to my surprise I really love how they look on the truck. I know, they aren't correct (they're square body caps) but the correct caps would've been about 3-4 times the cost of these. They look the part to me, and I think the truck looks tougher.
Still have to clean it up before I can think about listing it for sale, but getting it running again was an important step in the right direction.
I also worked on the Expedition last week. We dropped it off at the mechanic shop to have a simple routine oil change and ended up getting hit with a $2,600 bill for new front lower control arms, rear upper control arms, and a 4 wheel alignment. Not fun at all, but this is exactly the reason why I take our family hauler to the shop rather than doing oil changes at home - I wouldn't have checked the ball joints and found them to be very worn out... On a positive note, the Expedition has never driven so well and solid as it does now. That inspired me to finally get around to ceramic coating and bolting up the new wheels and tires that have been taking up space in my shop for months now.
As a reminder, I picked up this Armour wheel coating kit based on @D.F.B 's review and experience. It was quite simple to apply. Once coated, I left the wheels to cure for 24 hours. Once cured, I systematically jacked up each corner, removed the old wheel/tire, detailed the wheel well and suspension, and finally installed the new wheel/tire with new lug nuts. It was going pretty well and was an enjoyable way to spend a beautiful summer afternoon.
(shield your eyes from that rotor flash rust, @D.F.B )
As I was finishing the very last wheel on the passenger side front, I noticed a wire harness hanging out in the breeze completely naked, with no loom. This caught my attention, so I investigated. To my disappointment (and slight anger) I discovered that someone that wasn't me (and I likely had paid to do service) had gotten lazy and failed to properly route said harness. Instead, they had zip-tied it haphazardly to a heater line that just so happened to be quite near the exhaust manifold. Obviously, this melted and disintegrated a large portion of the factory corrugated wire loom, leaving the bundle of wires exposed and very close to the hottest part of the engine bay.
By some massive stroke of luck, a visual inspection of the exposed wires showed no signs of melted insulation or bare wire! I can't believe how fortunate I was there, because no doubt that harness would have been expensive and difficult to repair or replace. With just enough access, I was able to wrap the exposed portion of harness with electrical tape, followed by some nylon woven wire loom that I had in stock. Following this, I rerouted the harness up much higher on the firewall, tying it to another harness in a more proper and safe path than the lazy tech before me had attempted...
I just have one photo of this debacle, taken after the electrical tape wrap job:
I was not happy to have to do this repair, but I am grateful that I caught it and took care of it before it became a real massive problem.
The new wheels are such an upgrade though!
We took it to Mt. Rushmore for our first outing on the new wheels and tires, and I was quite impressed with the driving manners of the new tires. As a reminder, they are Yokohama G015's (thank you for the recommendation @OutlawDrifter )
Thanks Marc!Hub caps look good on the pickup. Glad you found the harness before it became a bigger issue.
New wheel/tire combo looks good!
I appreciate all of your help with the coating, thank you!Those new wheels look fantastic! Just wait to you wash them next, the effort put into the coating will make cleaning so simple.
I have no way of knowing for sure that it happened during my ownership of the vehicle, but there were two jobs in particular I had done at the shop where that harness would have been in the immediate way of the work being done... Thanks!No fun finding poor workmanship you paid good money for, draw backs of having others work on your truck that is not "their own" Reality is most people would not notice and mechanic is working against "book time" for a job...
Wheels look great!


Are you planning to patch the rocker? Given your skills, it should be fairly quick and easy to put in a new rocker and prime it.. something that could be a daunting task for a potential buyer. I'm sure it would add a lot of value. Body panels for old Chevy trucks are pretty cheap..
Are you planning to patch the rocker? Given your skills, it should be fairly quick and easy to put in a new rocker and prime it.. something that could be a daunting task for a potential buyer. I'm sure it would add a lot of value. Body panels for old Chevy trucks are pretty cheap..
Truck is looking good! I installed a set of those hubcaps on my 78 Chevy crew cab when I was in high school. It cleaned the rims up a lot due to covering the axle hubs and lugnuts.
Like burger said, the missing rocker panel is the only thing that says to walk away for potential buyers. But without knowing what the underside looks like I wonder how hard it would be to just install them?
This.
Otherwise this is just a flat out tease...especially with your skills