OP
Platonic Solid
Well-known member
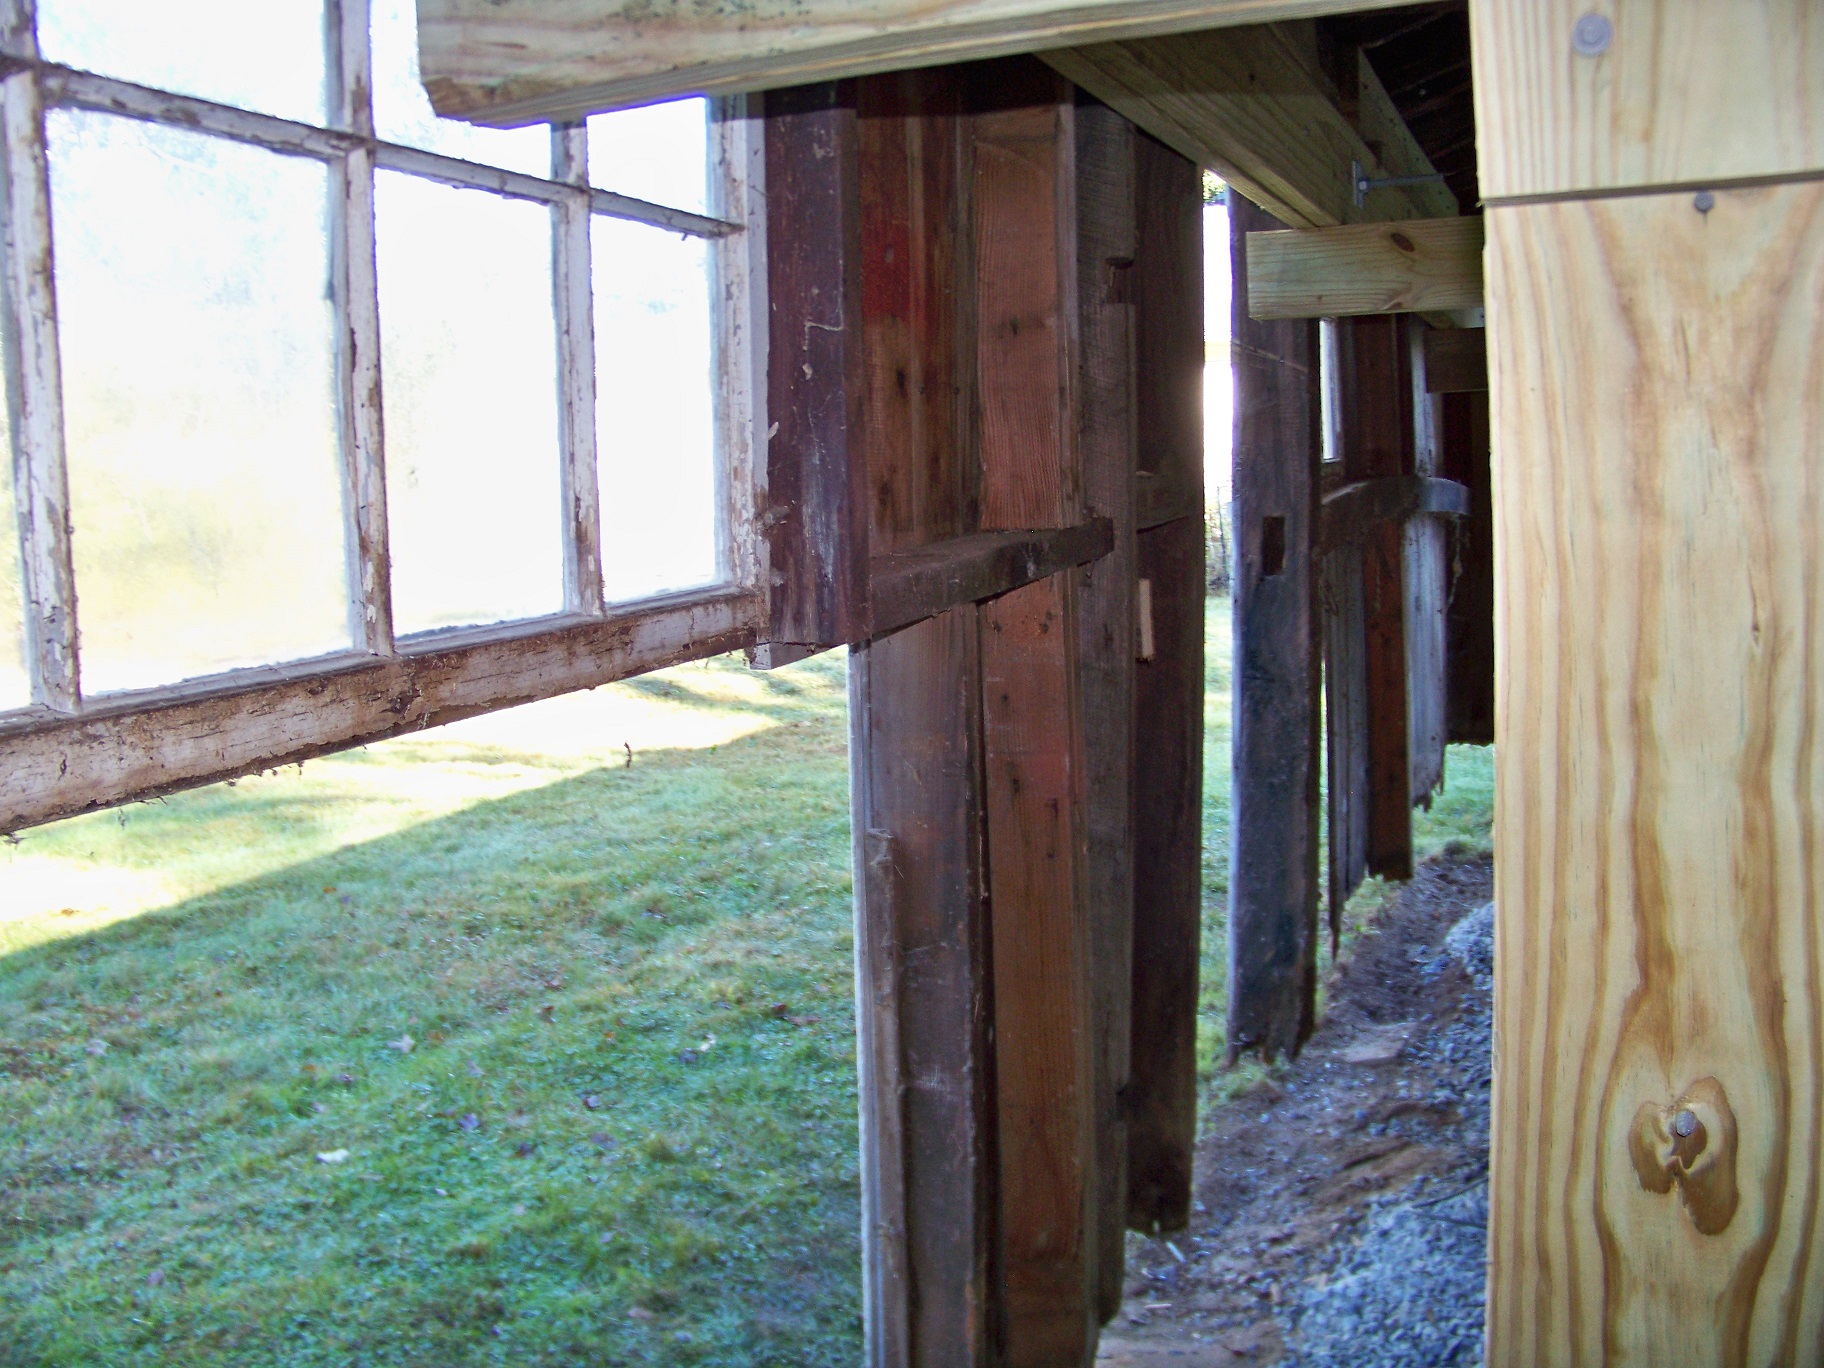
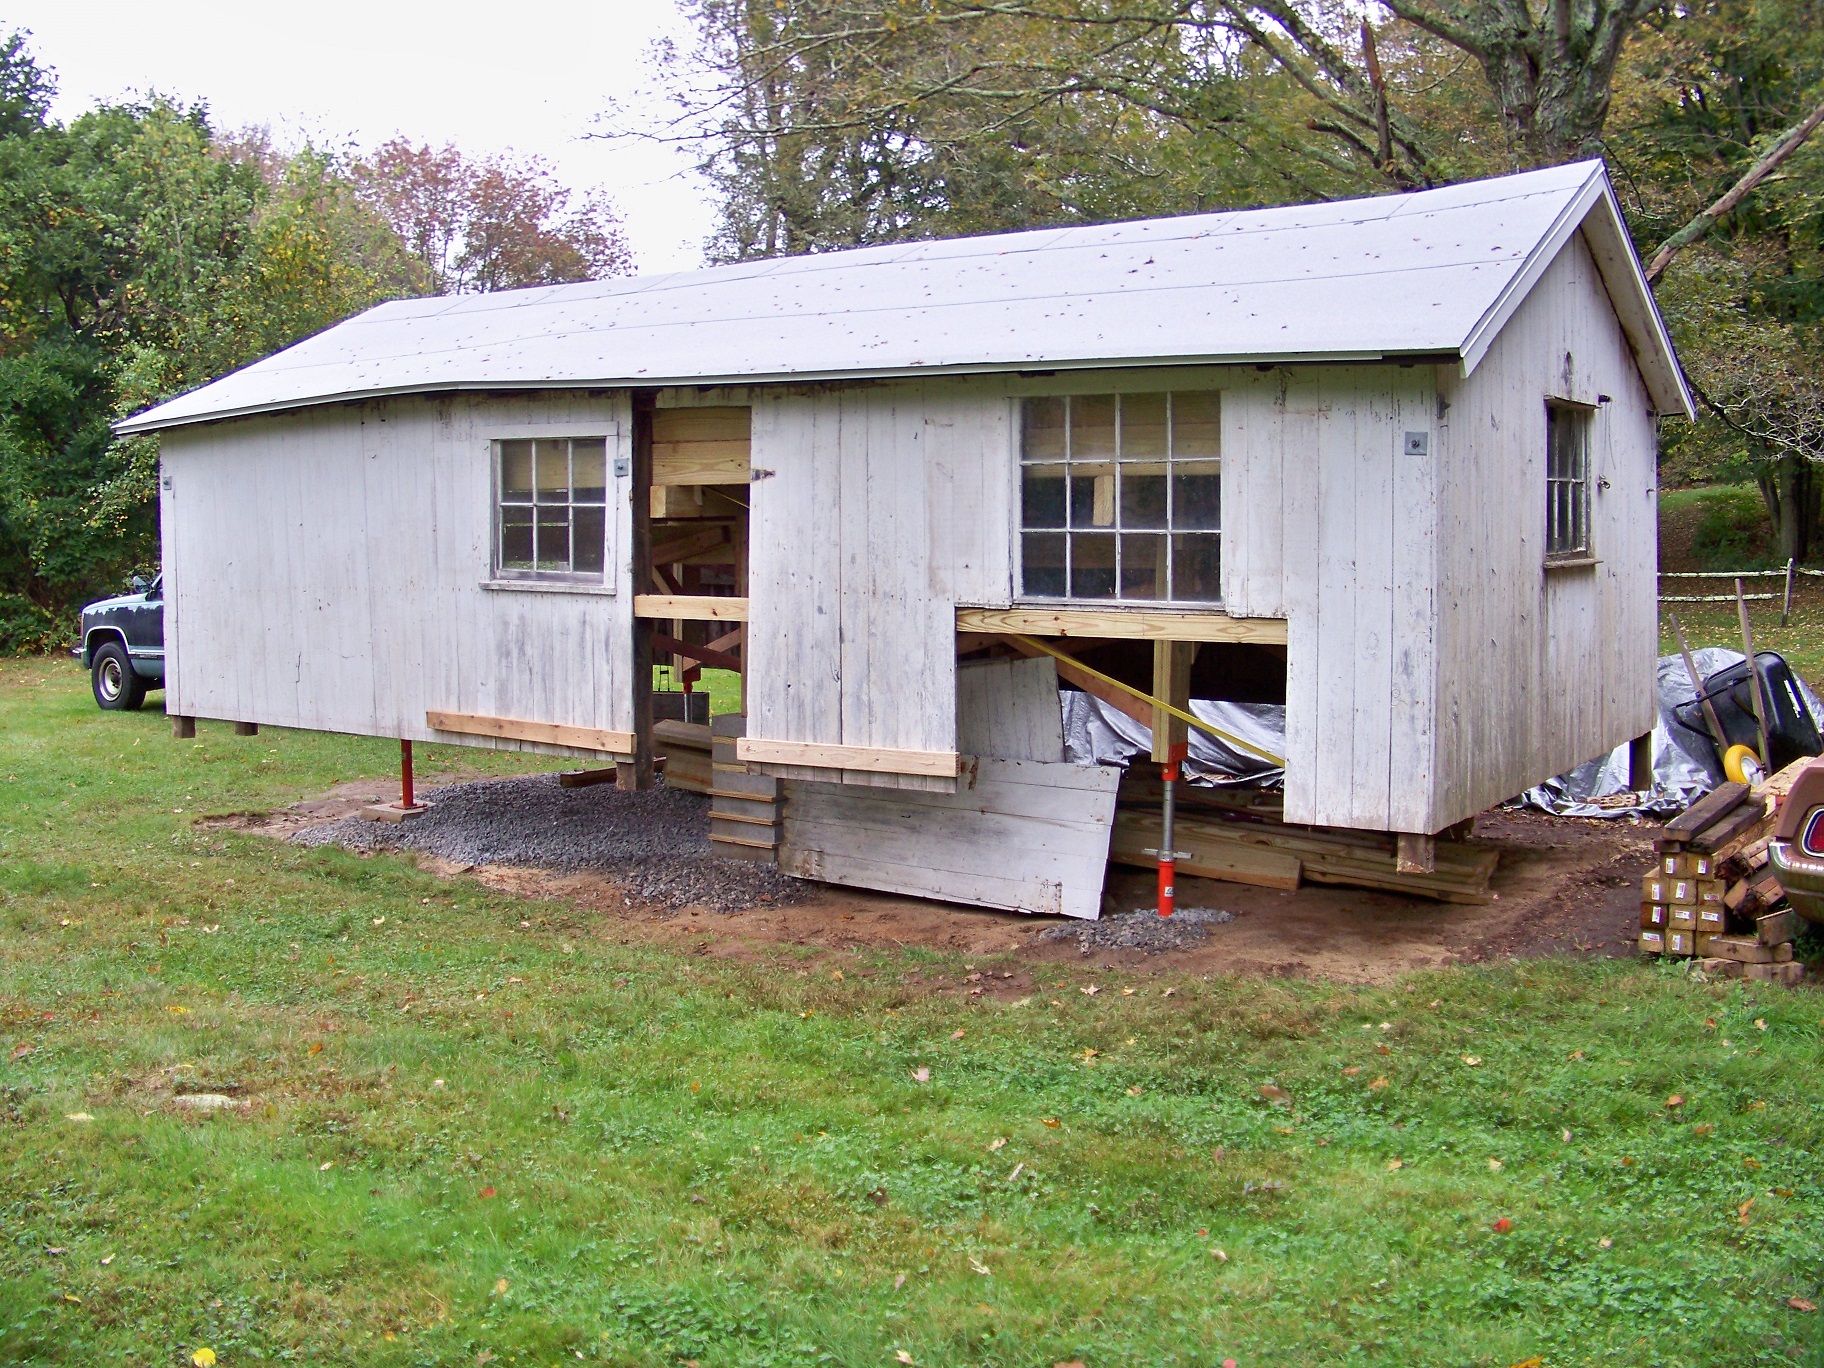
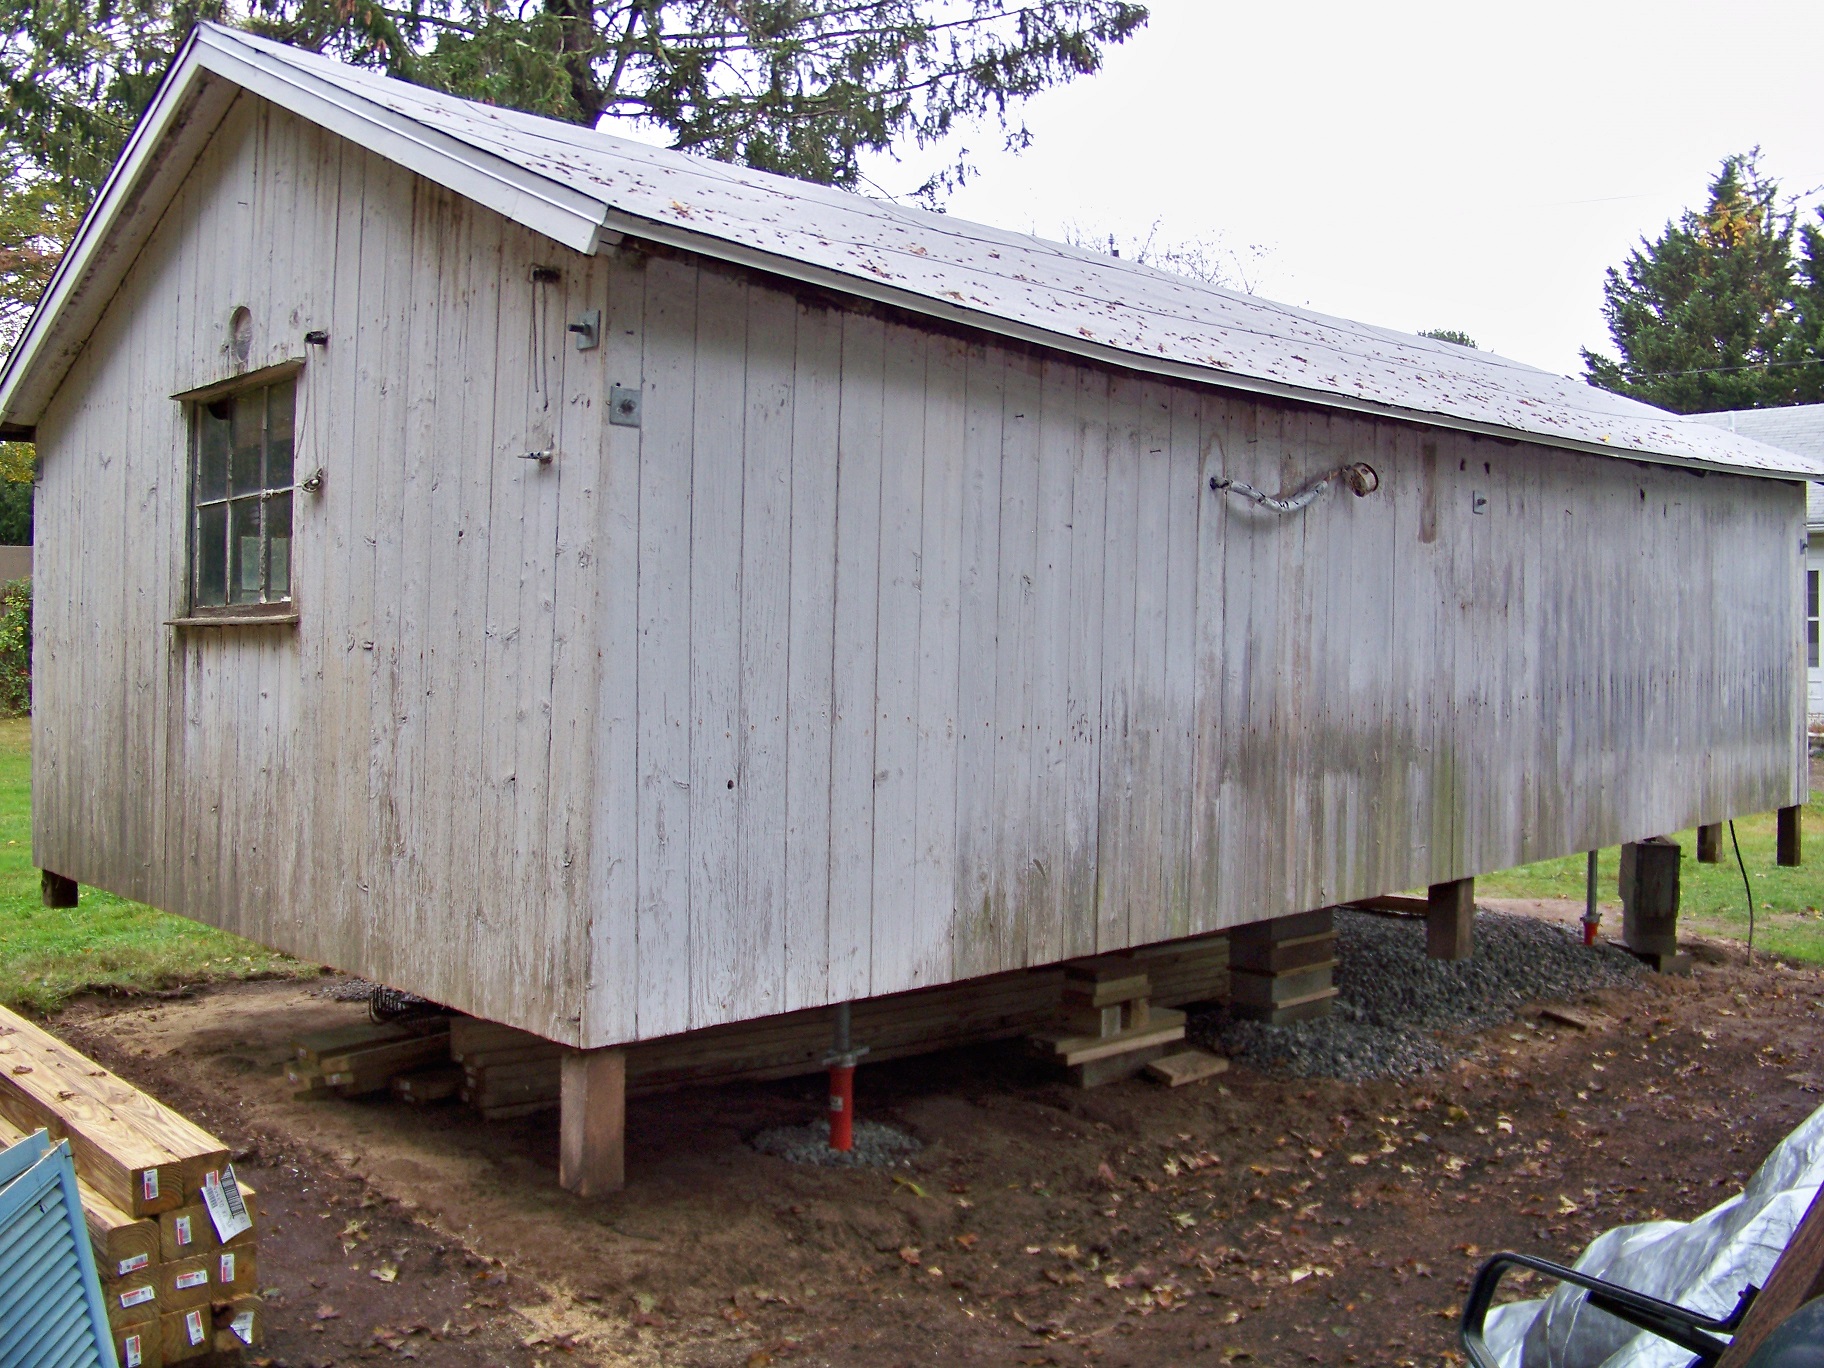
It will have a floor with floor joists.


If that is rolled roofing, I'd level the building and roof when I set it back down. I don't believe it'll undue your roof repairs?
At 14 and 21 inches, I'd back the hay wagon and move it to a new location
LOL!
Nice job!
Told you to ignore the "nay-sayers" and just do it!
You are doing something that only a small group of us have done!
See that fellow here in Wisconsin wants to raise his garage and a whole bunch poo-pooed him too!
I love this thread, i also agree that id make every effort to get the roof square after whats been done, likely it will be fine or require minor adjustment after the fact, but it will be worth it.
It would be a shame to do this work, drop it back down on the new sill and floor, and still have a bowed roof.
Lifts are fascinating, I have plans to do one also!
 It would be nice if that's all it takes to get rid of them. Meanwhile the chipmunks seem to be having a field day under the giant tarp.
Good idea! The front of the garage actually has a flag holder there. Putting one near the back also might do the trick. Think I'll get actual flags so it doesn't look too awful. Thanks.Place plastic grocery bags around the gutter area so they catch the wind and make a fluttering noise as they fly like a flag, that's how we keep birds from nesting on our downspouts during the mating season.
Did you stuff the holes with Ammonia soaked rags?....I noticed something else - After cleaning all the debris away yesterday I don't see any newly reformed vole holes!
No, on Monday i cleared out the leaves and removed what little was left of the rotted sill in the ground. The next day there were no visible holes. We'll see if that holds true when I go there on Saturday.Did you stuff the holes with Ammonia soaked rags?
Maybe I can find some cheap plastic flags. I bet those strings of triangular party flags placed along the eves would work, but I think that would drive me nuts while I'm working on it. Plus it's kinda tacky, in a used car lot kinda way.I don't know flags will do the trick...something about the noise the plastic bags make seems to be the only deterrent...good luck with the flags as I know what you mean about the look of plastic bags...not a particular nice thing to see hanging on a out building.
Good idea! The front of the garage actually has a flag holder there. Putting one near the back also might do the trick. Think I'll get actual flags so it doesn't look too awful. Thanks.
you will have an ongoing rodent issue. Plan to visit weekly to maintain “bait stations” if you want to be rodent free.
Sent from my iPad using Tapatalk
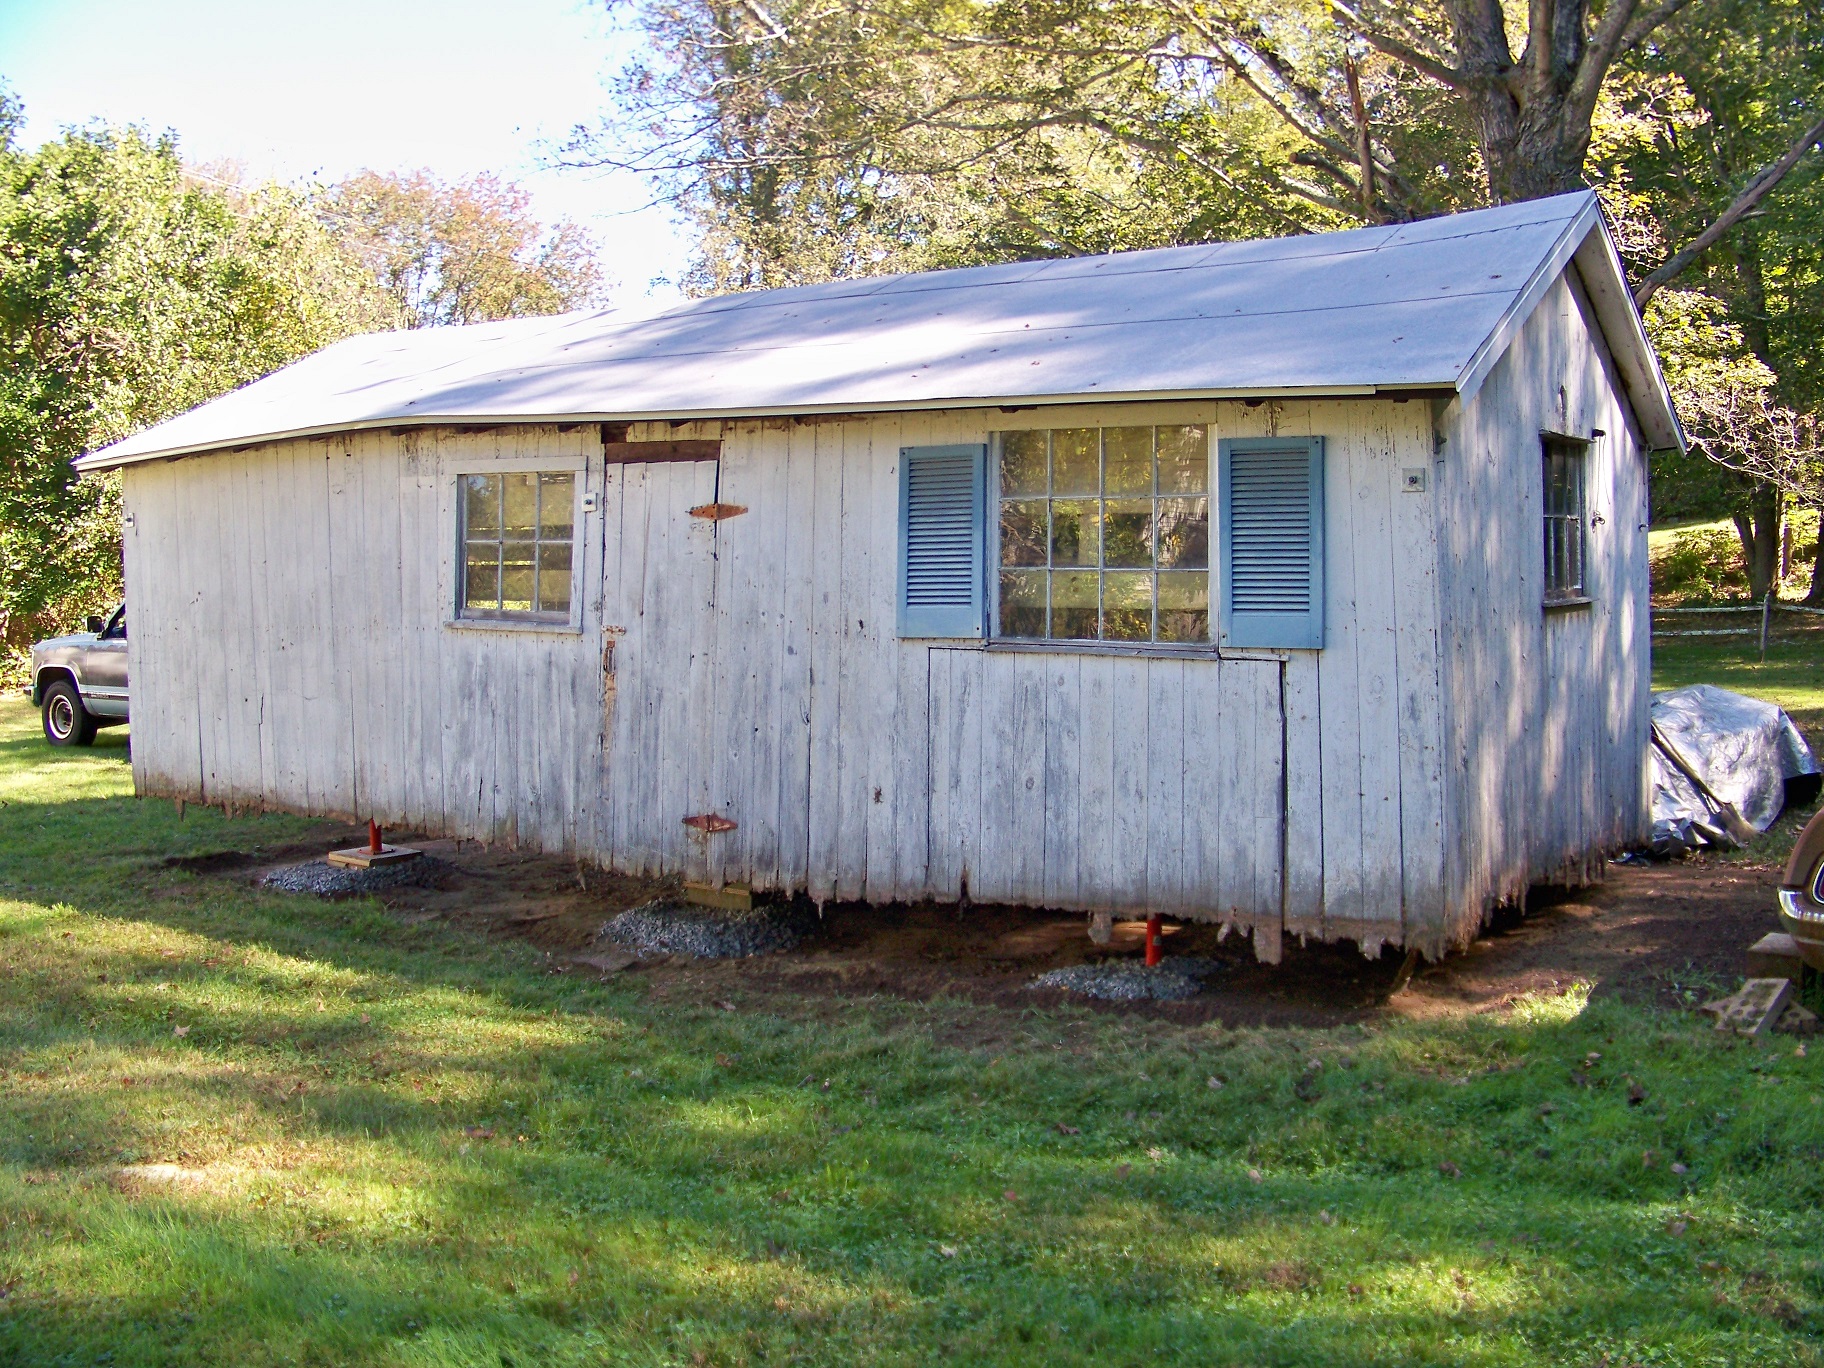
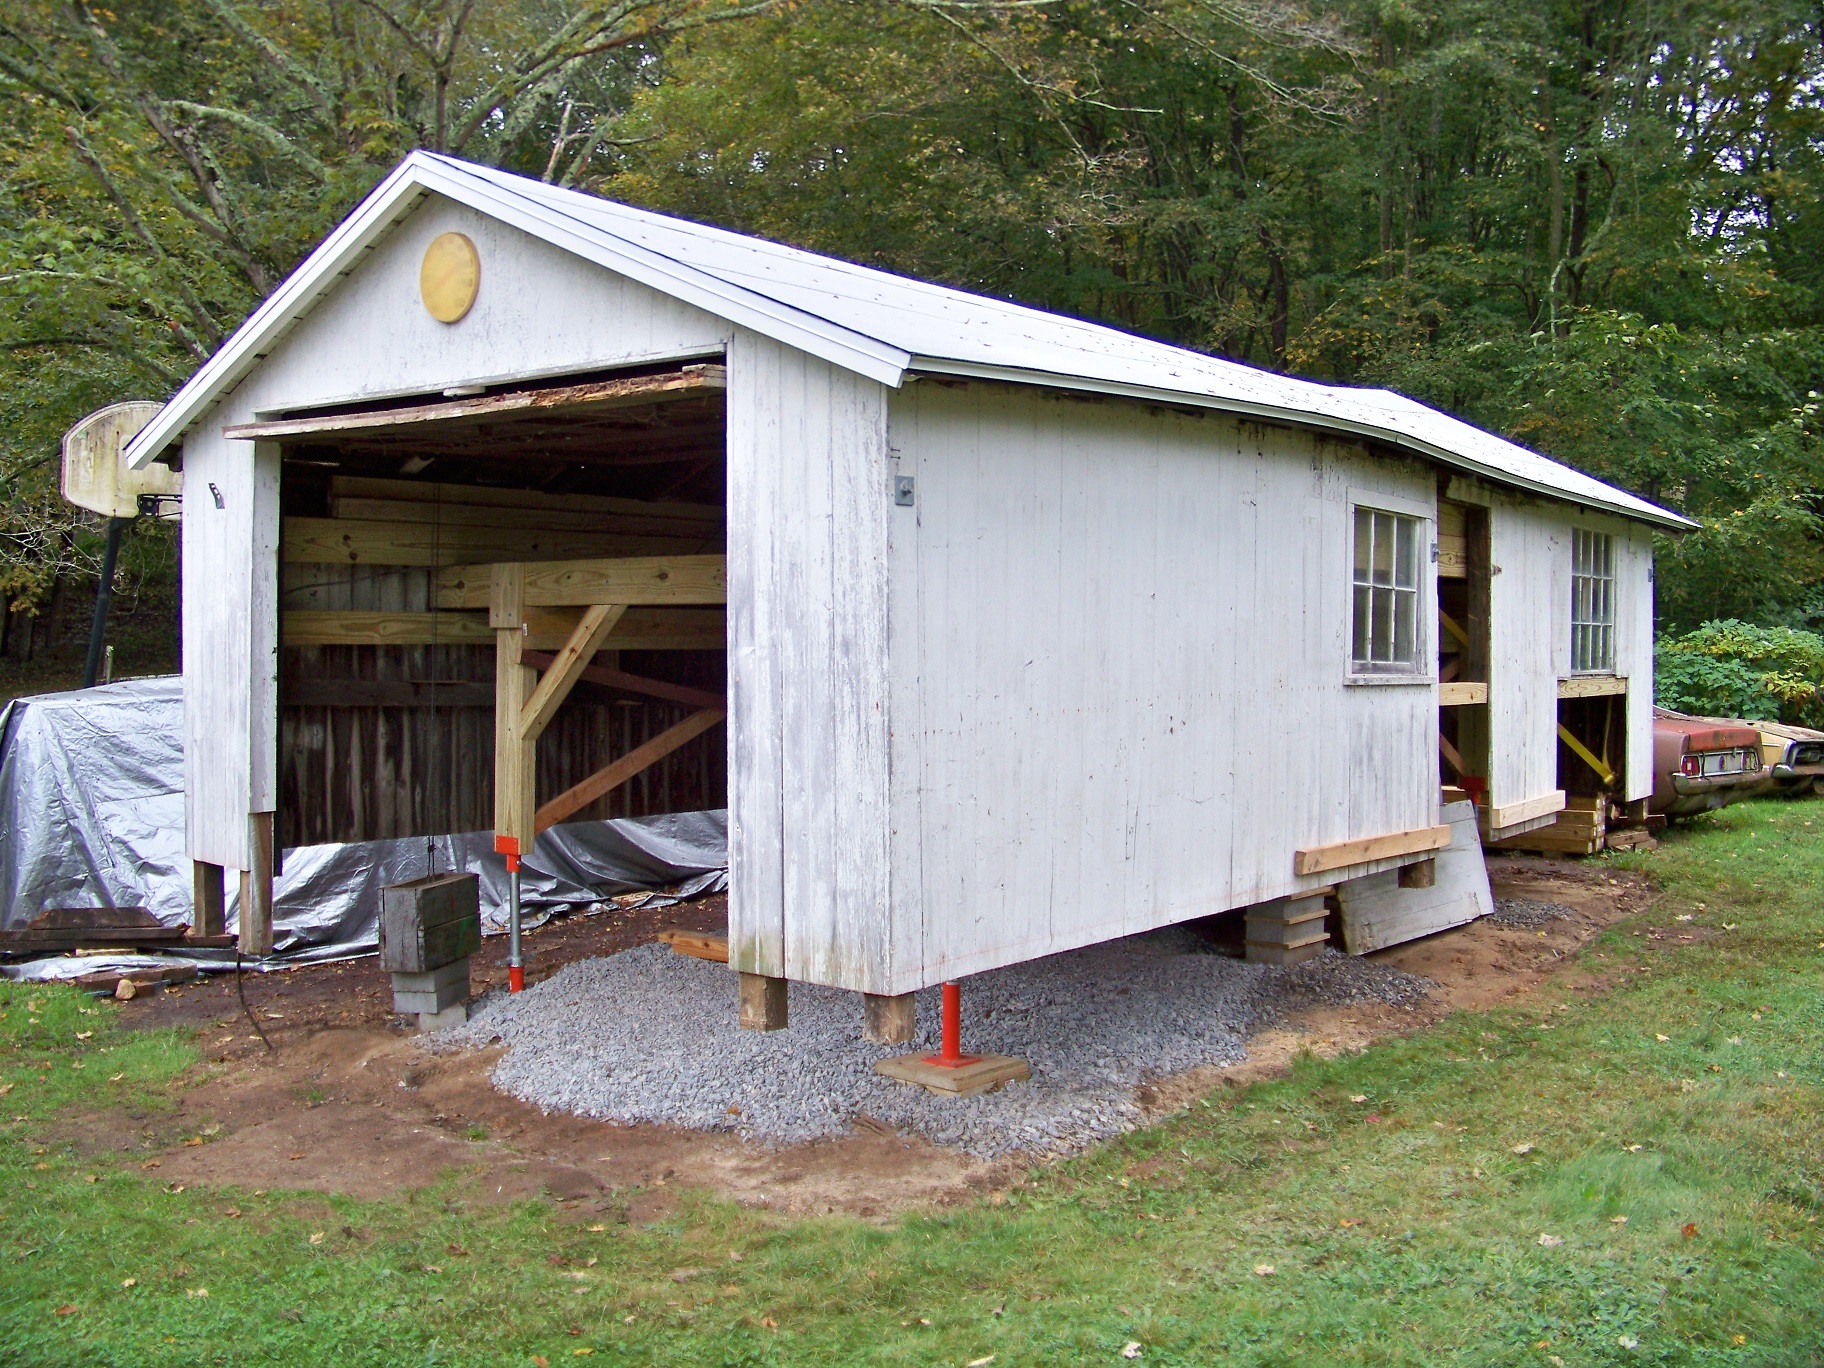
Platonic... The Shack is looking good... too good for Rat's.


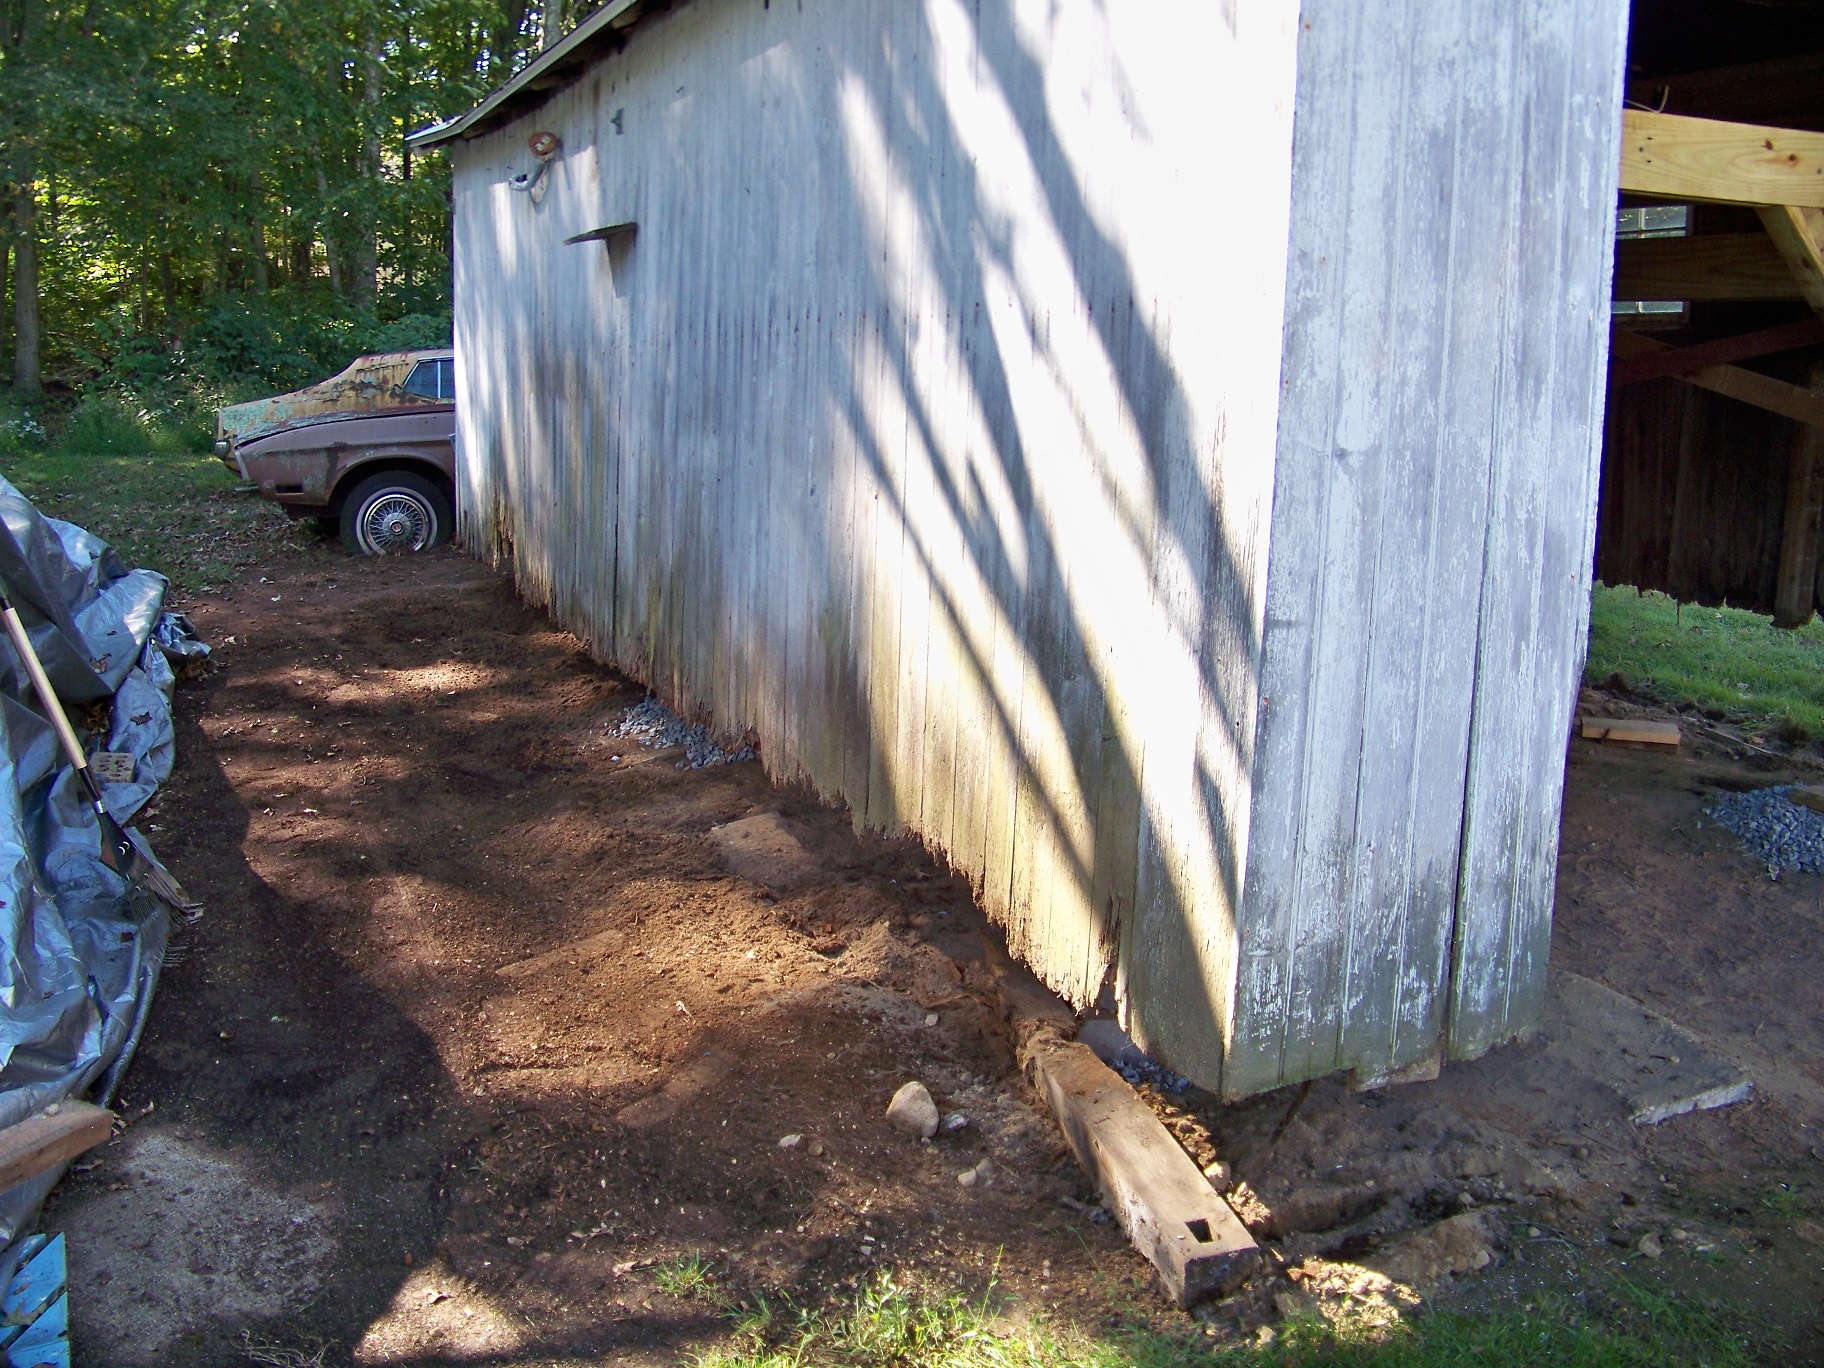
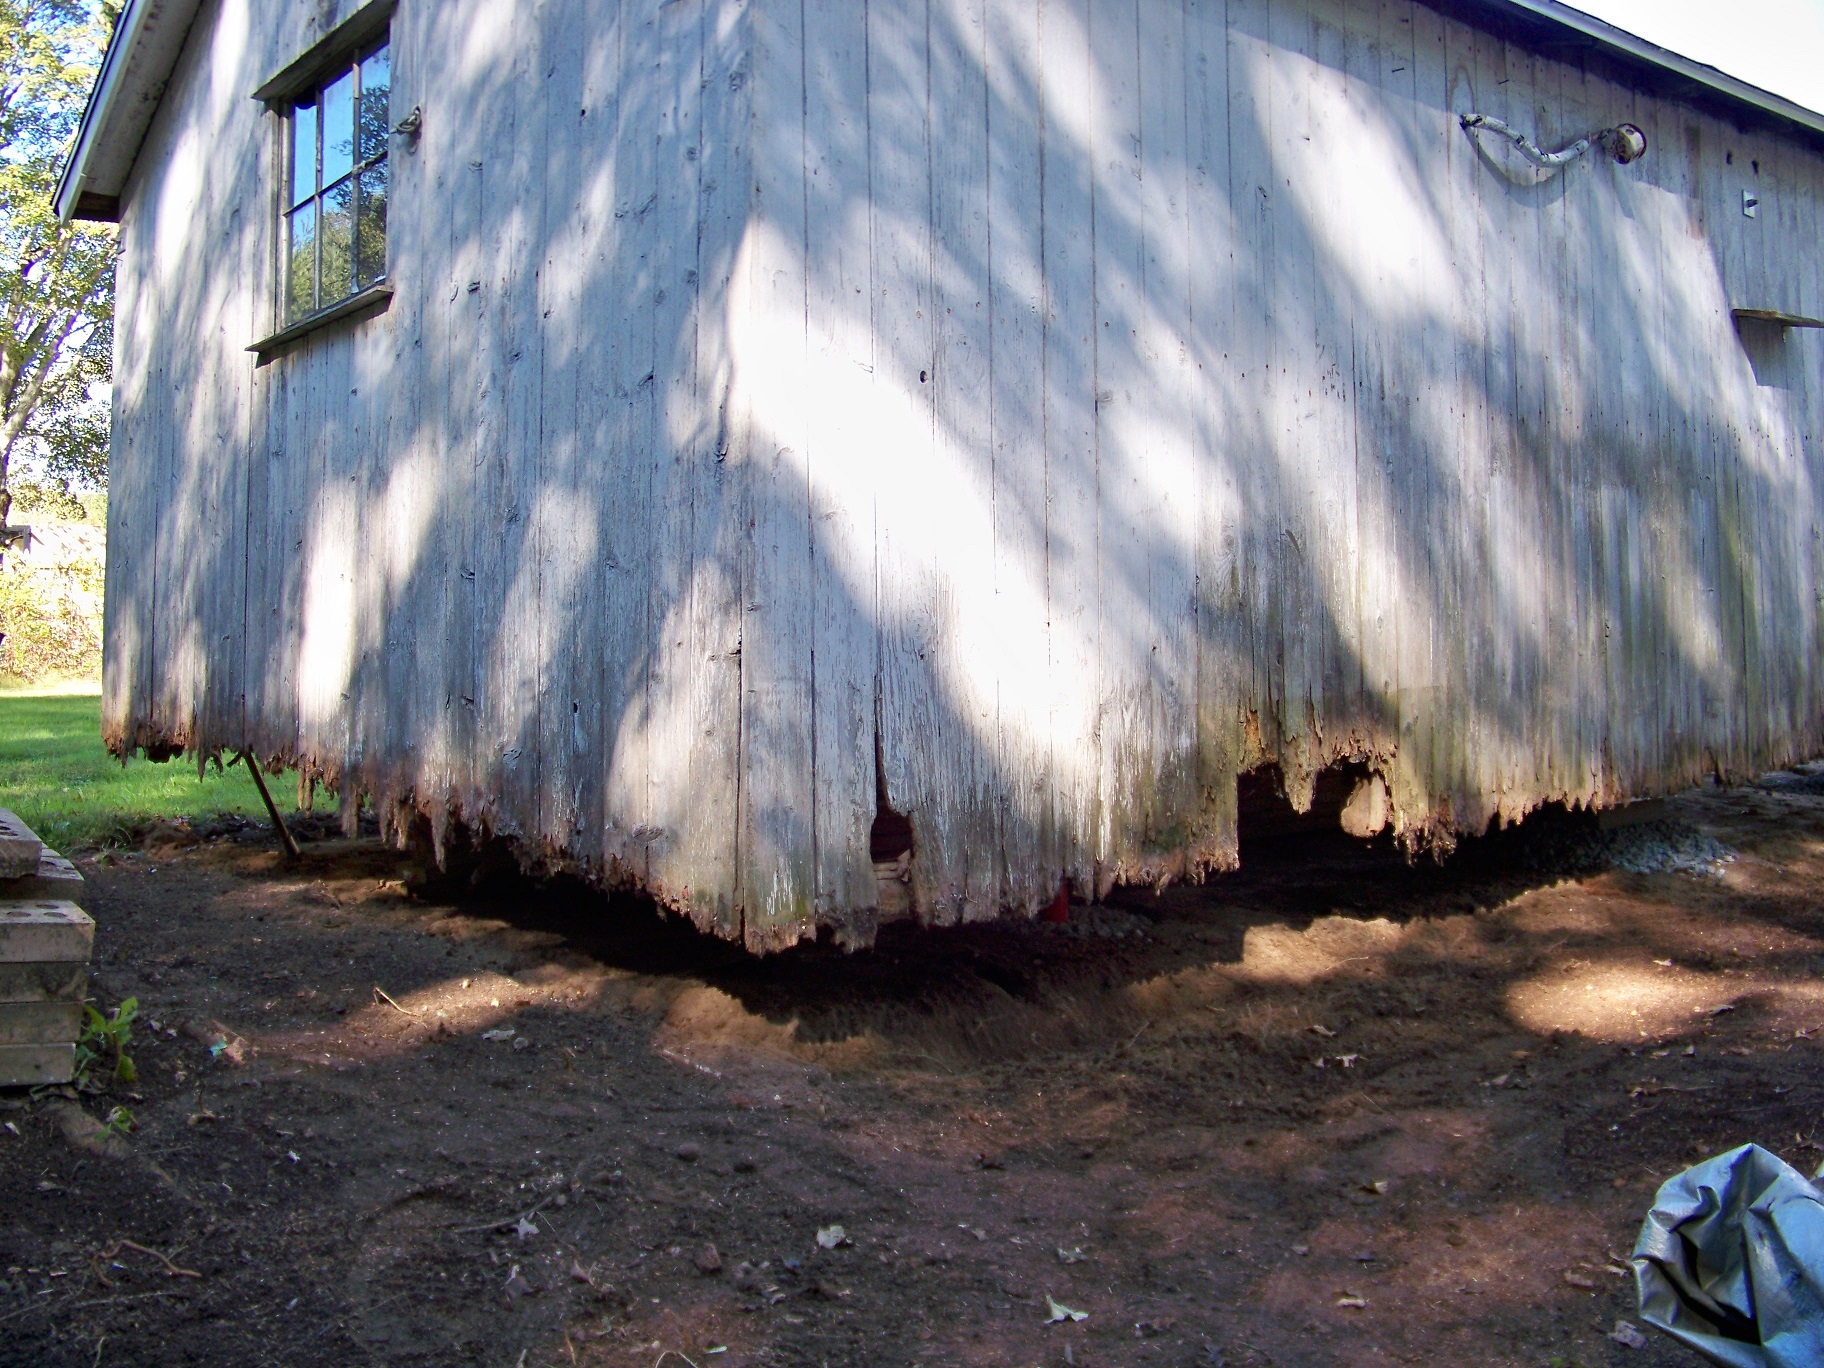
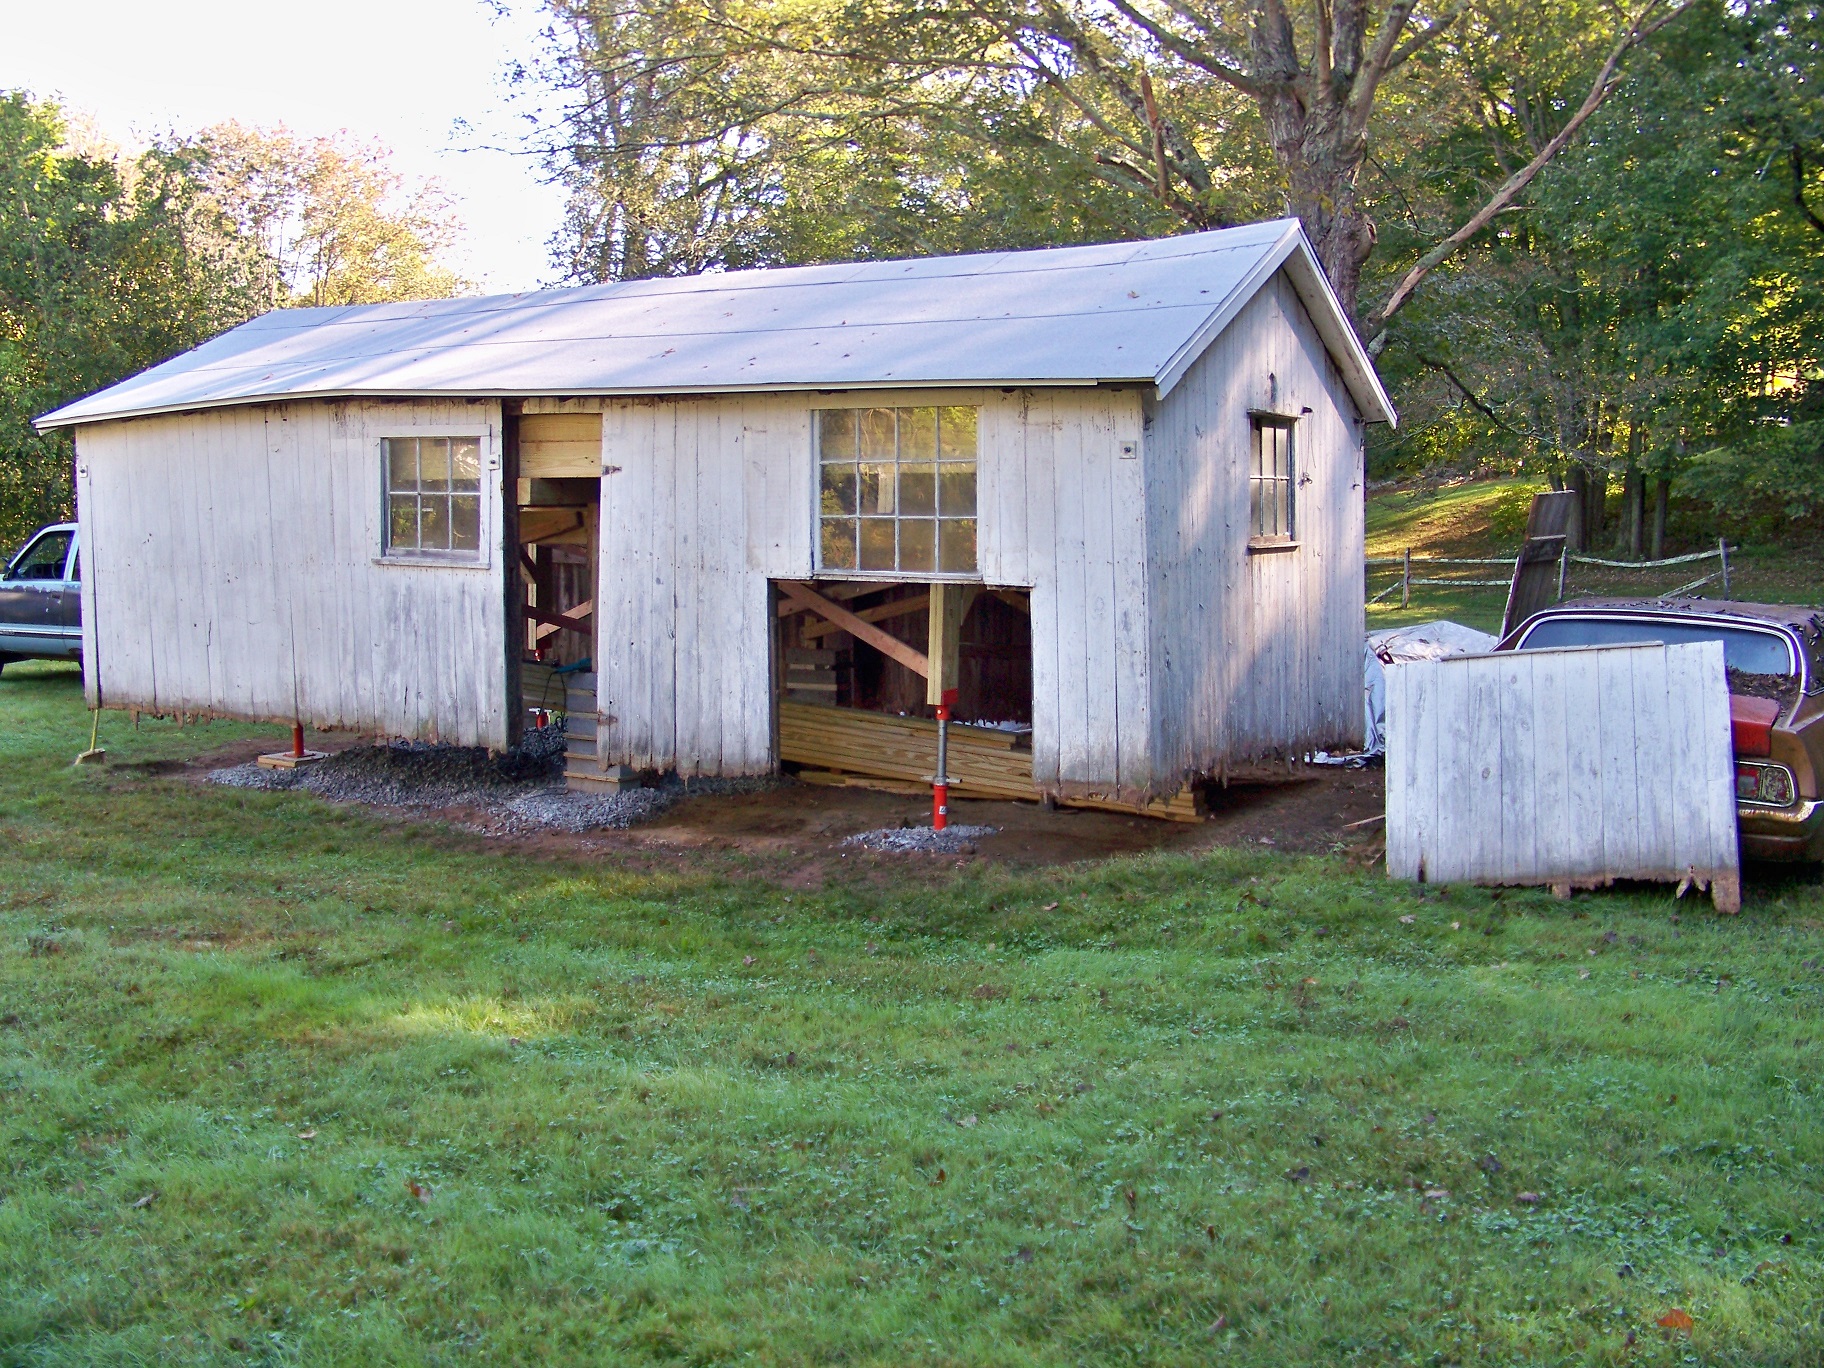
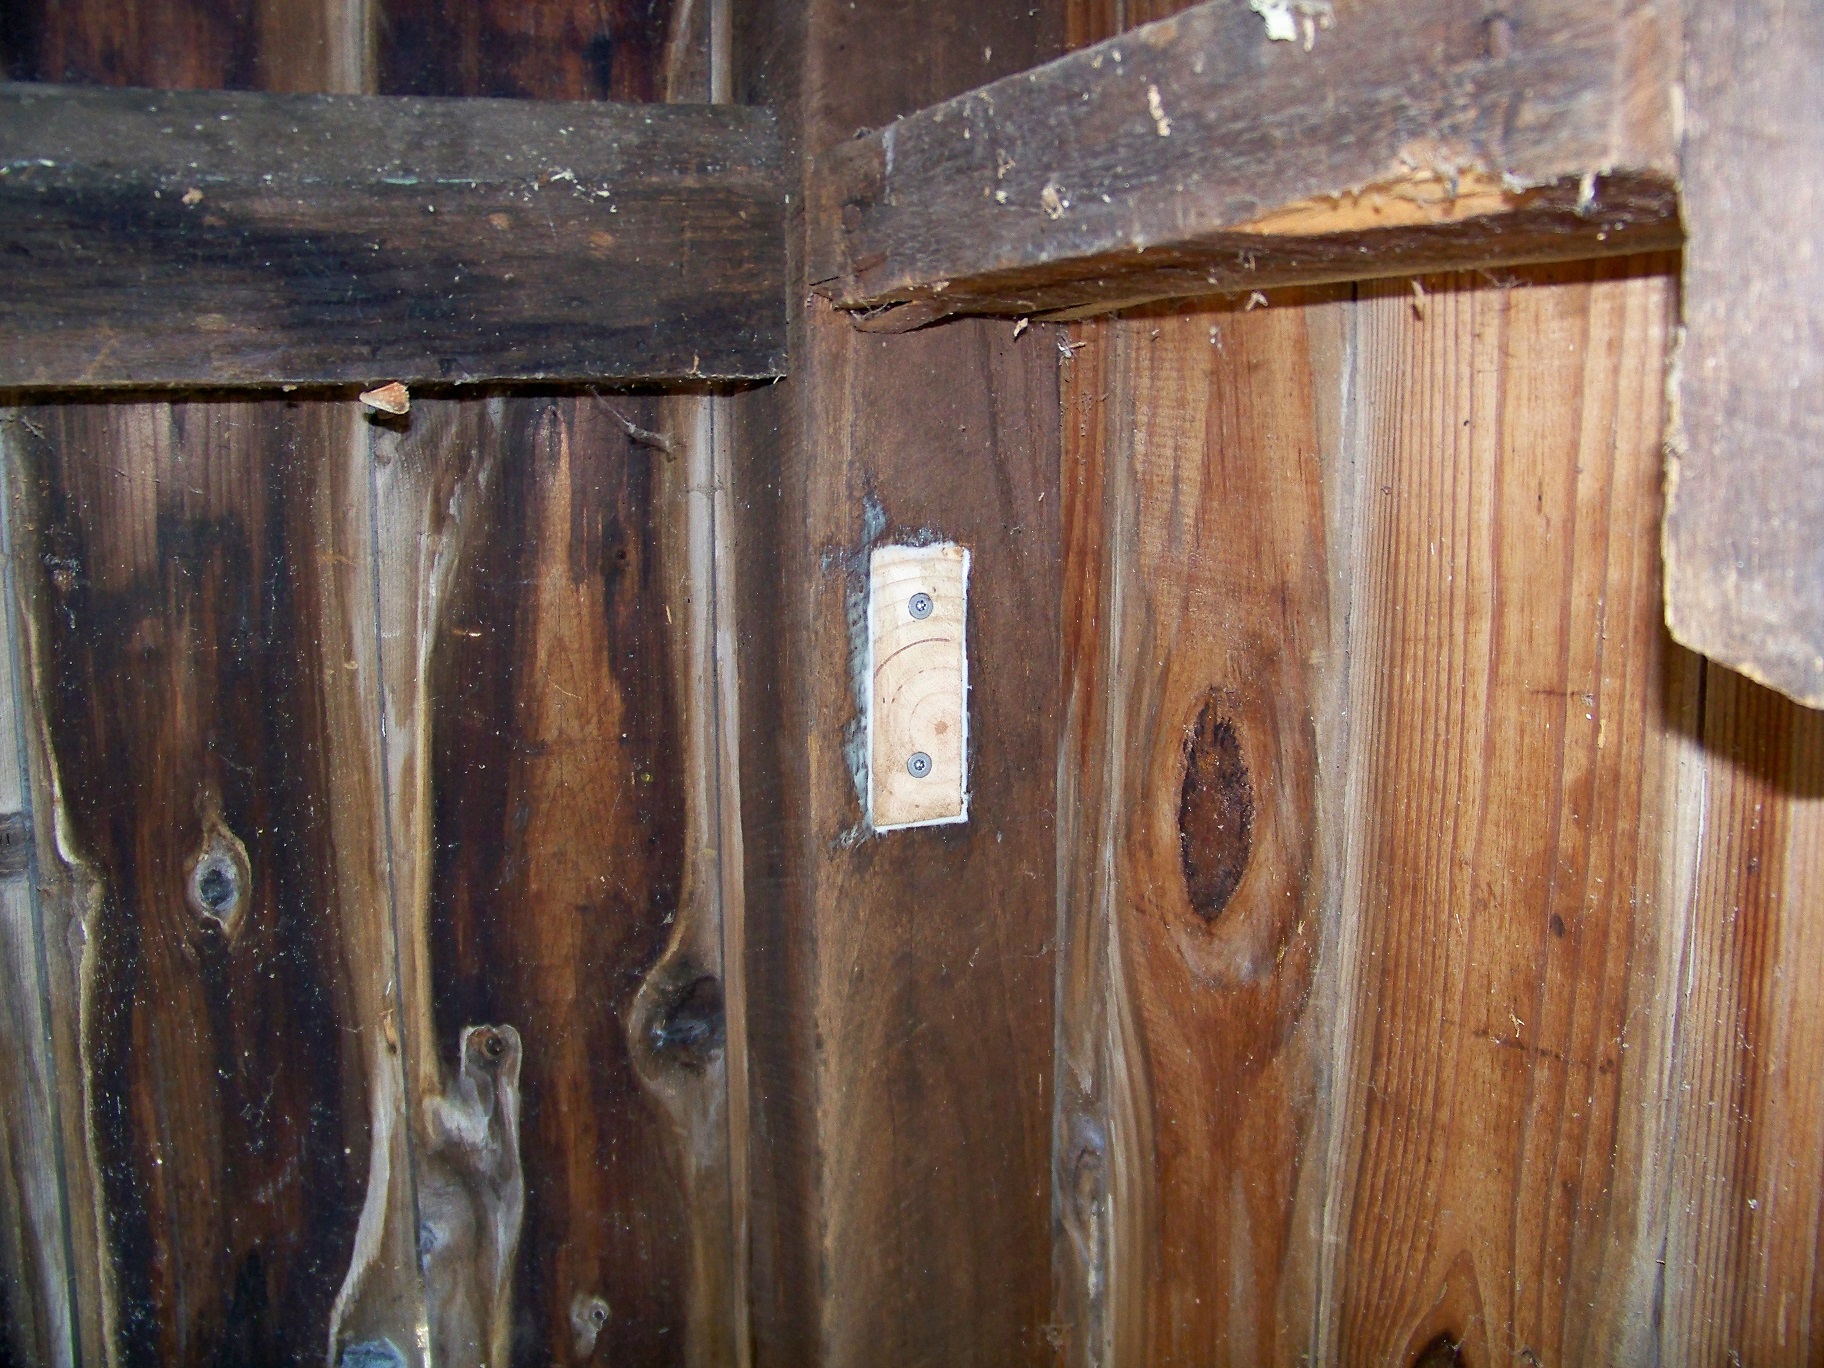
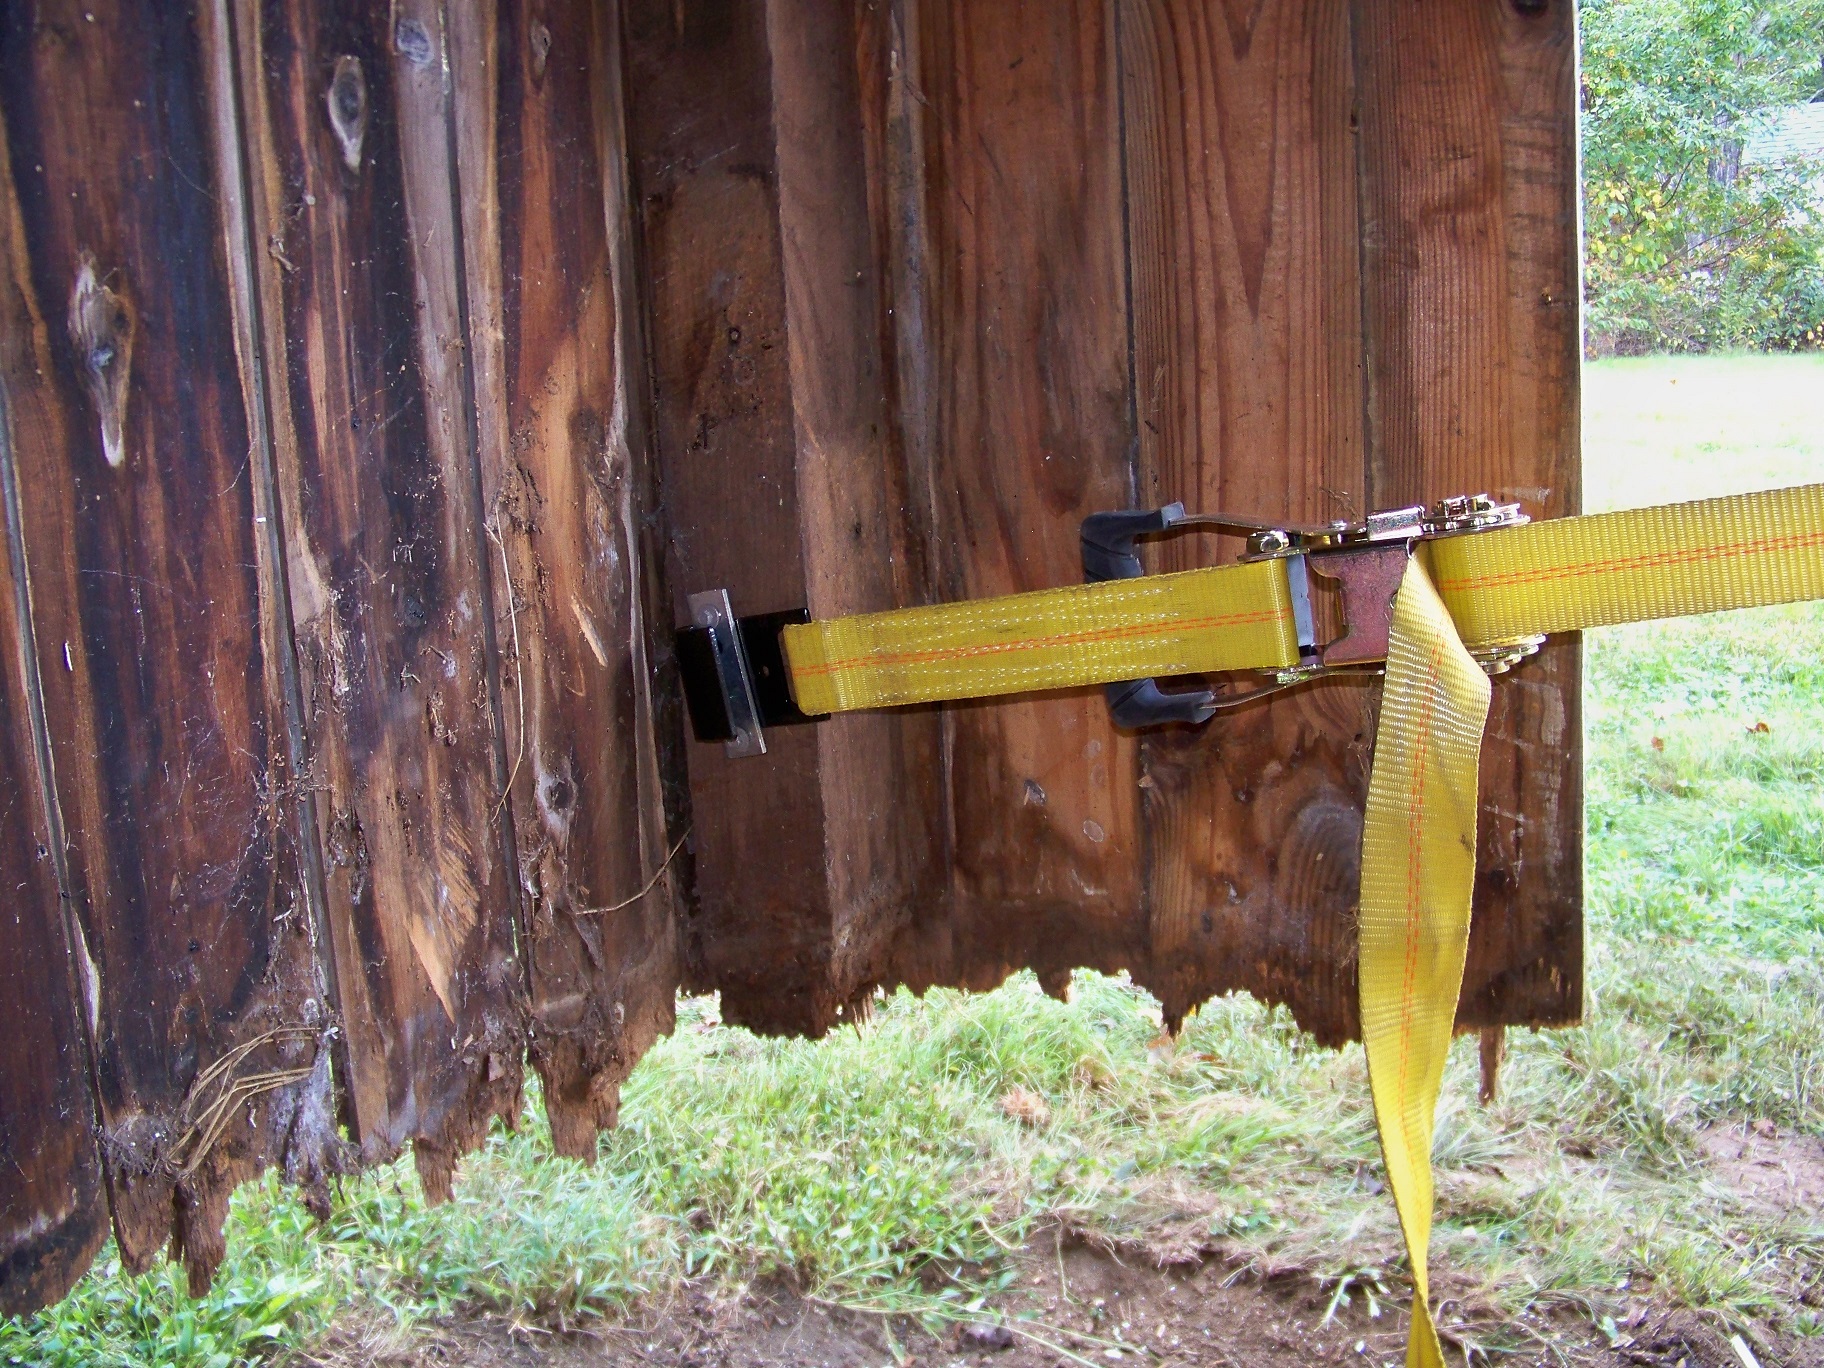
I actually have to check all the dimensions again. I started out with my laser level which is fine if you're dealing with a normal square structure, but this is far from square. Not that I have any desire to cut everything a third time, but rather than cutting the bottom level, I'm wondering if I should just measure the exterior 4 corner wall heights and make them all equal - connect the dots - snap a line and cut it that way. I had to re-cut the front so the siding immediately to the left and right of the garage doors is equal. This is actually more difficult that I expected - maybe if I made a reasonably level gravel floor I'd have something better to gauge from.That new cut line at the bottom looks too straight!
What's left looks easy. You just need to build a base with a straight and level top plate.
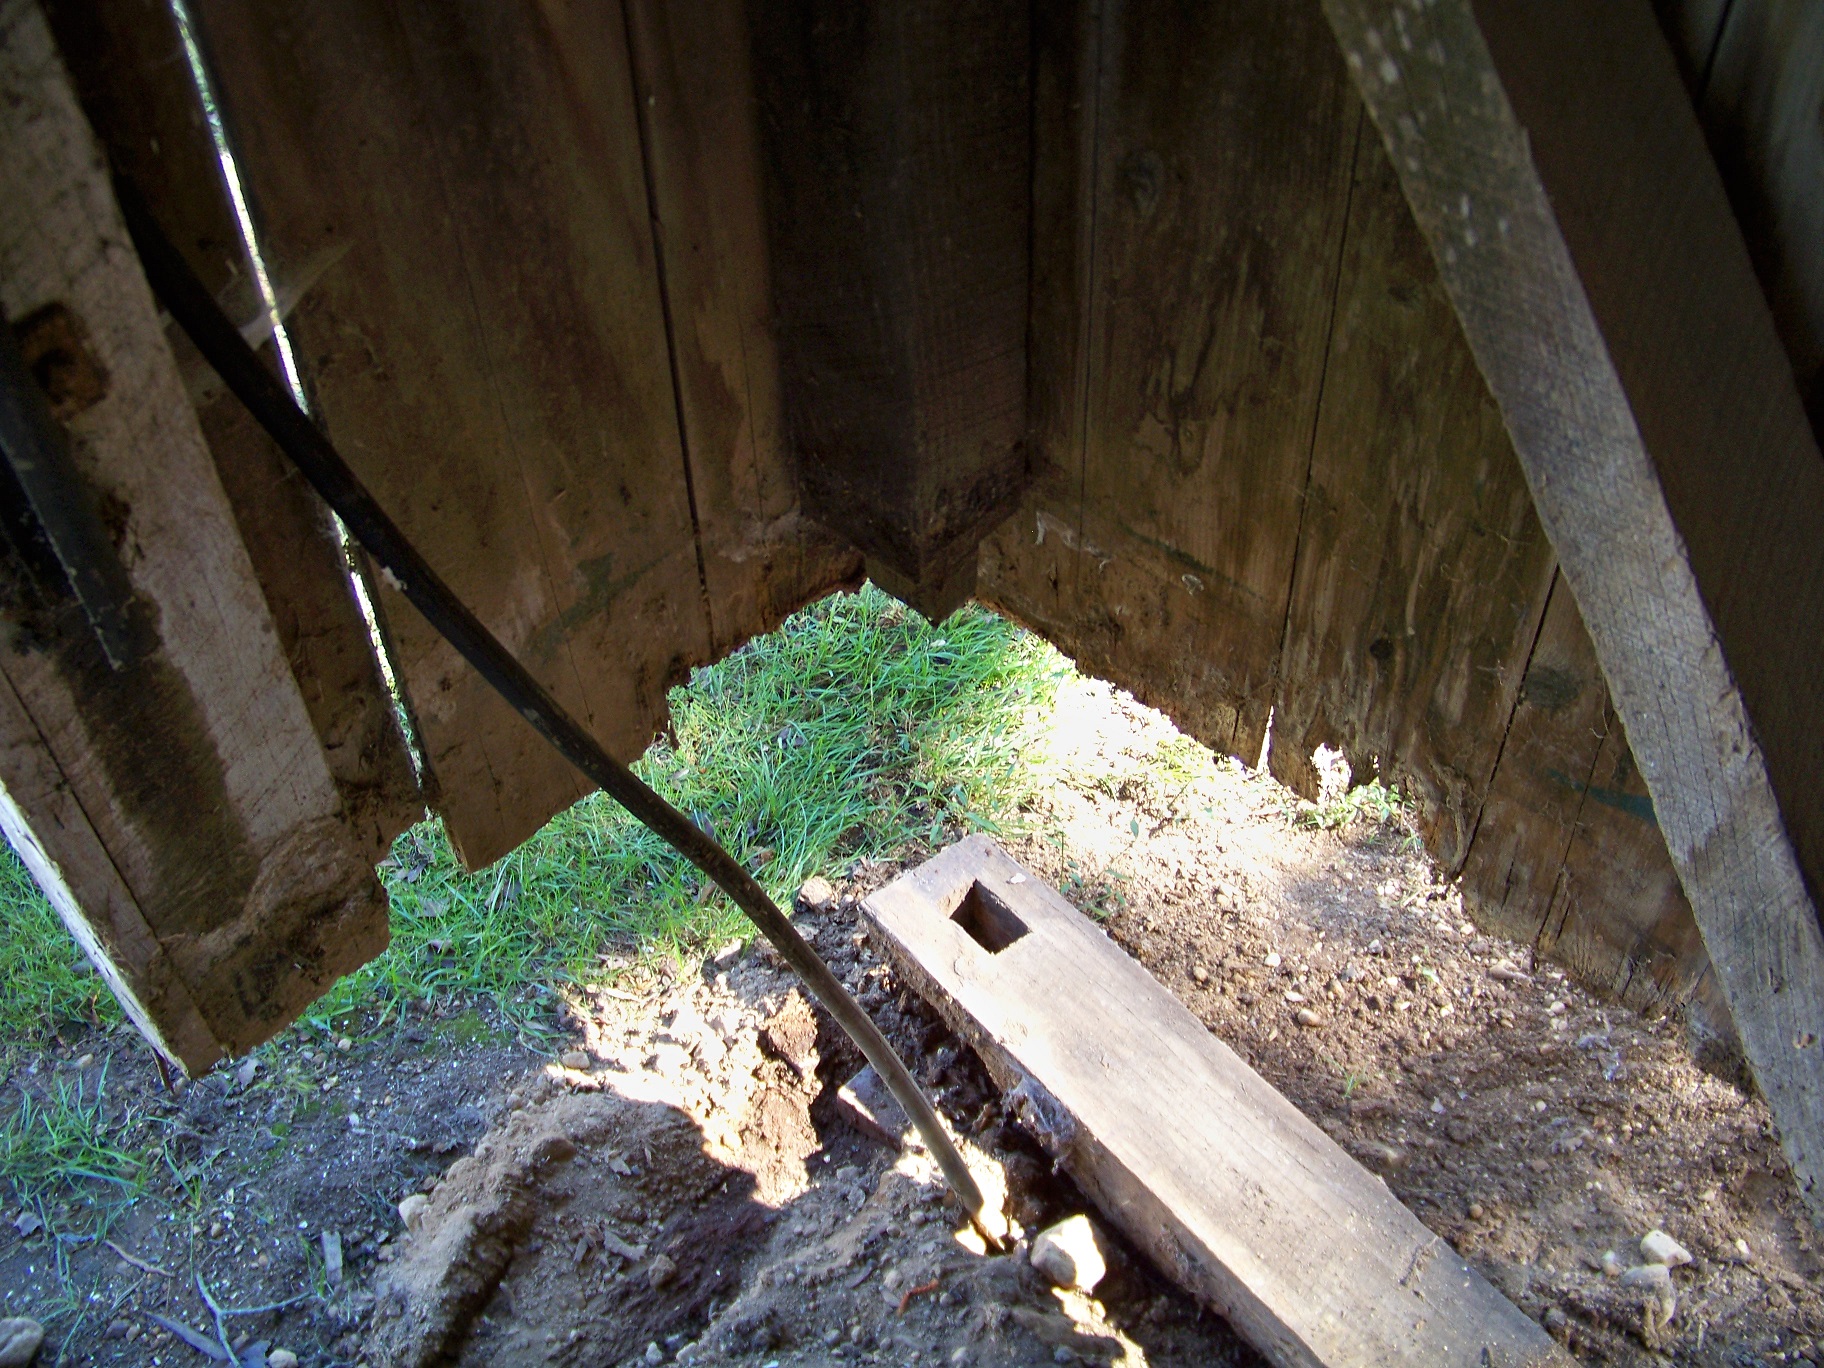
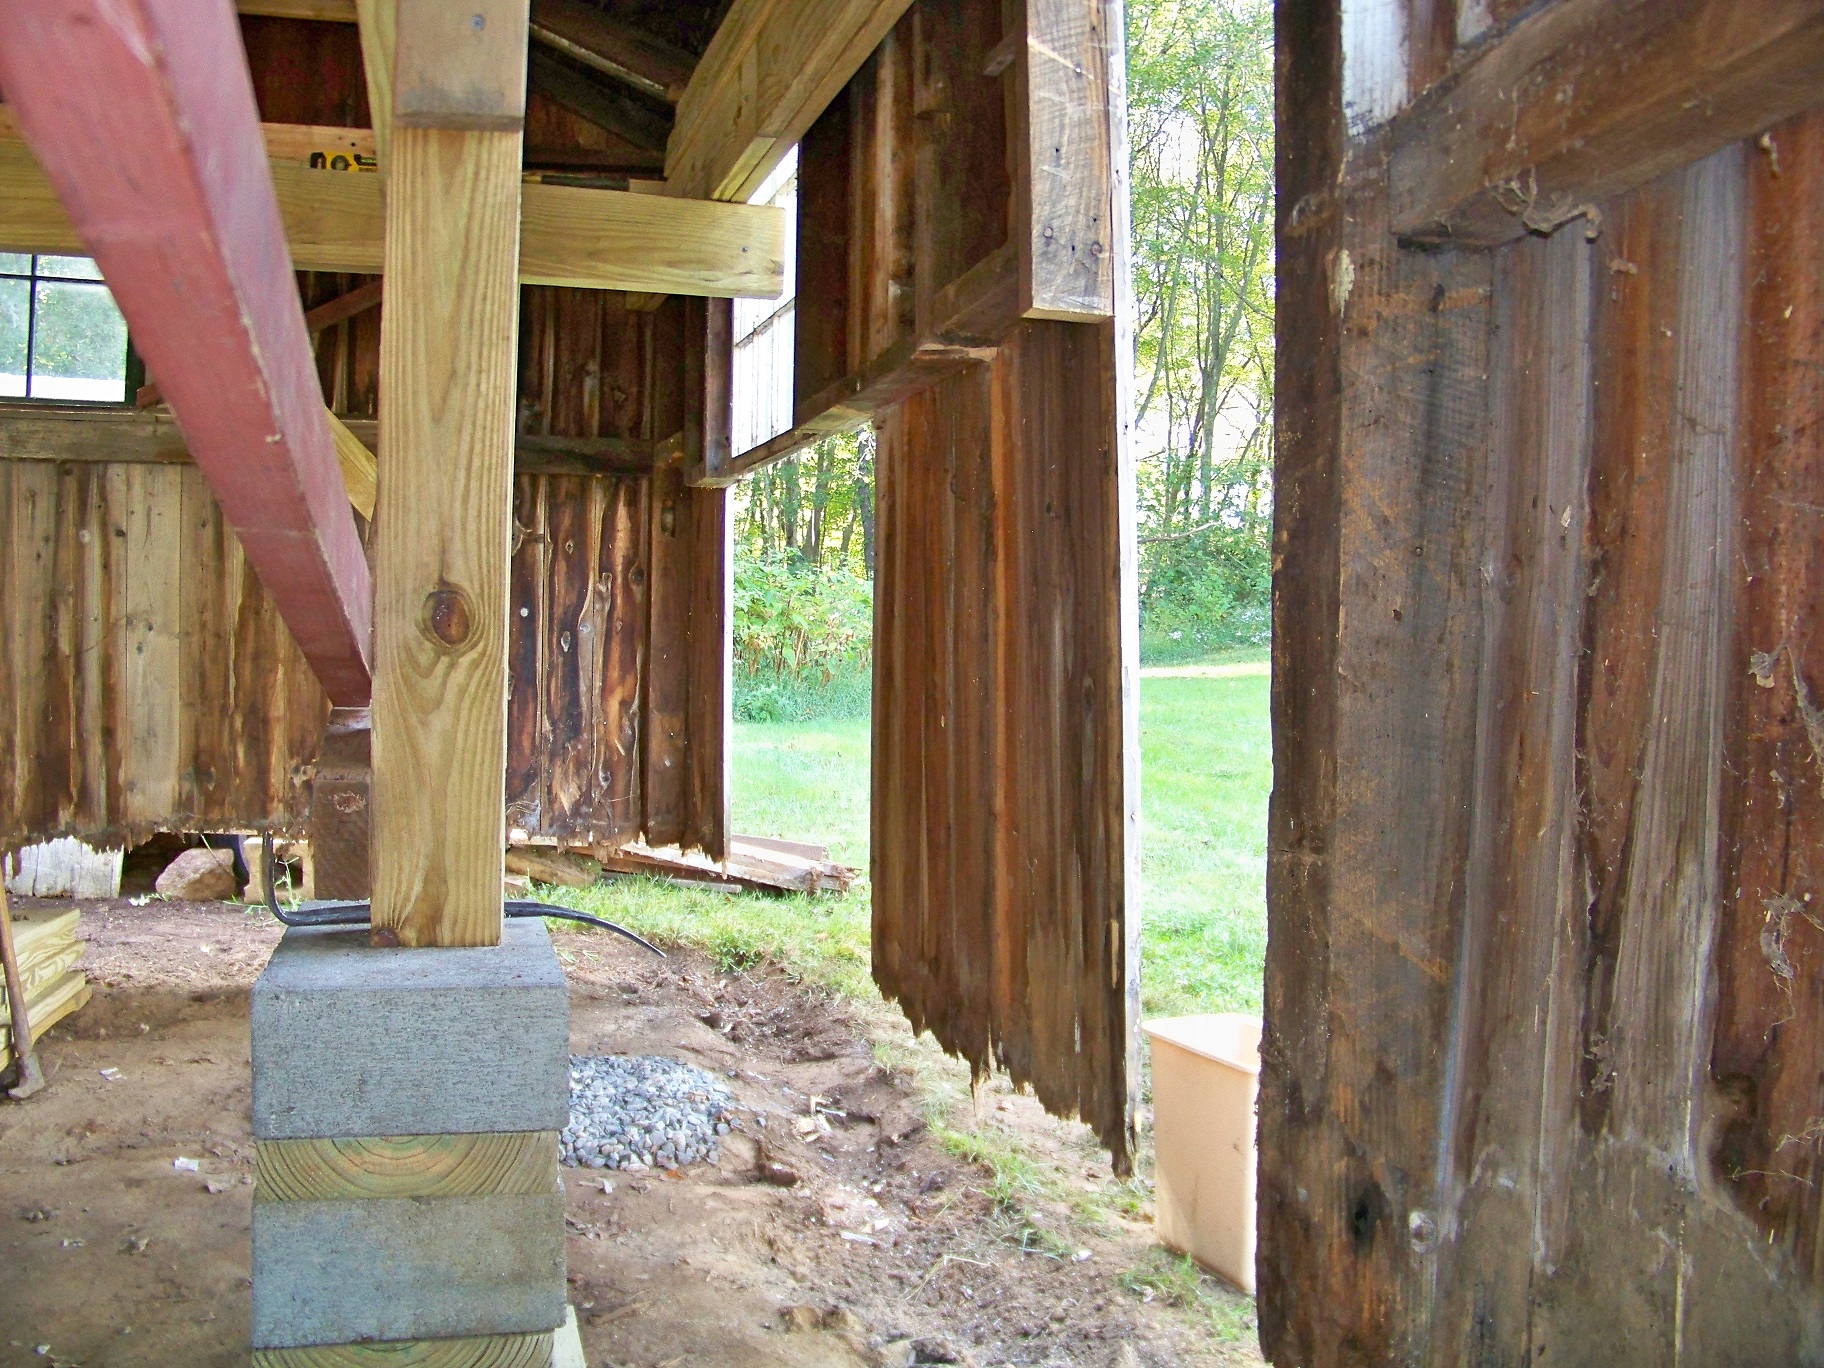
I'll just dig carefully to figure out where the underground power line is. I find it interesting that the typical method of holding a PT frame in place is to pound rebar through it (which is unfinished steel), yet fasteners need to be hot dip galvanized or otherwise ACQ rated.
I find it interesting that the typical method of holding a PT frame in place is to pound rebar through it (which is unfinished steel), yet fasteners need to be hot dip galvanized or otherwise ACQ rated.
")
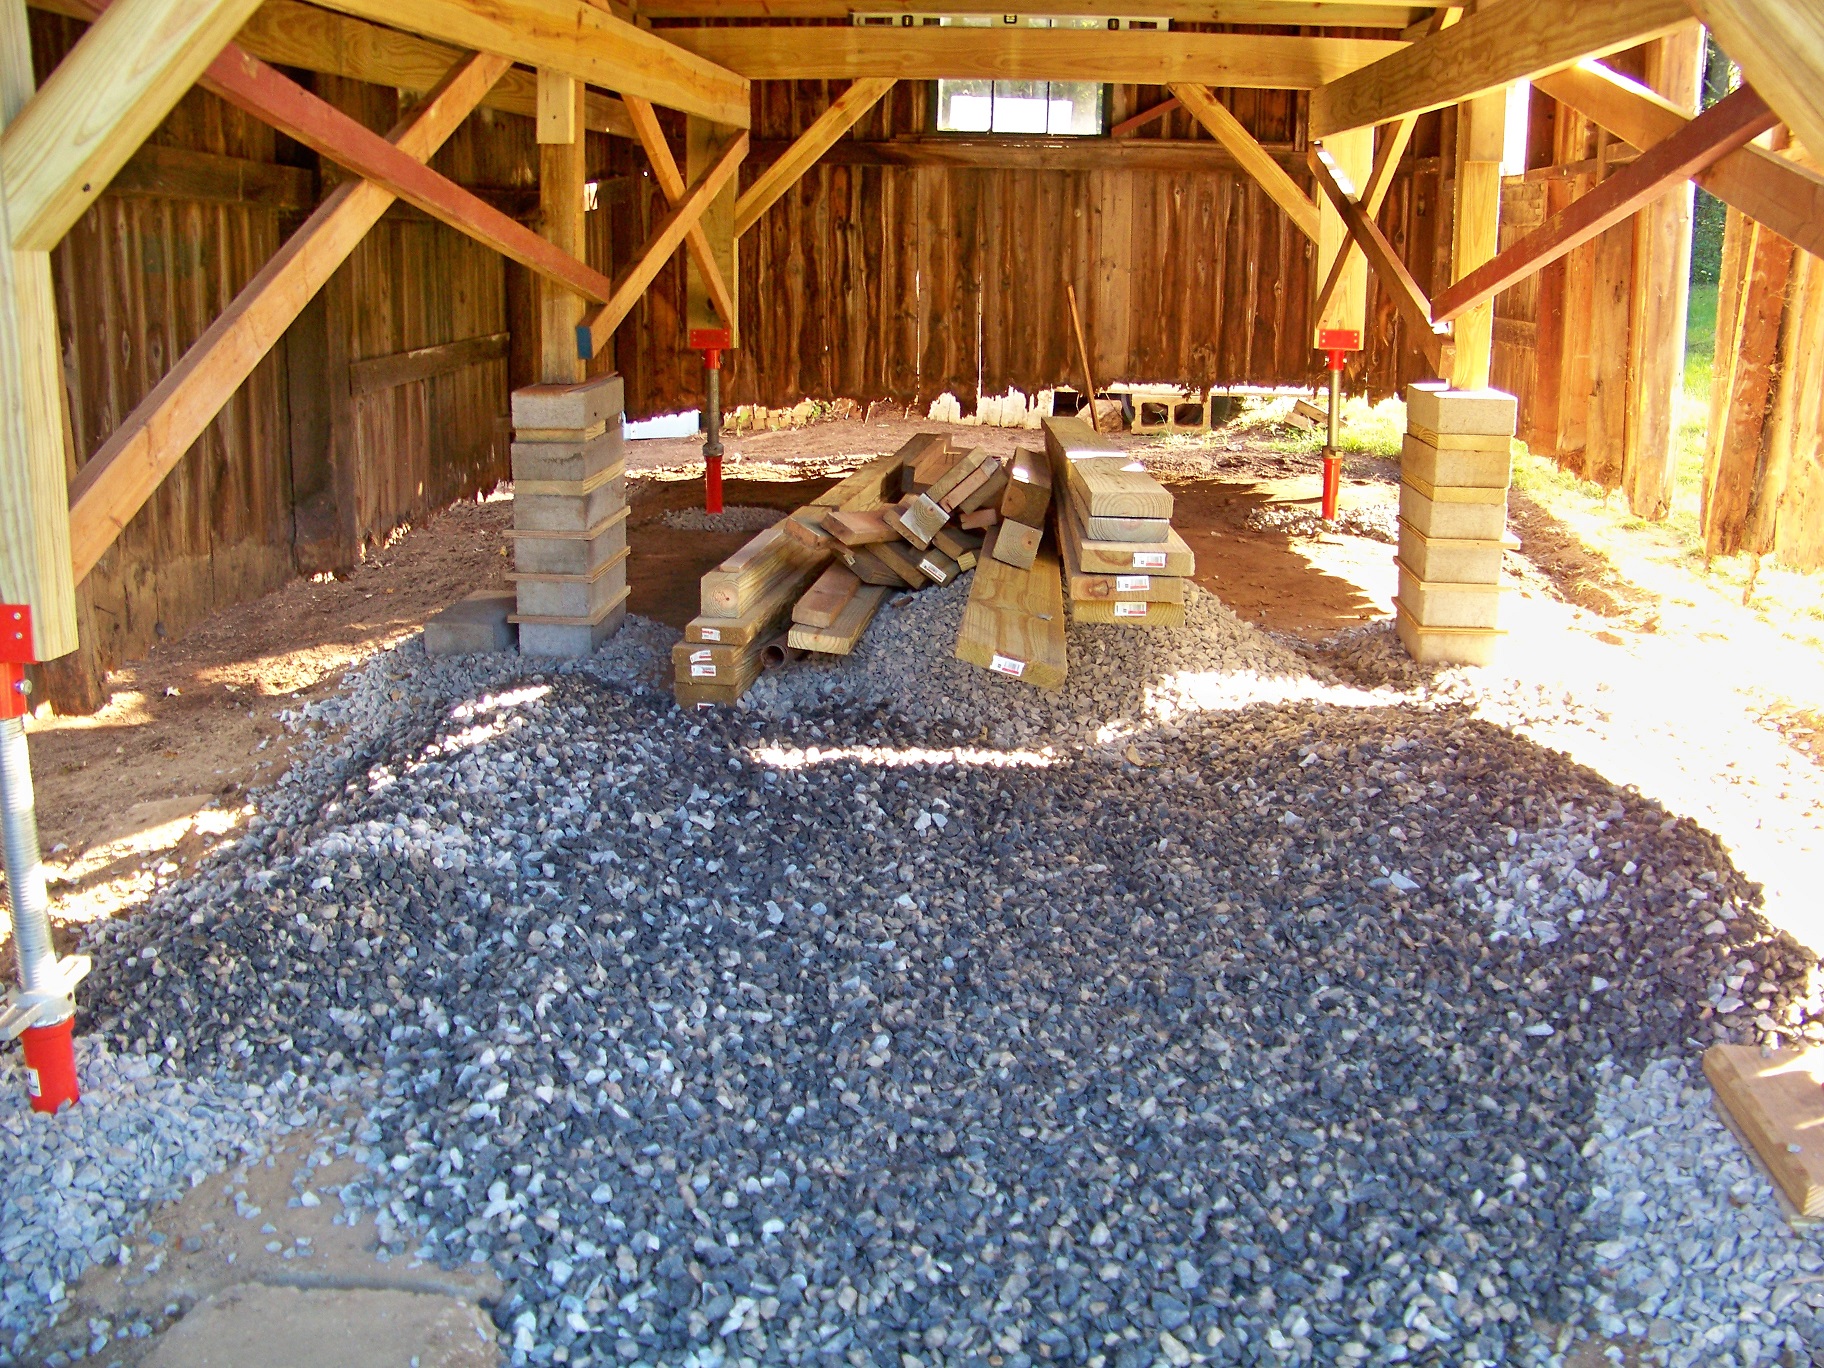
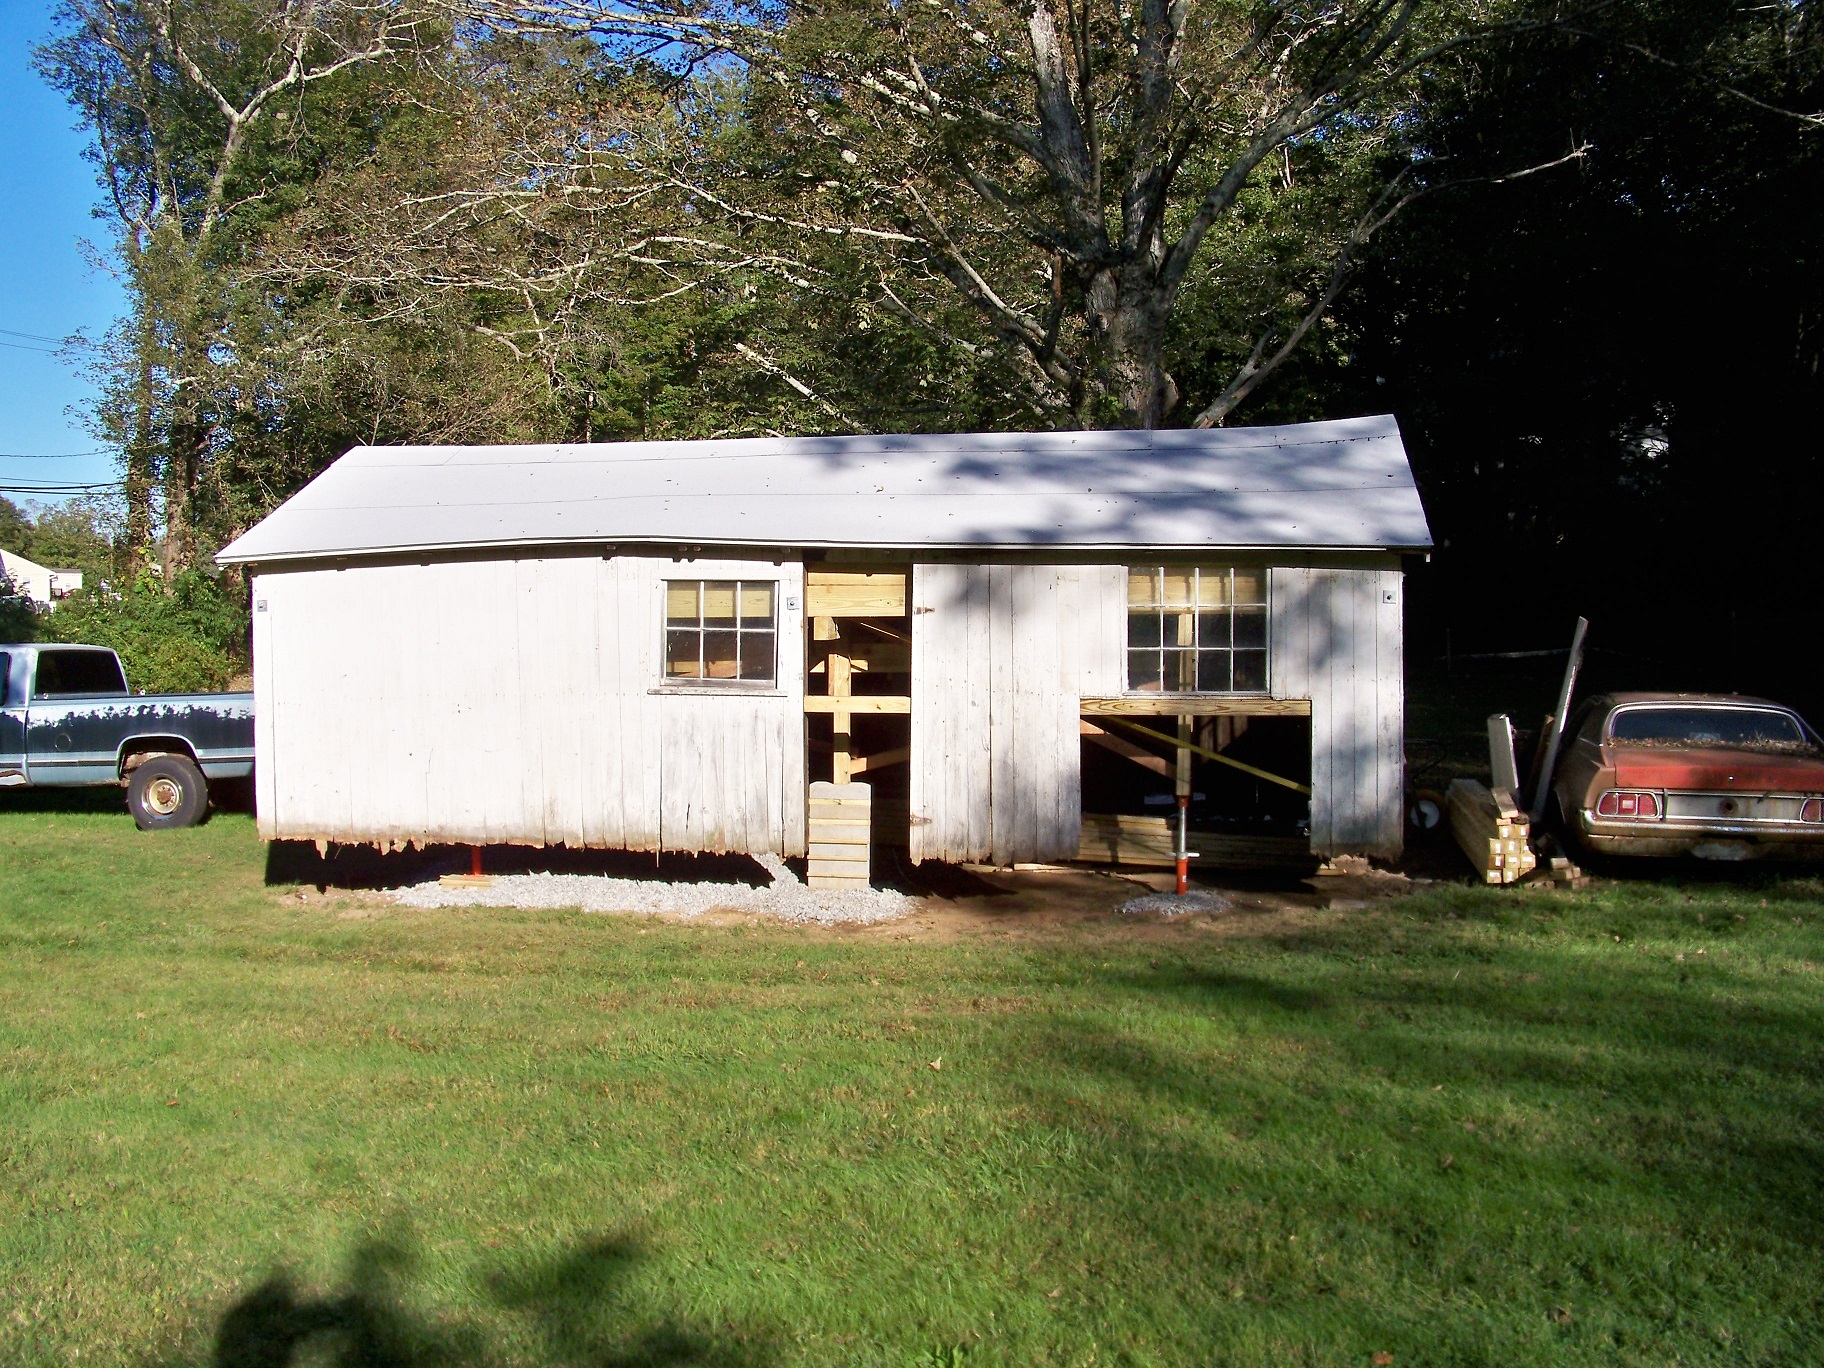
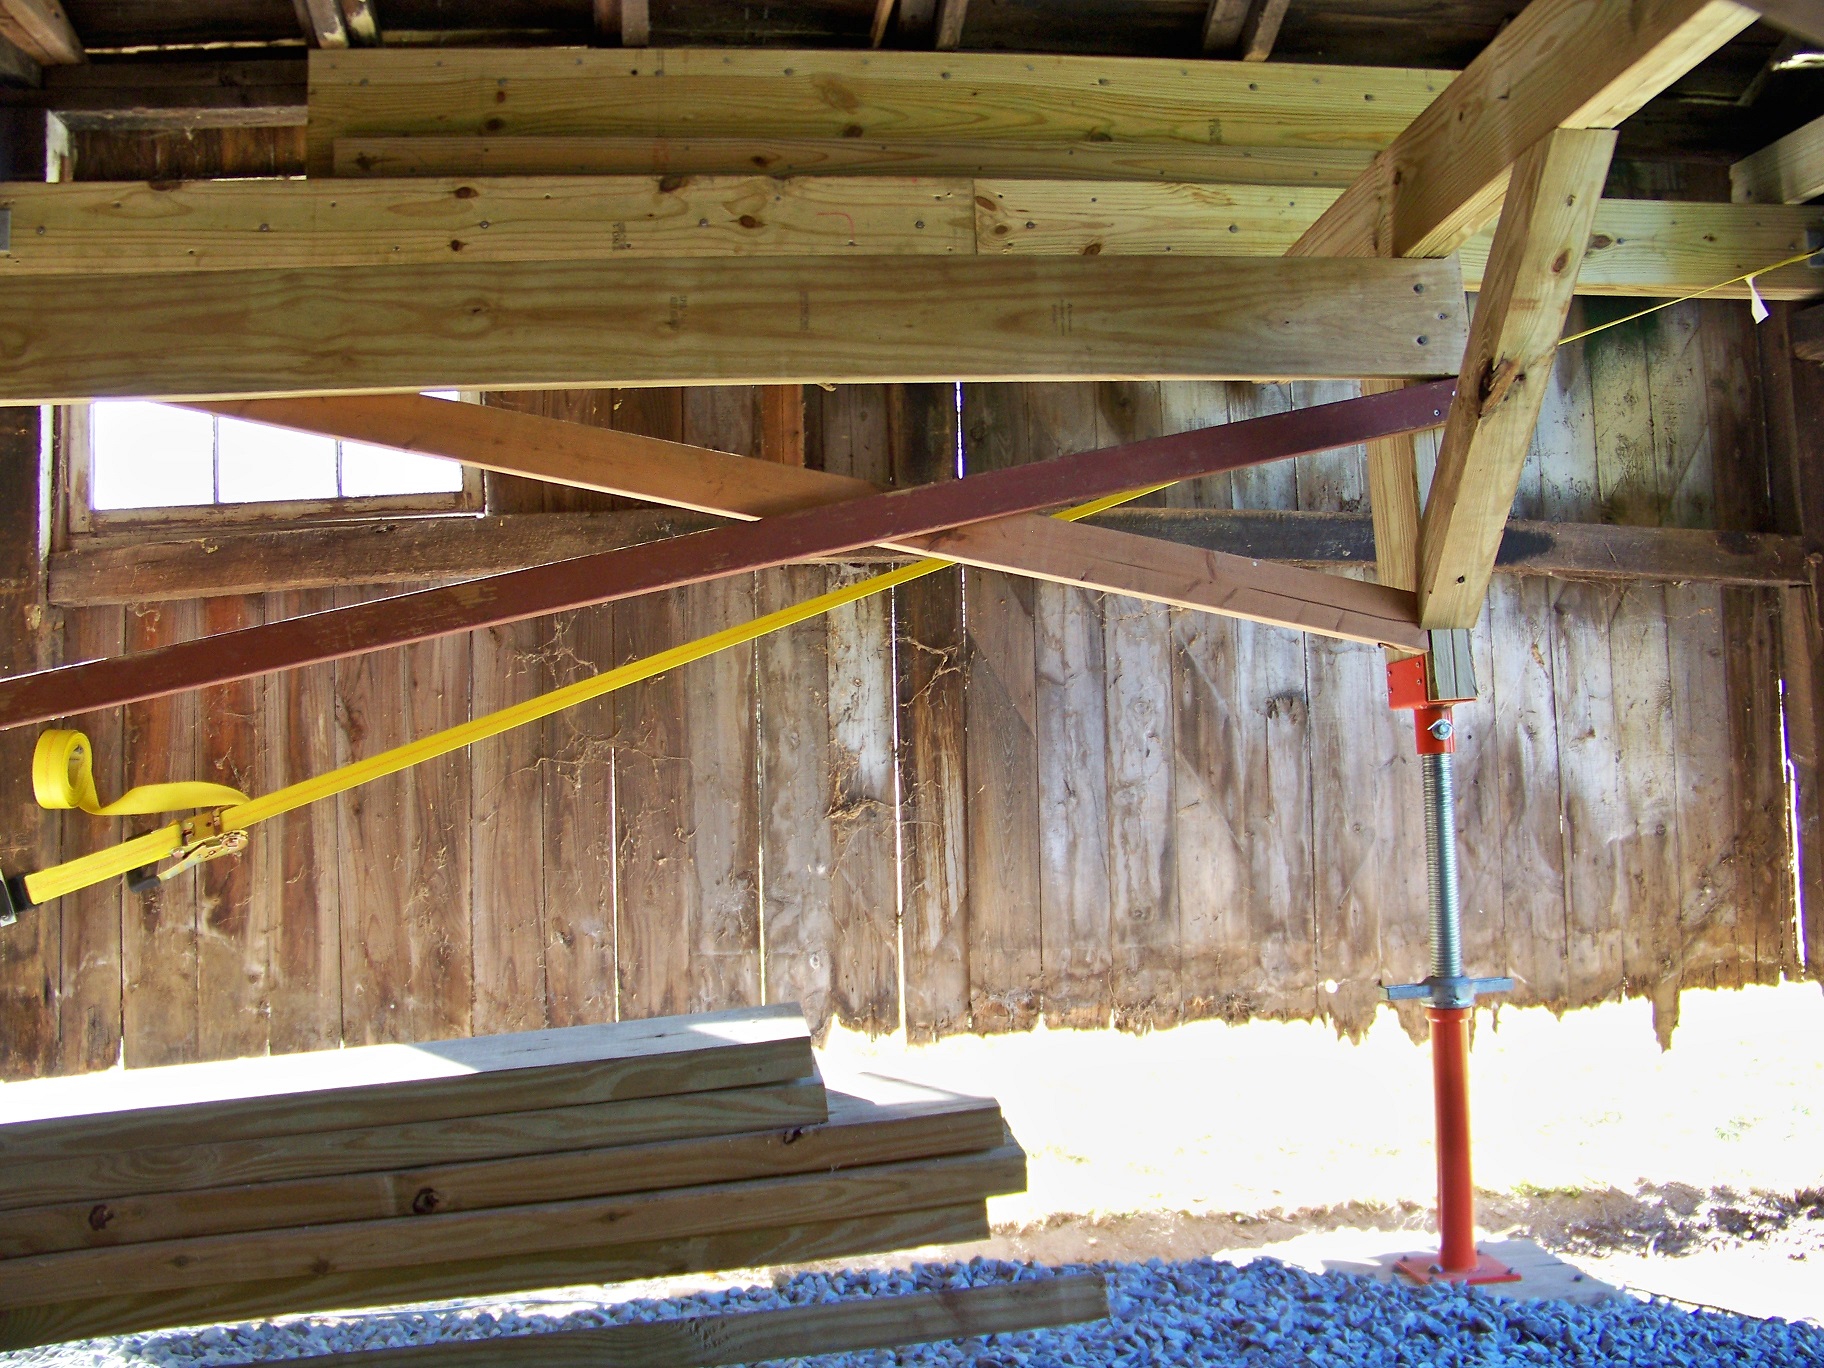
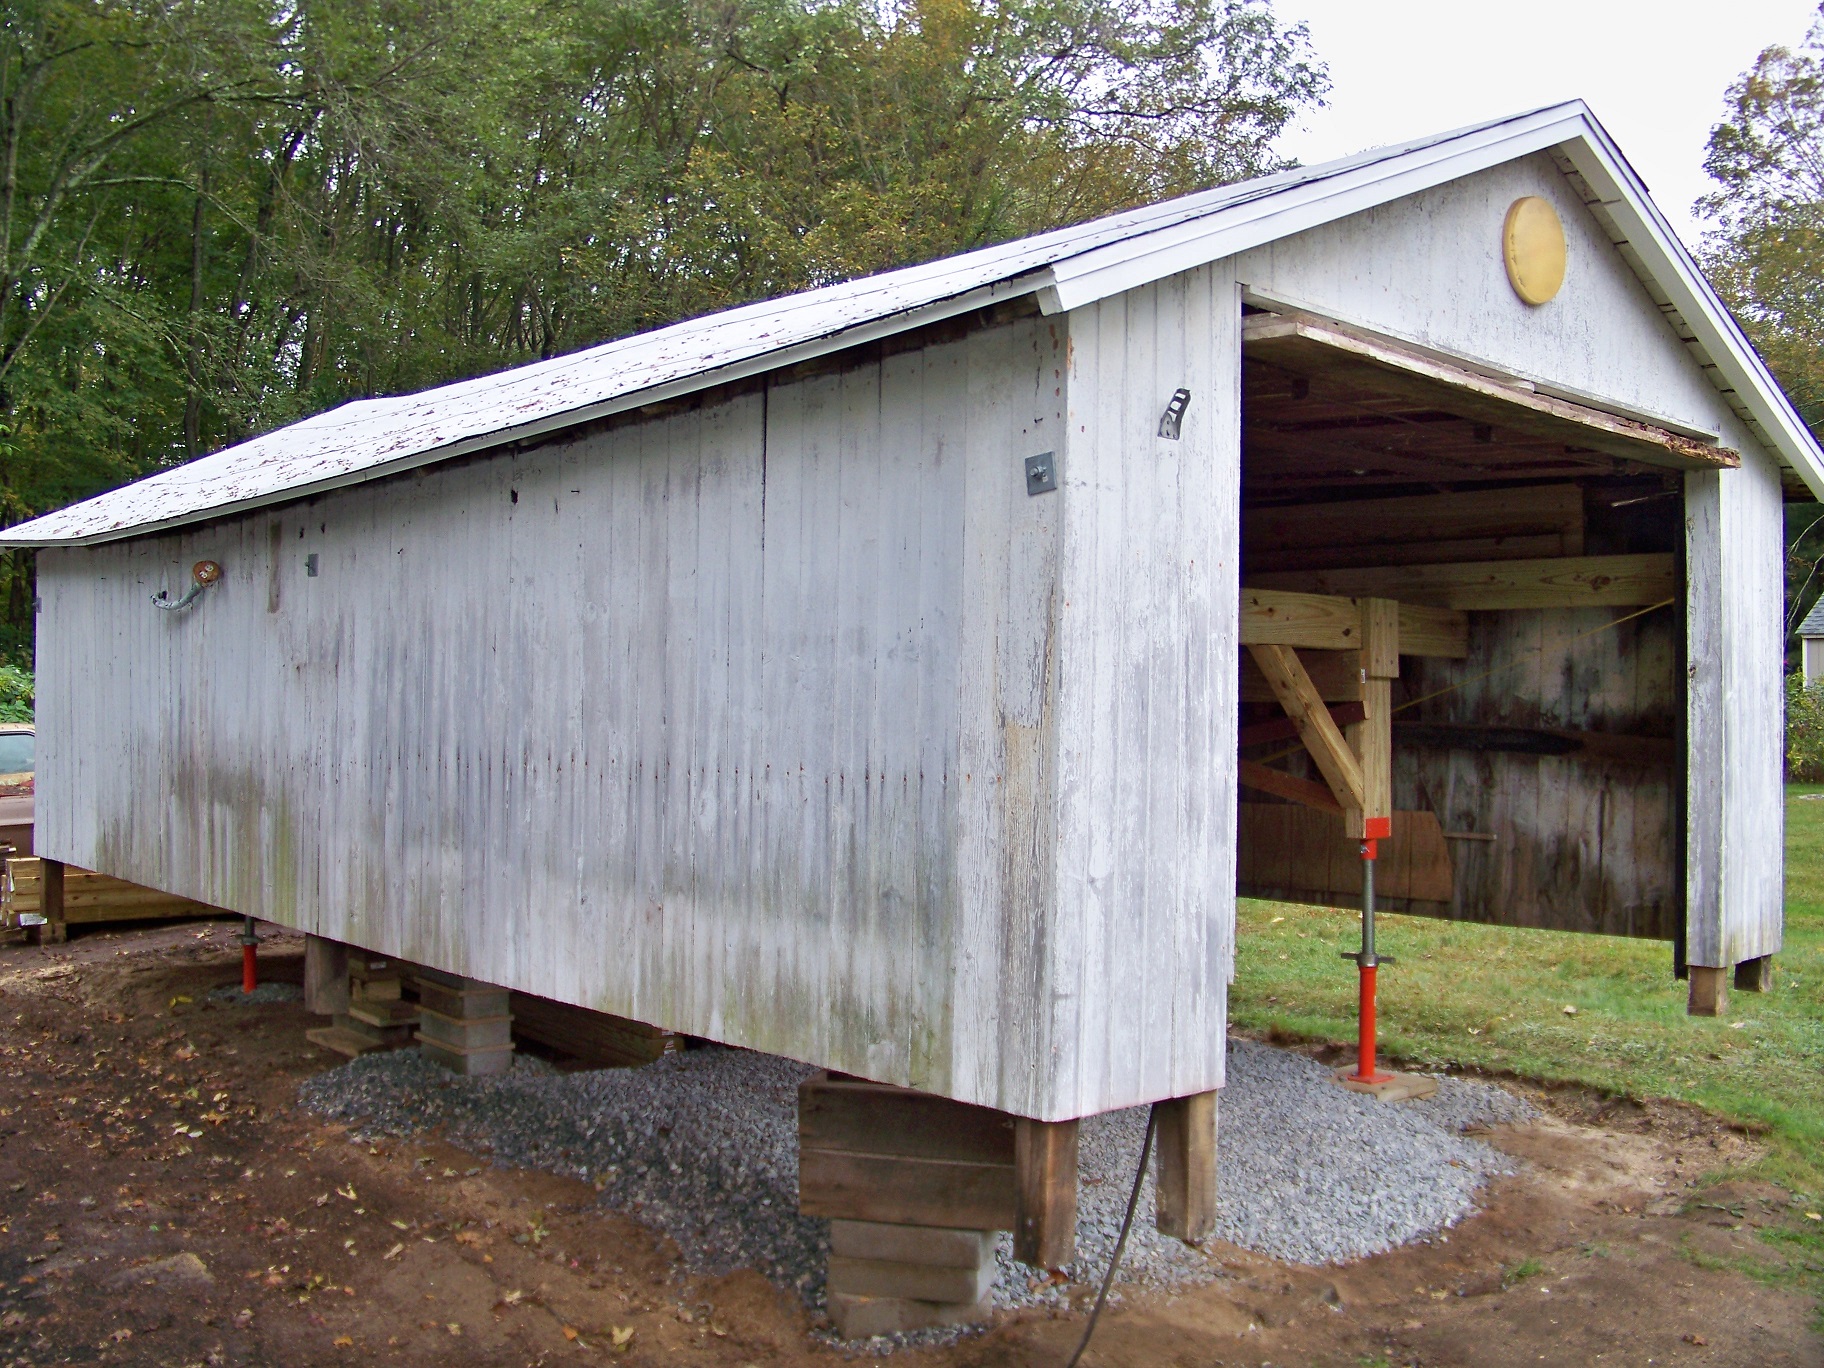
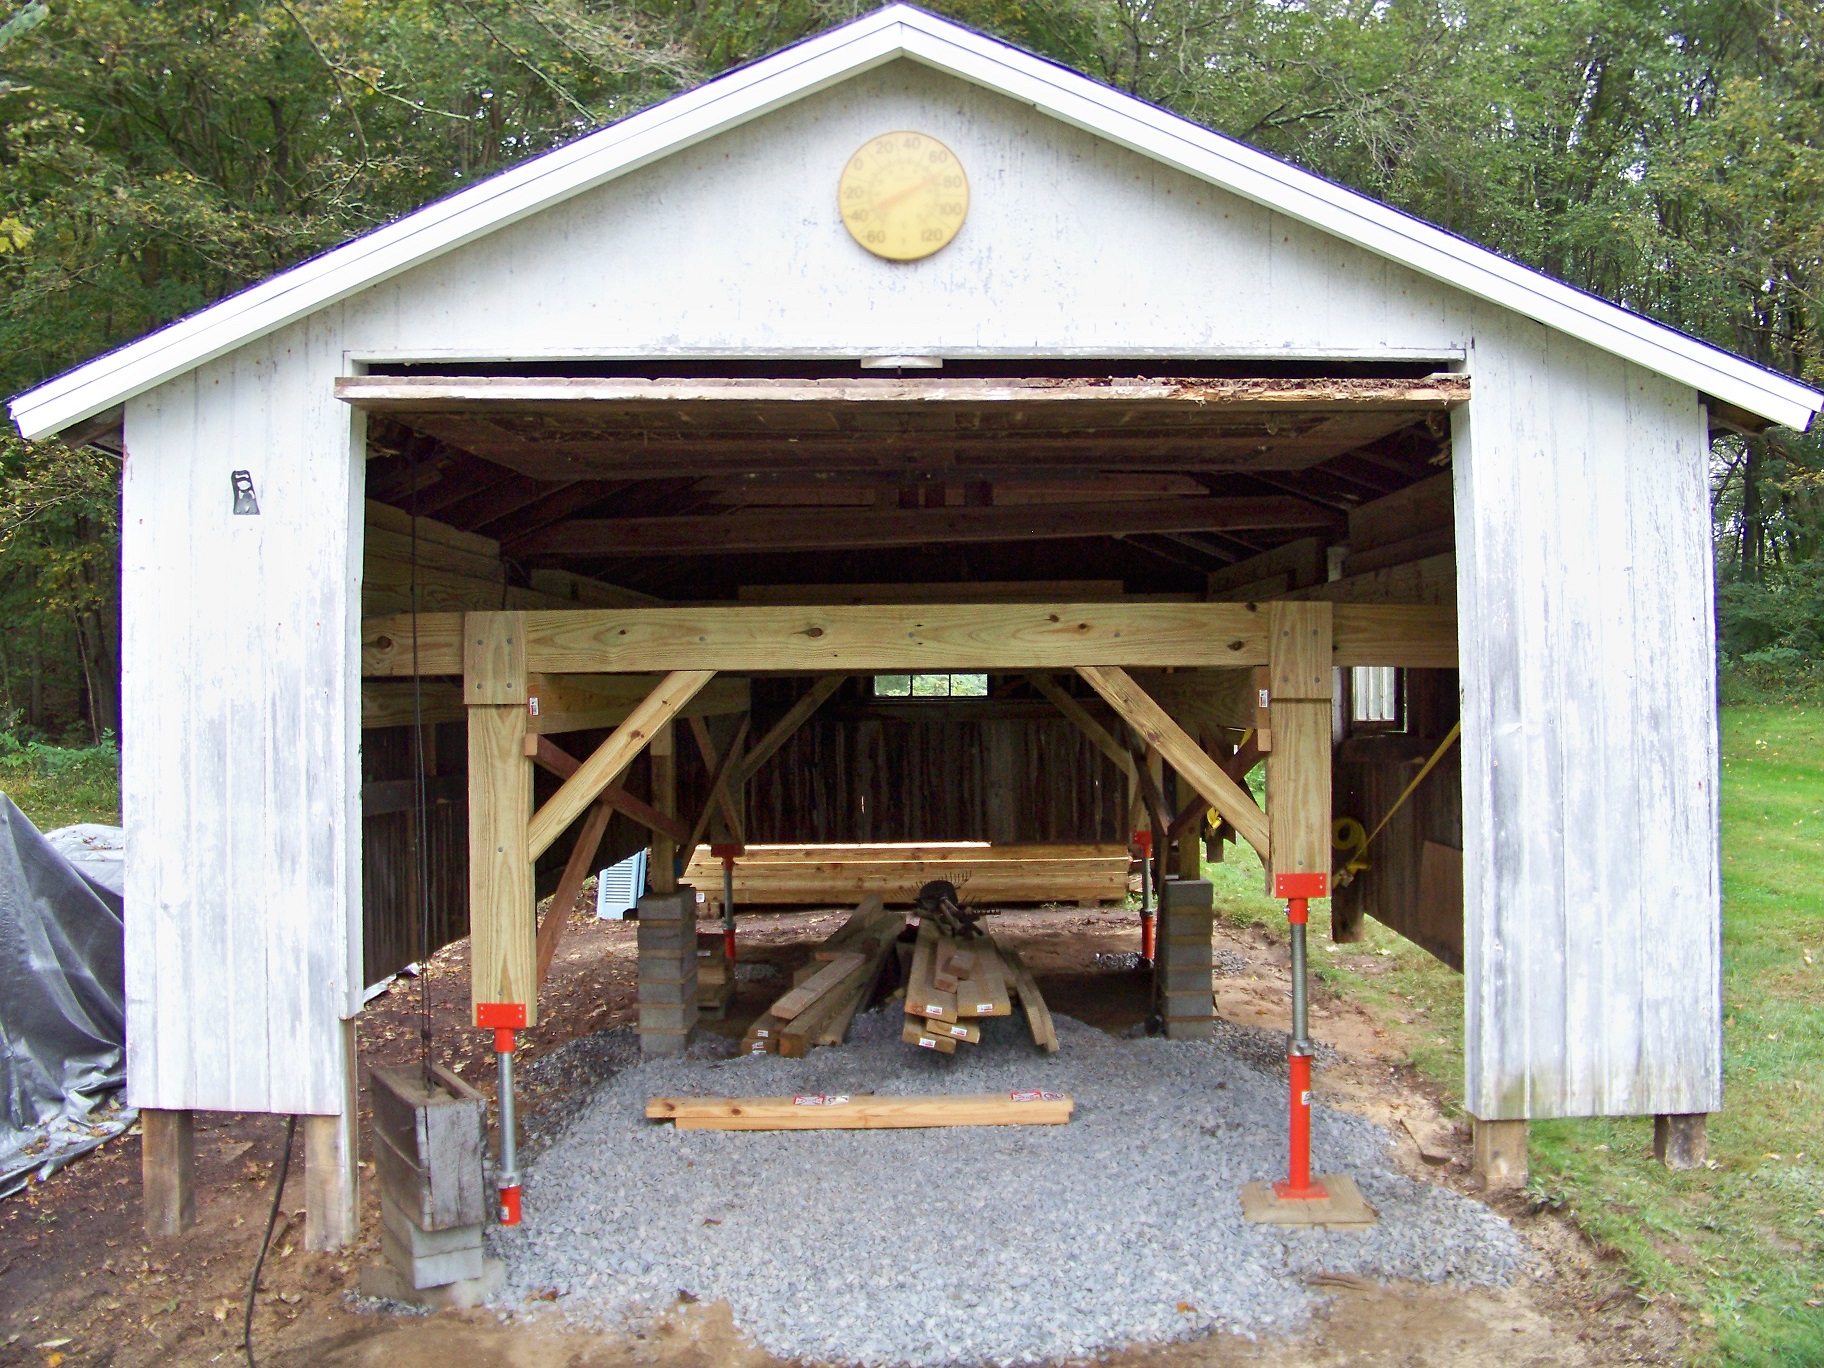
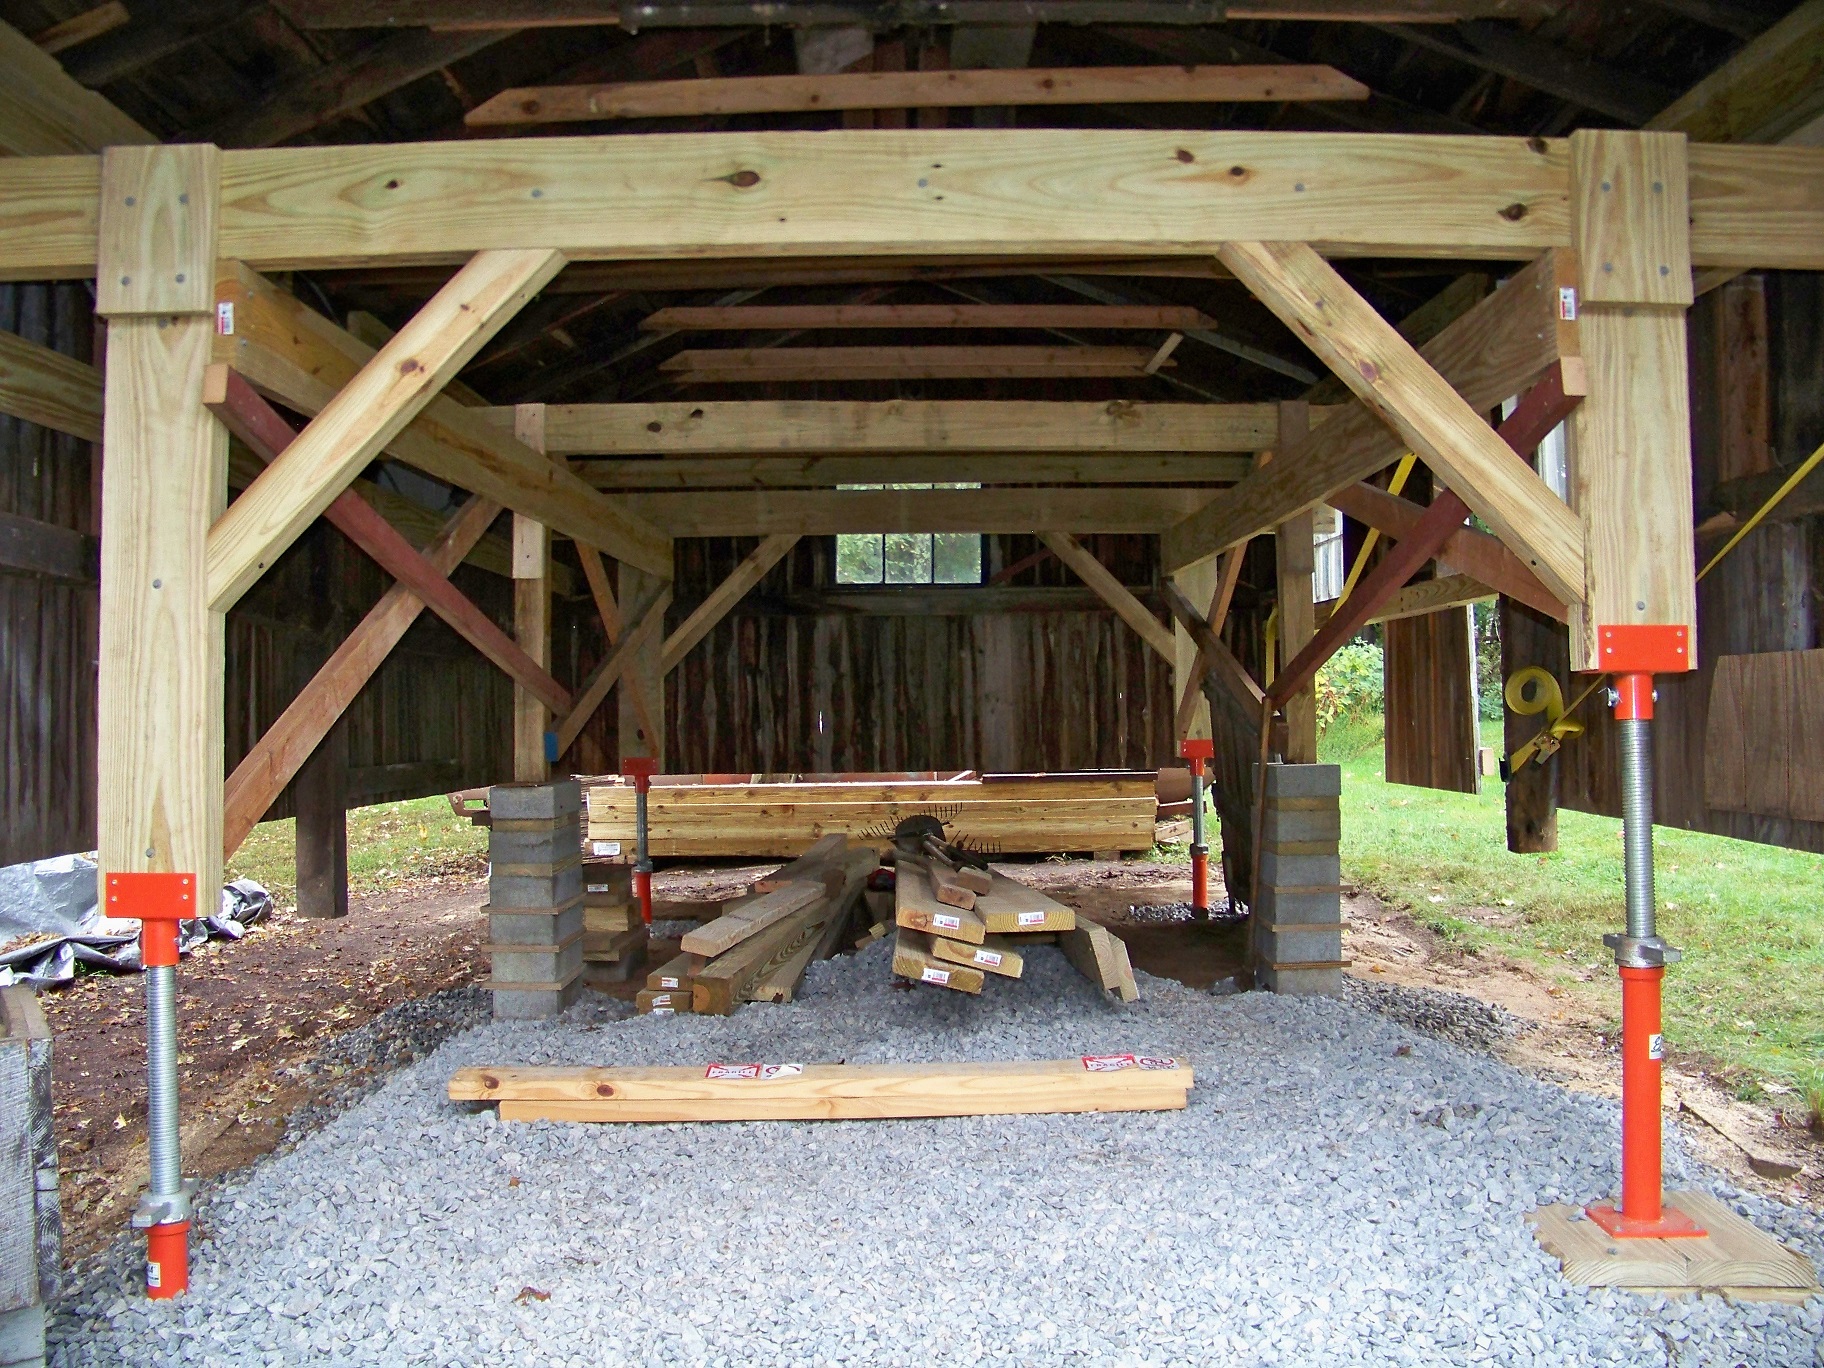
Progress Pics - End of day 5:00pm continued:
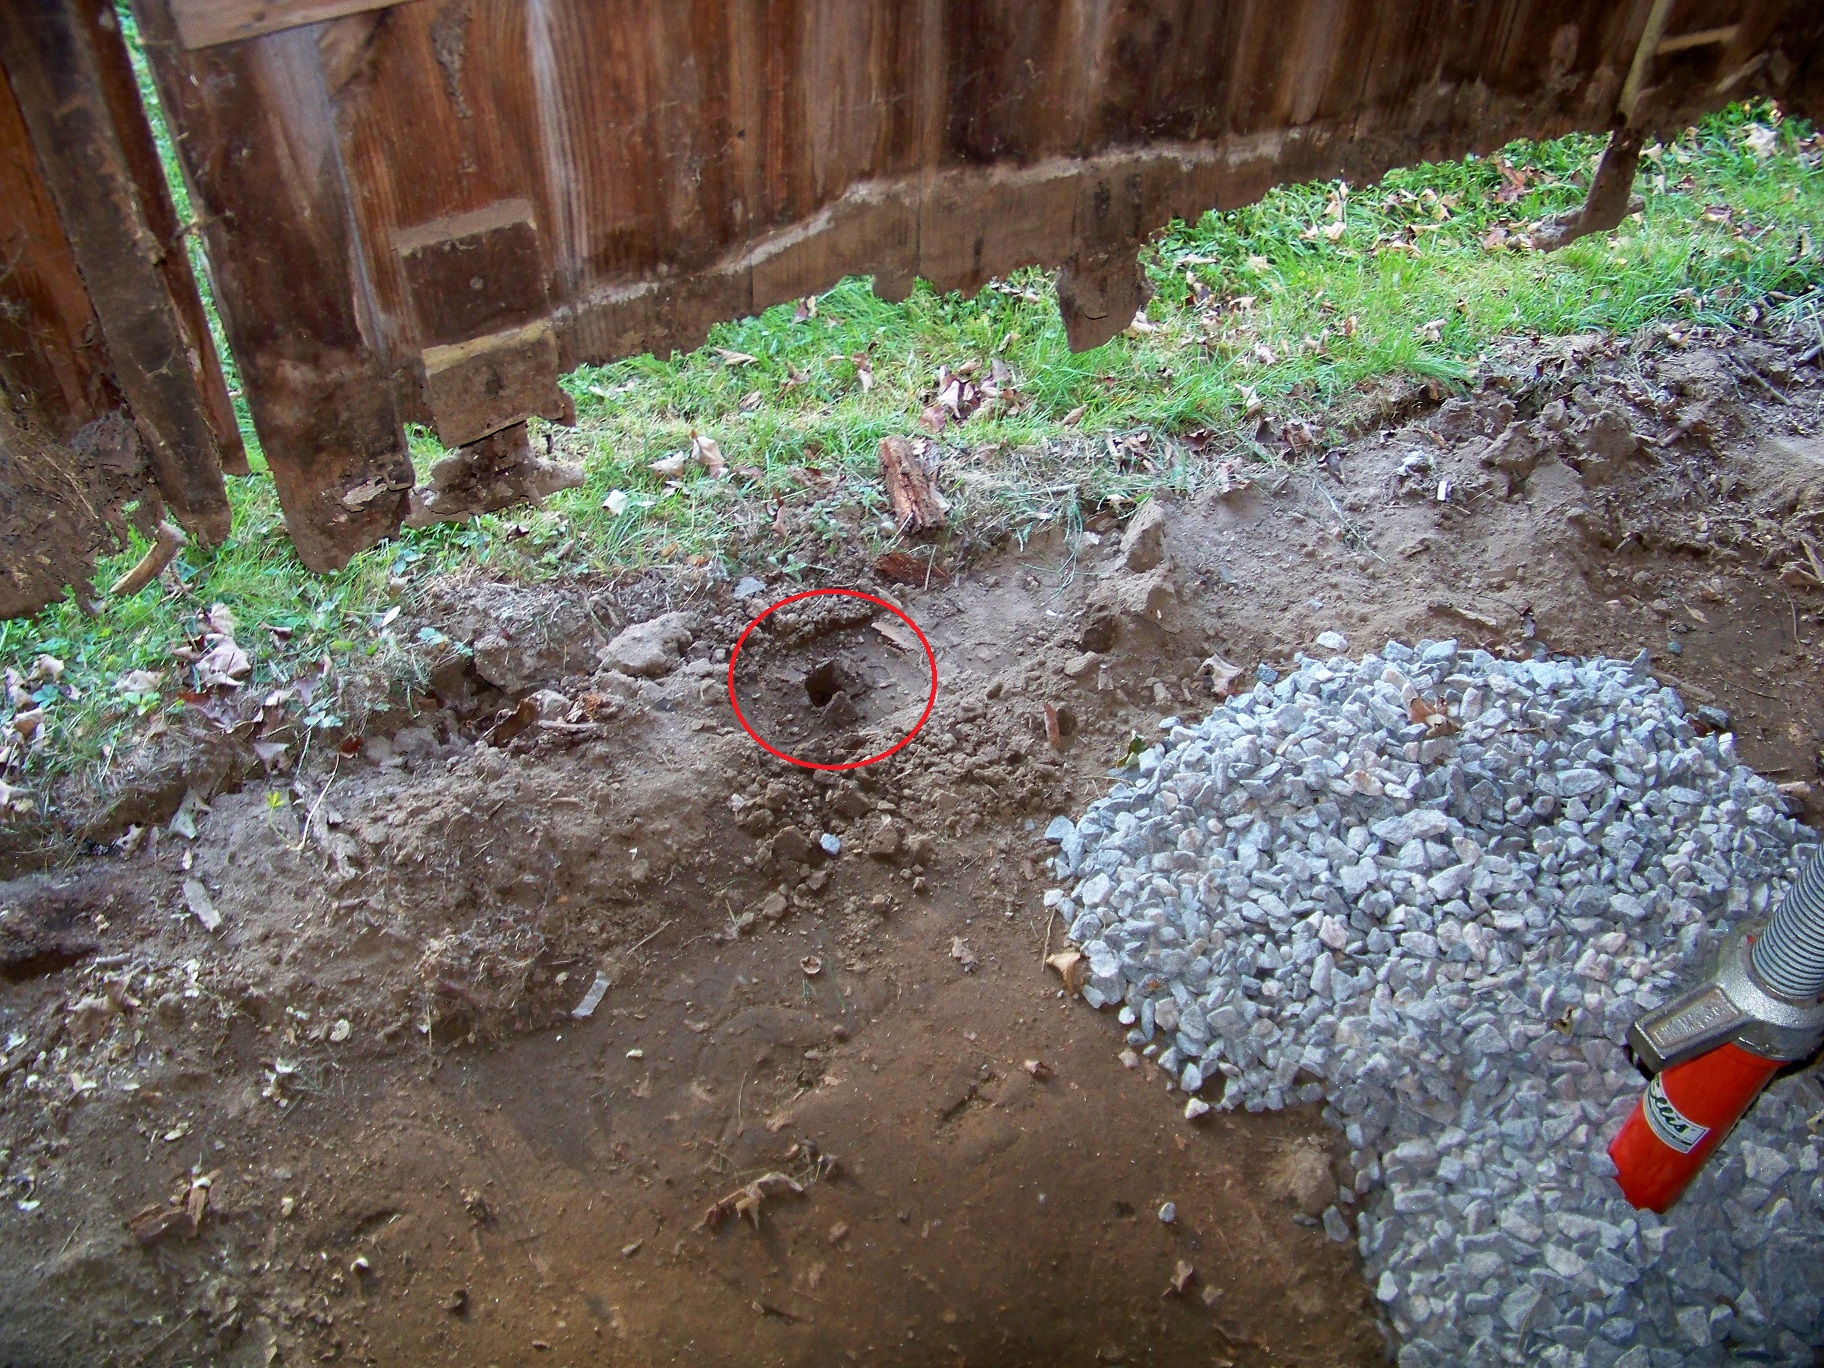
So I saw the culprit making holes and nests today. My best guess is it's a vole. Saw him disappear down a hole, so a took the rake and filled in the hole and stomped on it. 3 hrs. later the hole was back. Not sure how to get rid of these things.
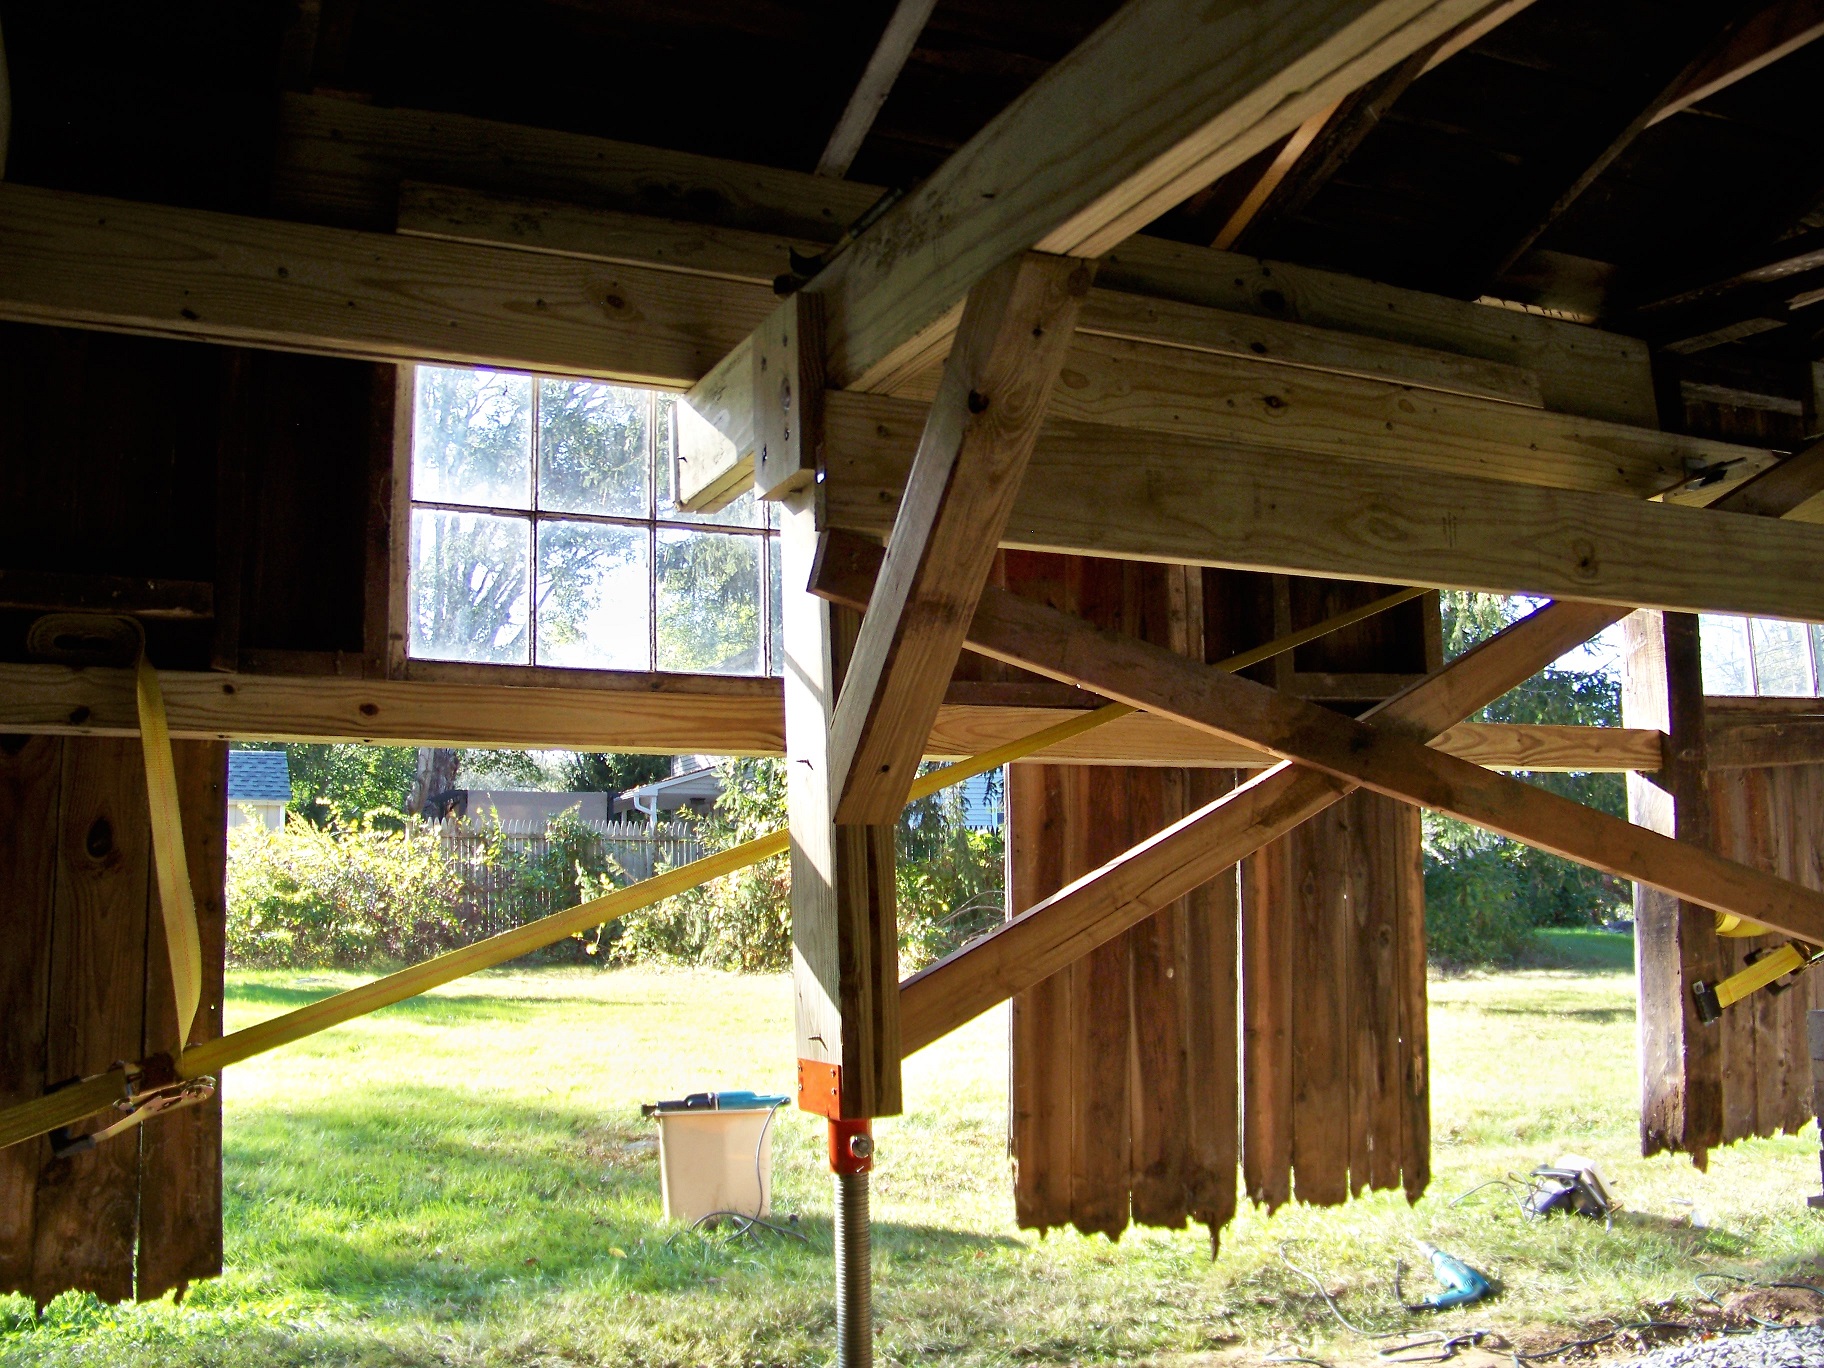
Next step - Cut the bottom off.
Then put two 12ft 6x6 PT length wise each side, to get the 24ft needed, on top of the aforementioned 6x6 perpendicular beams.
Attach framed floor to first set of 3 beams.


 image linked to HD