To avoid these ads, REGISTER NOW!

Raising the Rat Shack

To avoid these ads, REGISTER NOW!

Rex_A_Lott

Well-known member
Joined
Jul 27, 2011
Messages
167
Location
Upstate South Carolina
I discovered your thread yesterday afternoon, looking for ideas on resurrection of an old building. I have to admire your tenacity, and resourcefulness. Congratulations on the job you did so far!
Also, many ,many THANKS, for your documentation of the project, and your thought process as you weighed your options and made your decisions!!:beer:
 
OP
P

Platonic Solid

Well-known member
Joined
Nov 29, 2014
Messages
3,587
Location
CT-USA
Pvc expands and contracts way too much if you have any real lengths of the stuff fastened at both ends. My recommendation would be treated 1x or plywood and cover with something called ground breaker. It's a textured fiberglass sheet that comes in 1ft and 2ft high 50 or 100ft long. I used it on my last house to protect the pink board I put against my house foundation. Held up great to 10+ years of string trimming. Fades a little but other than that no complaints. That's what I'd use. They have a good selection of accessories for it at menards but you said those aren't near you. Maybe home depot?
http://www.homedepot.com/p/12-in-x-...ic-Foundation-Protection-Kit-GB-1-K/205735697
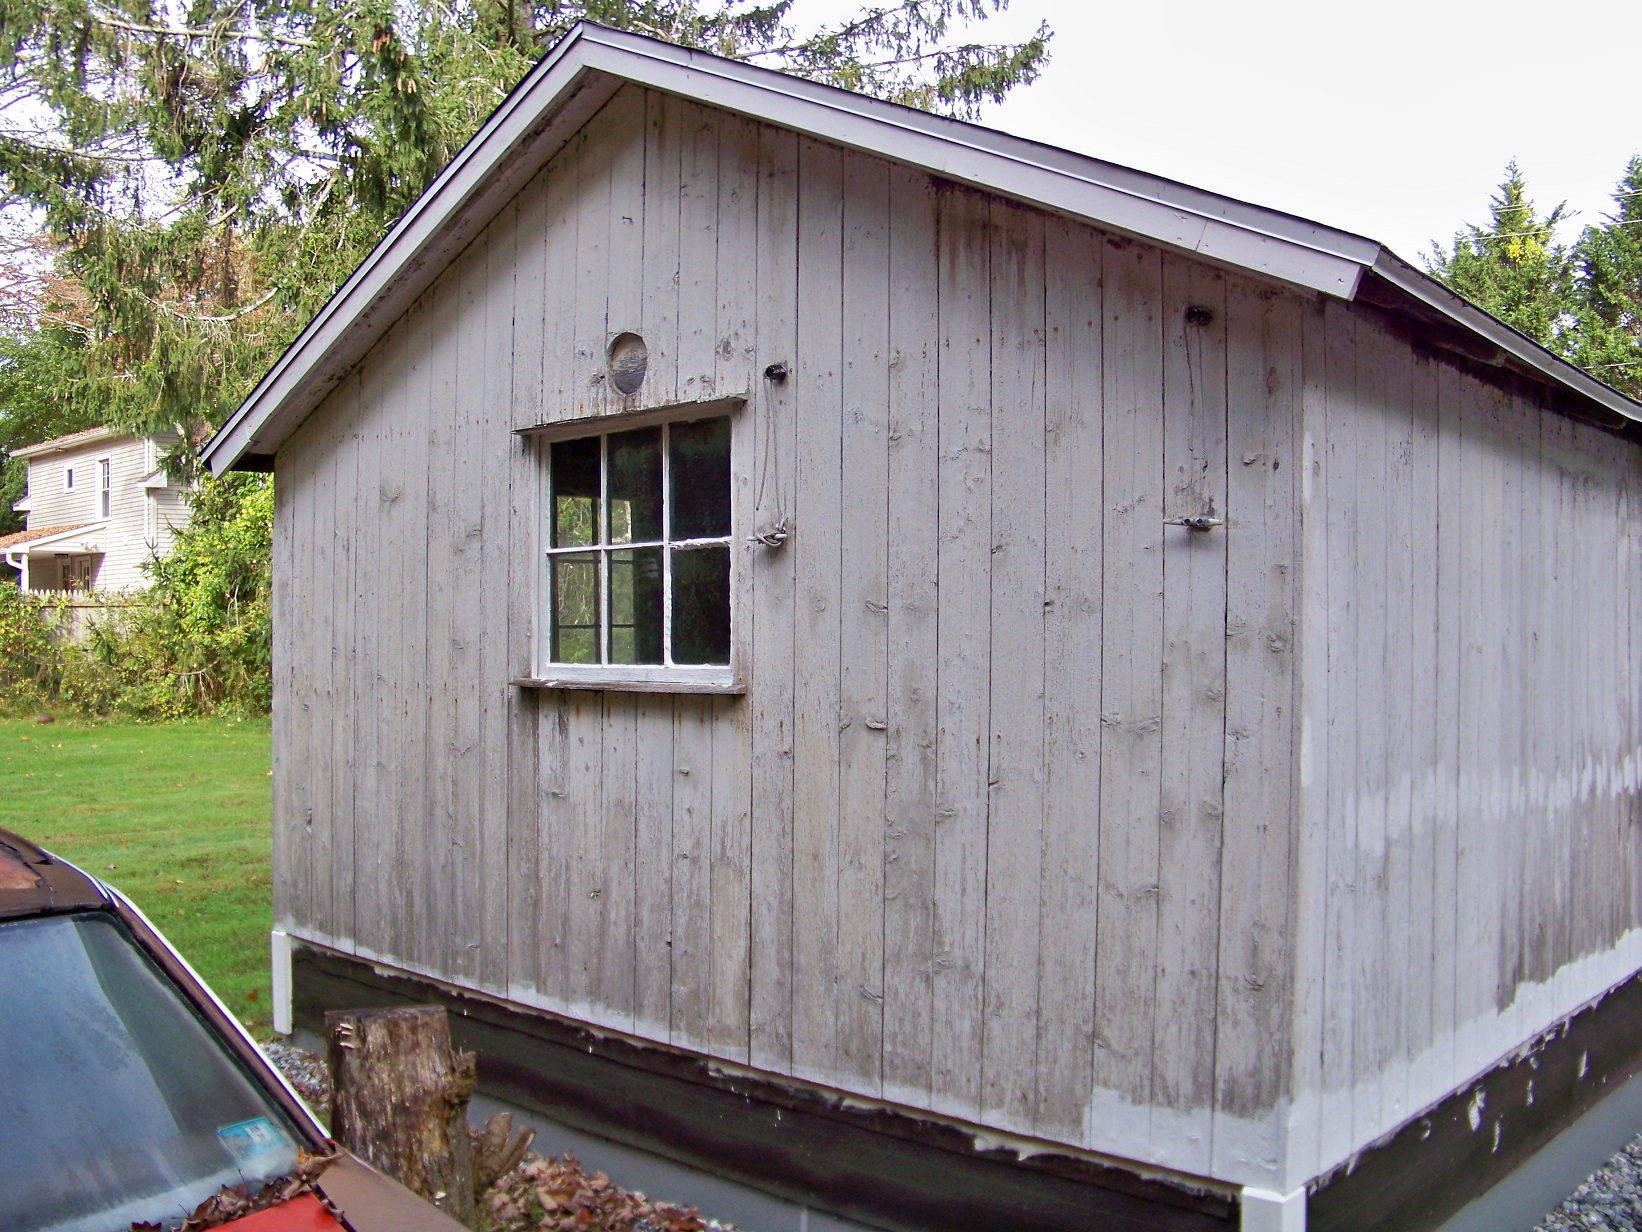
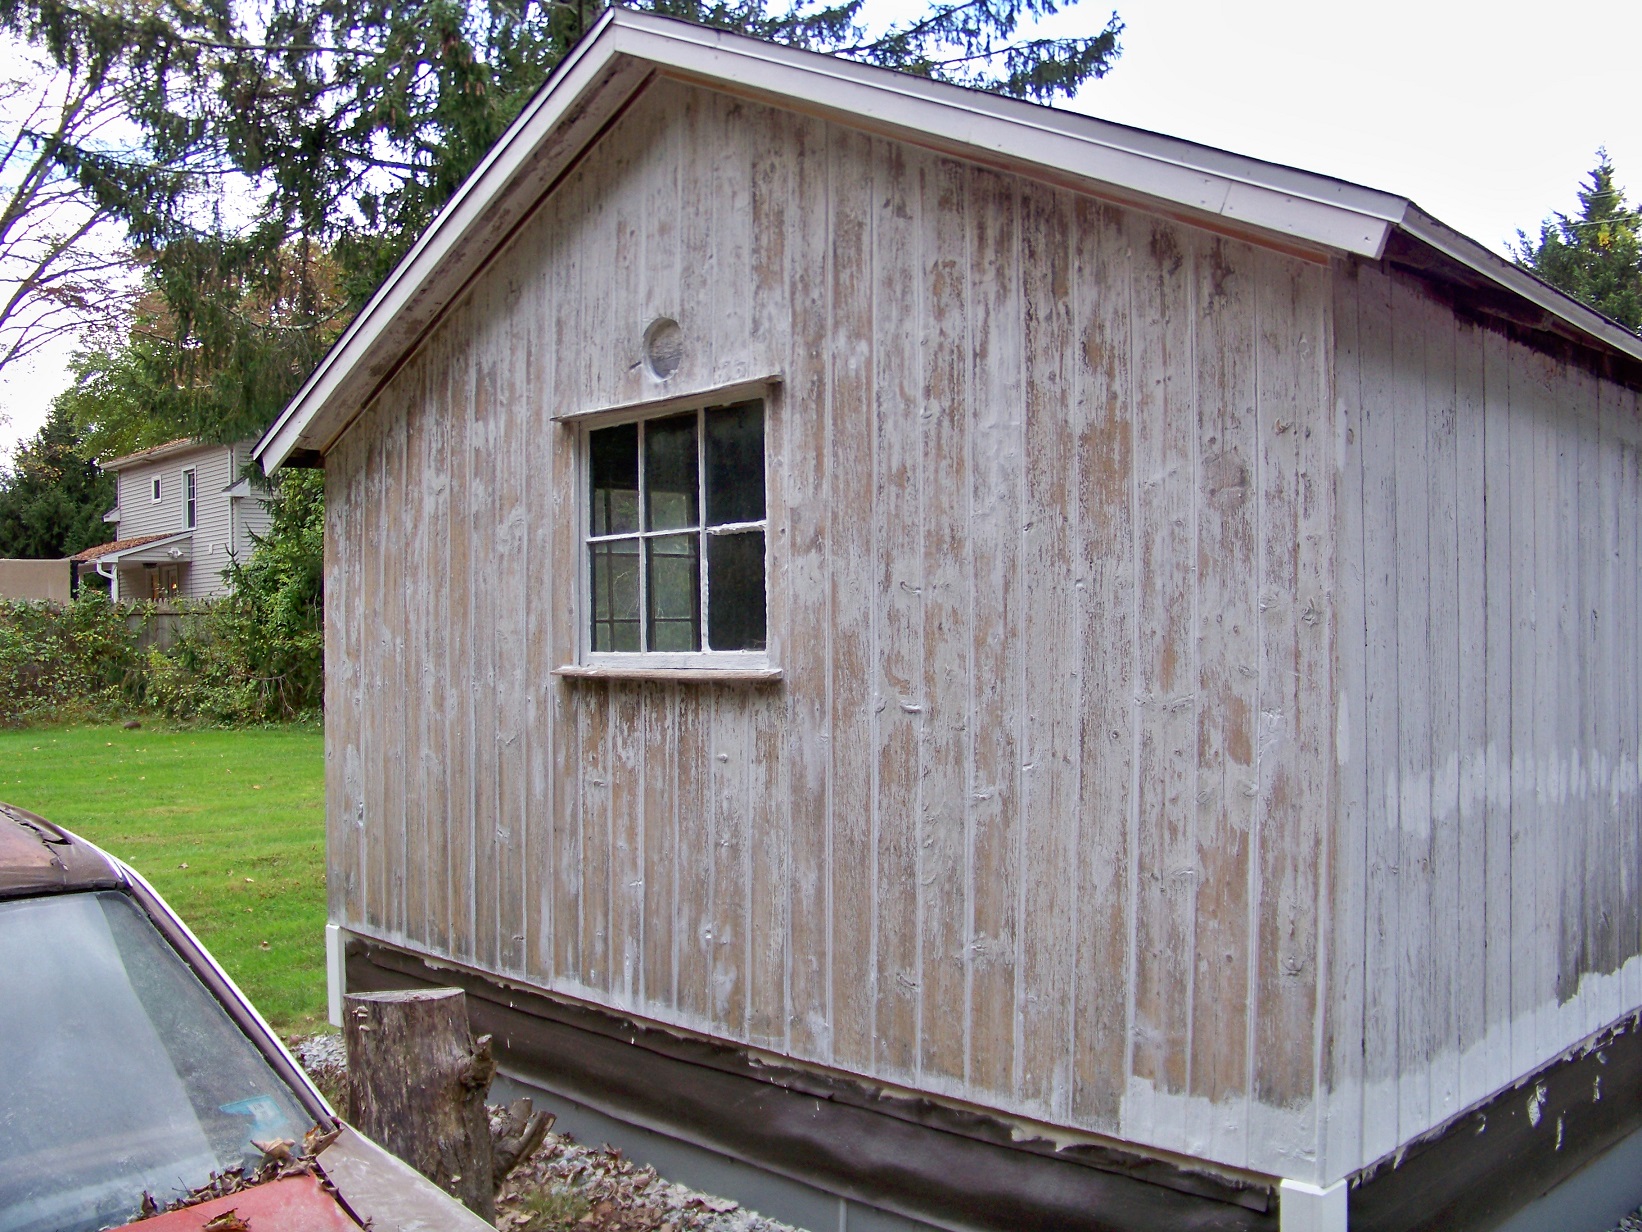
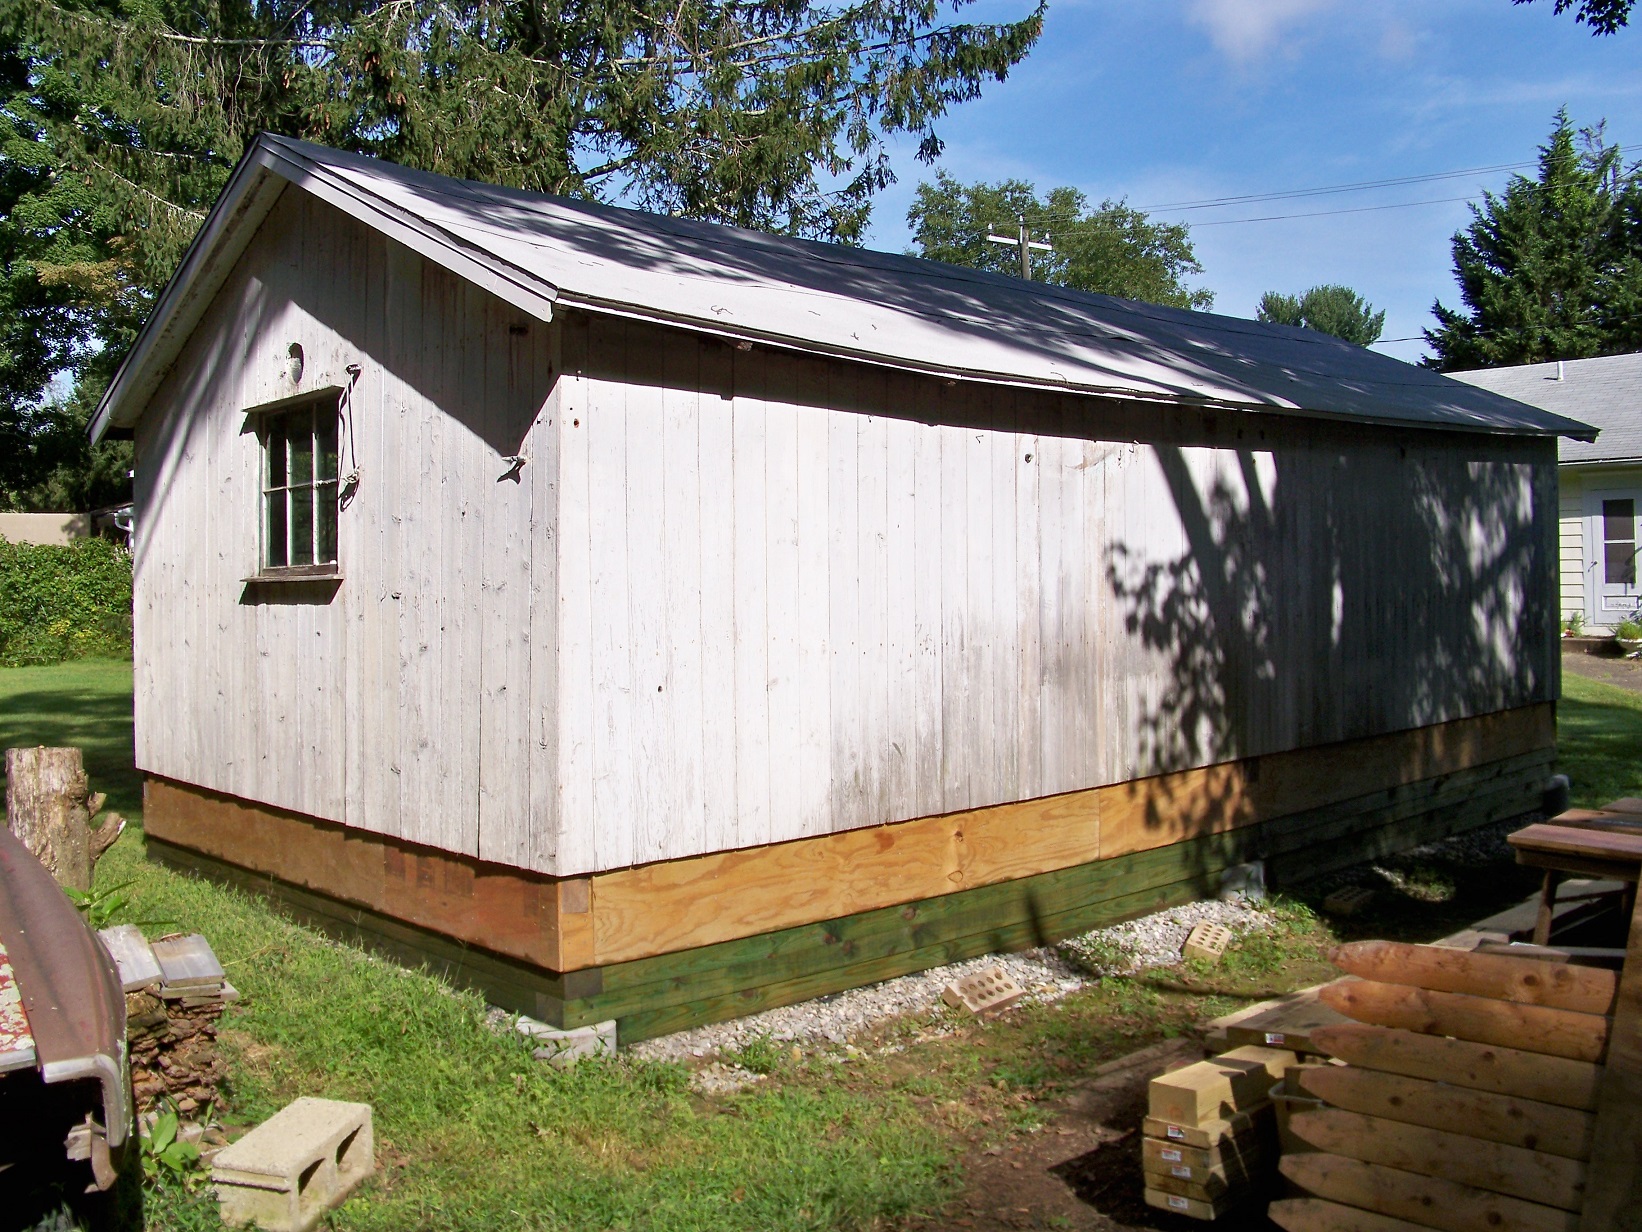
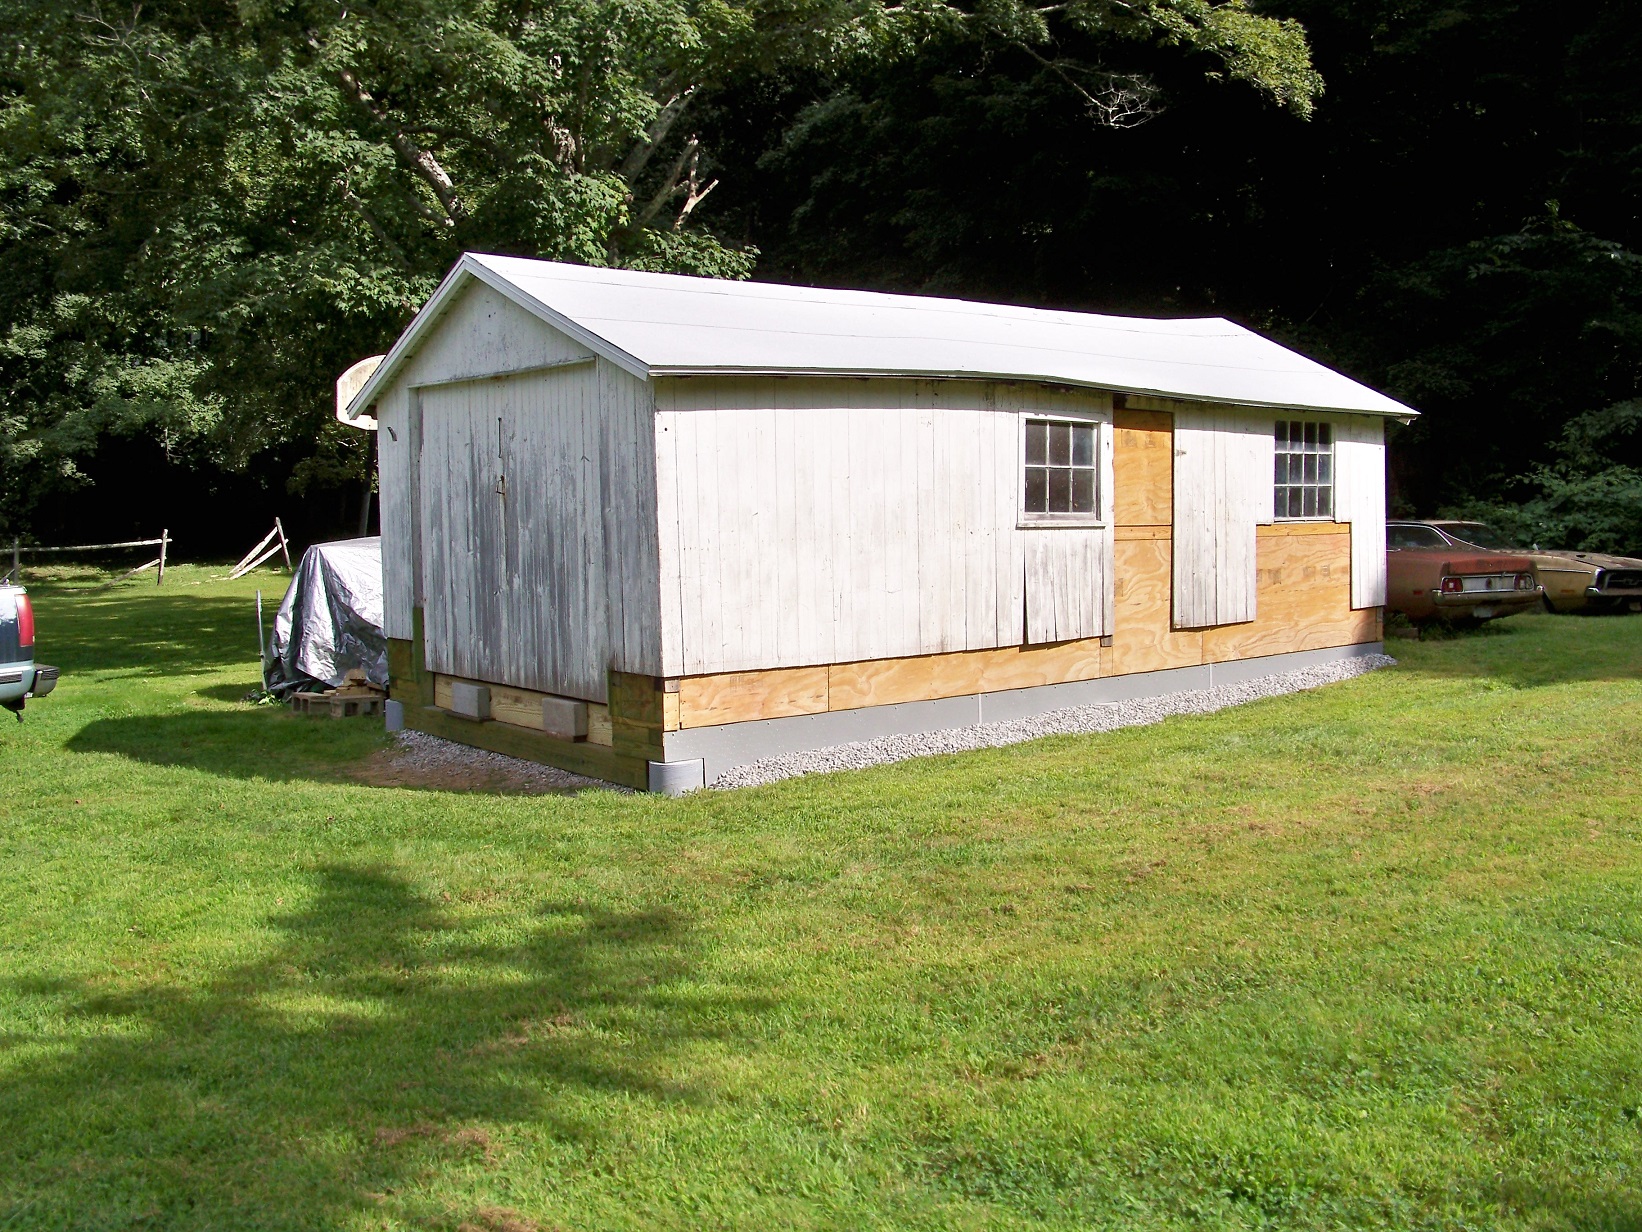
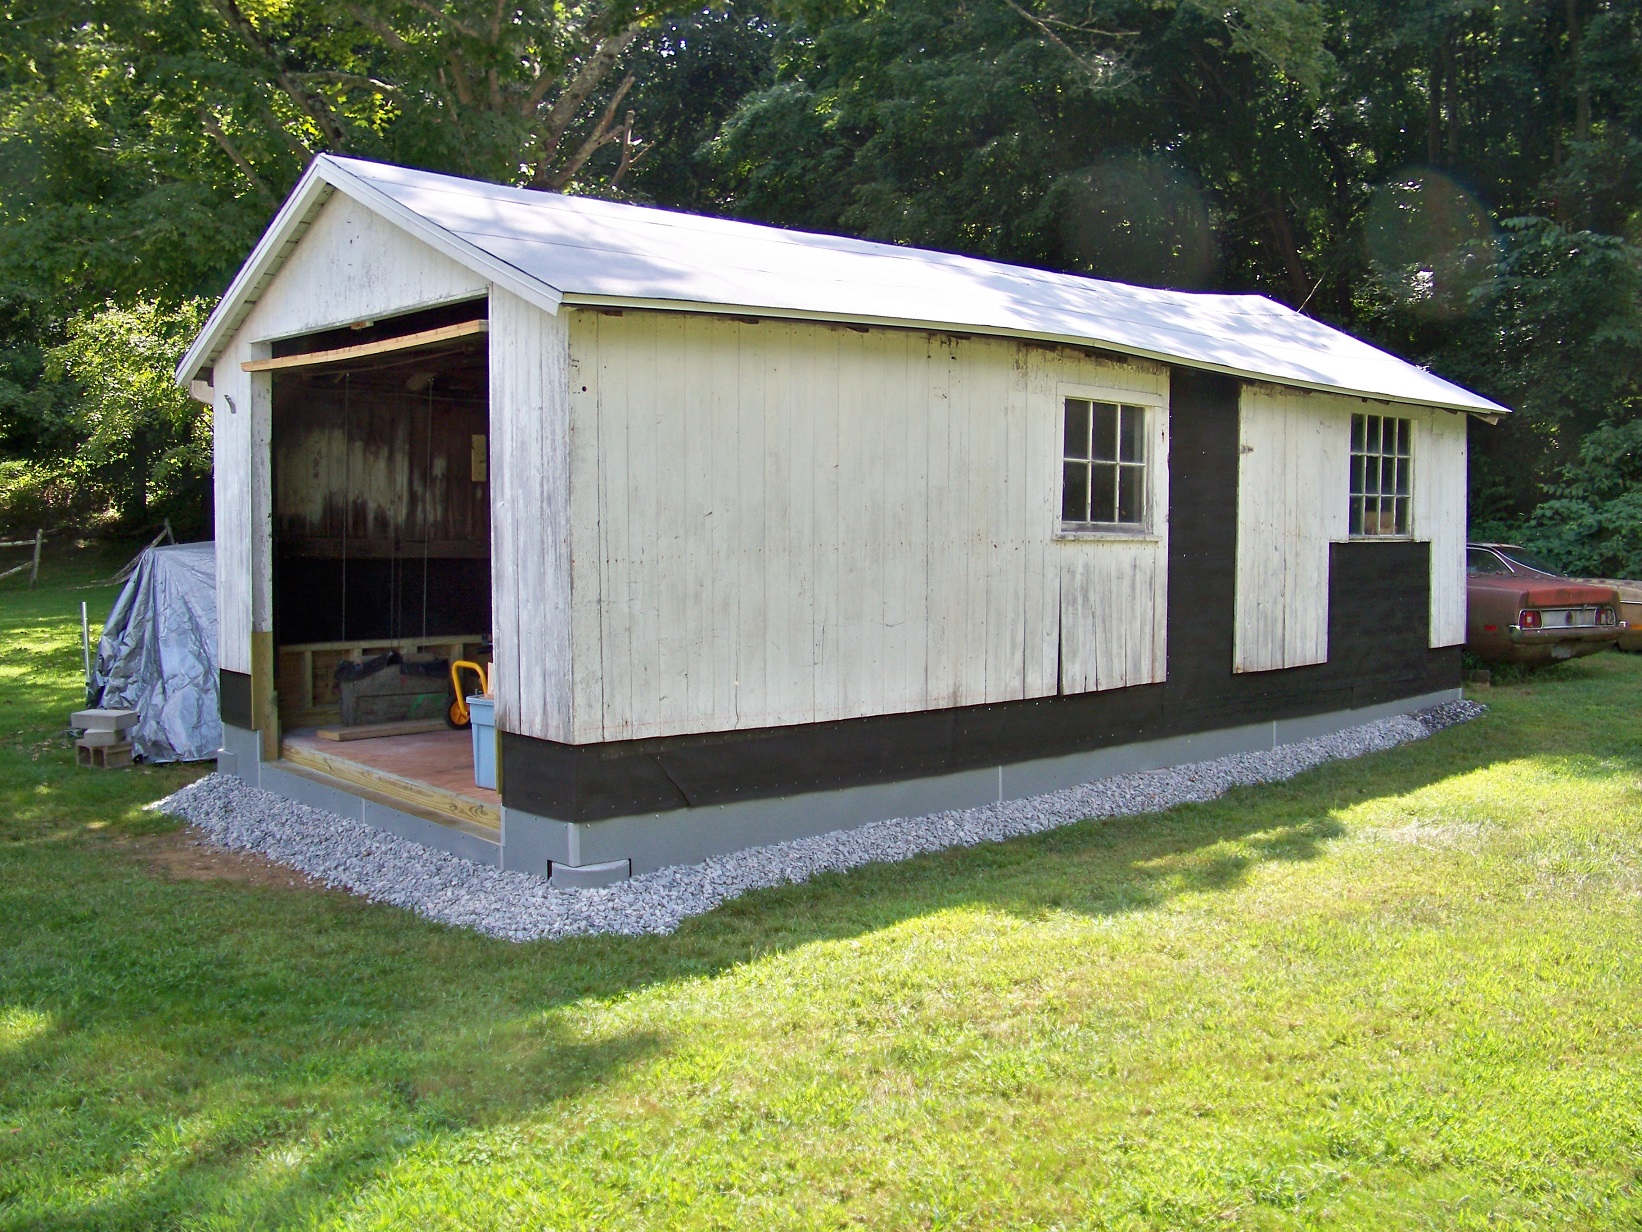
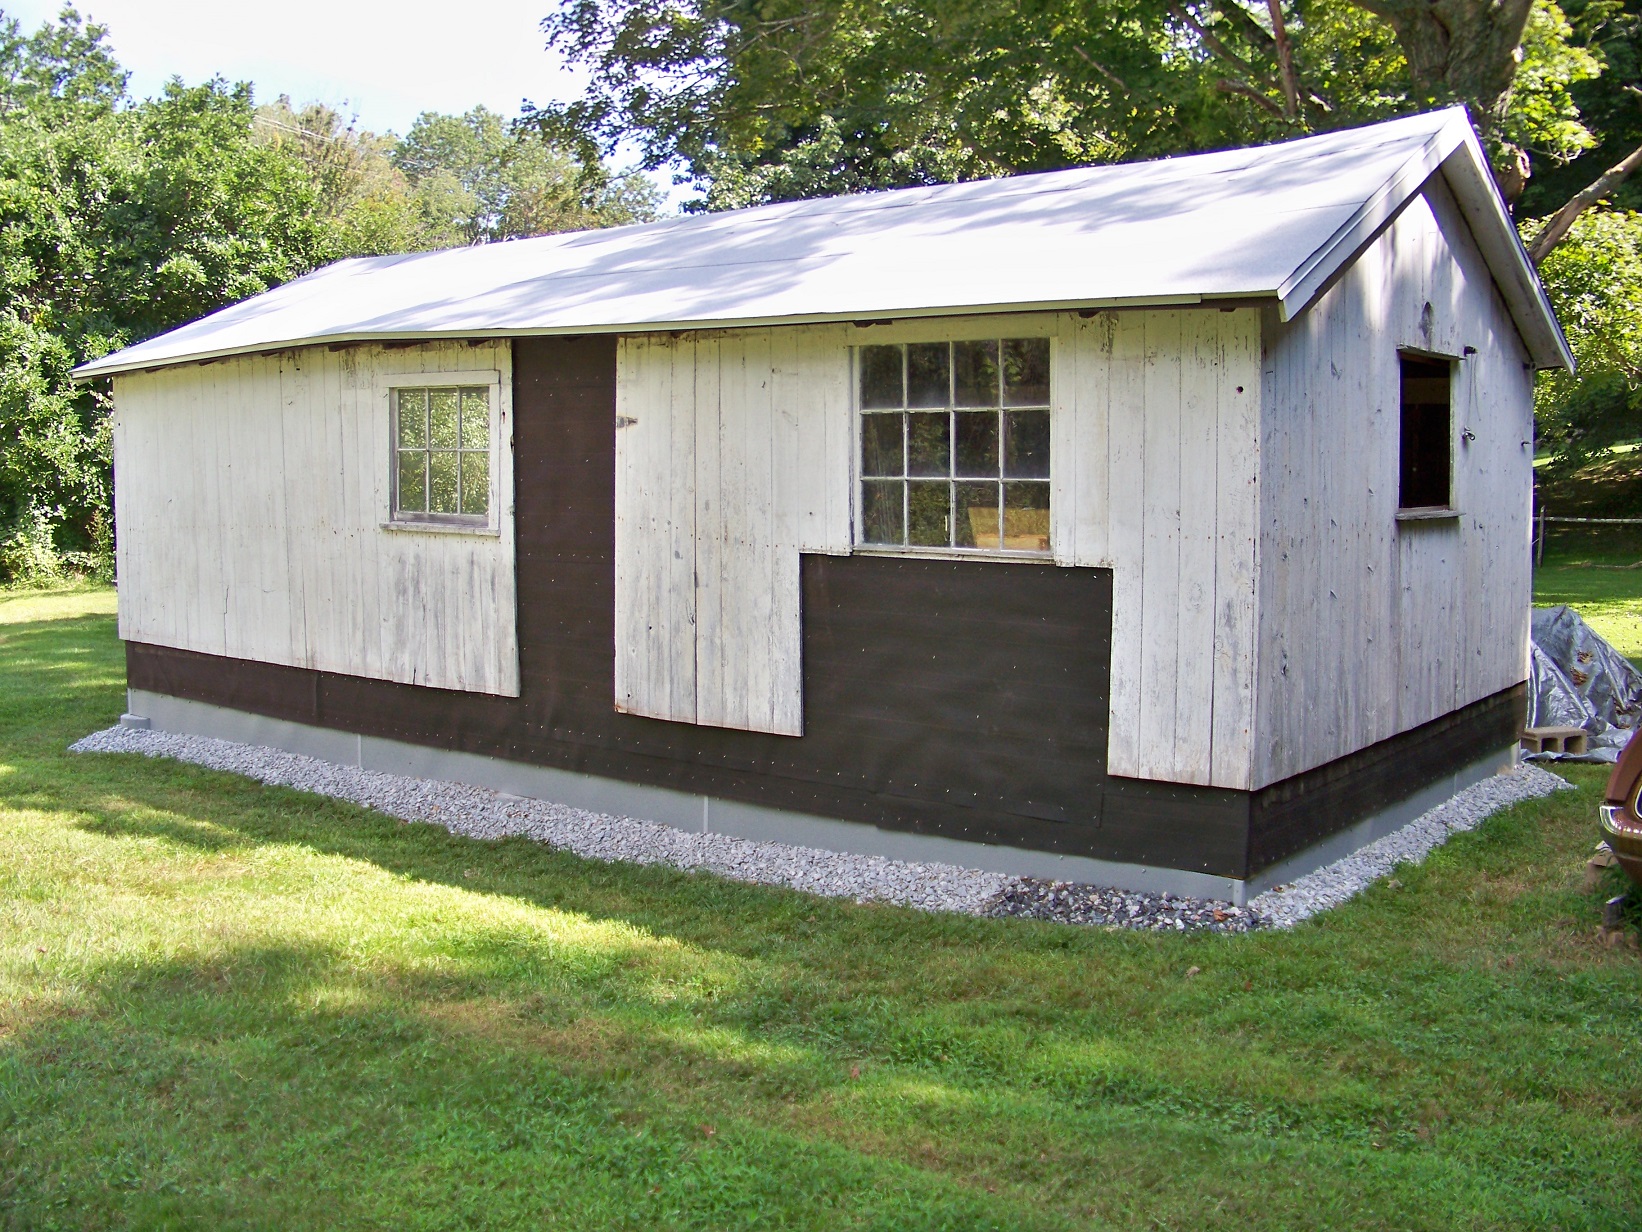
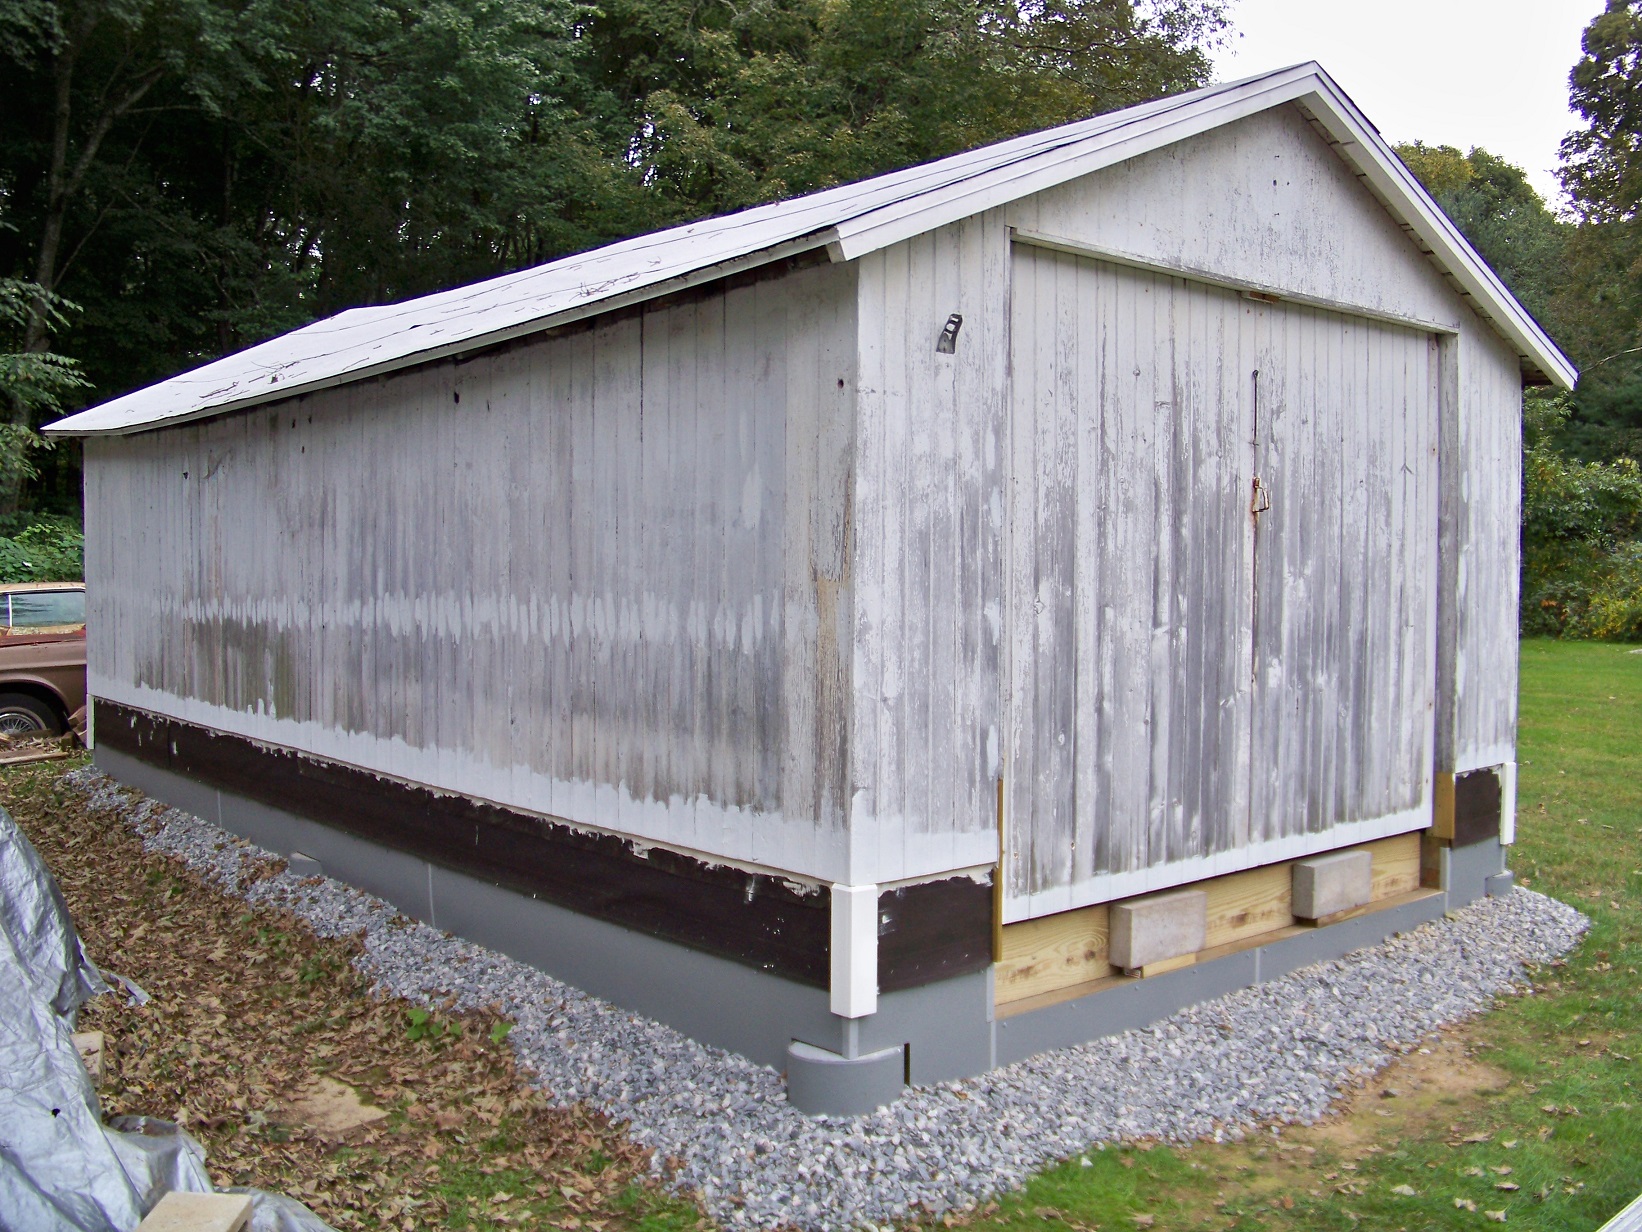
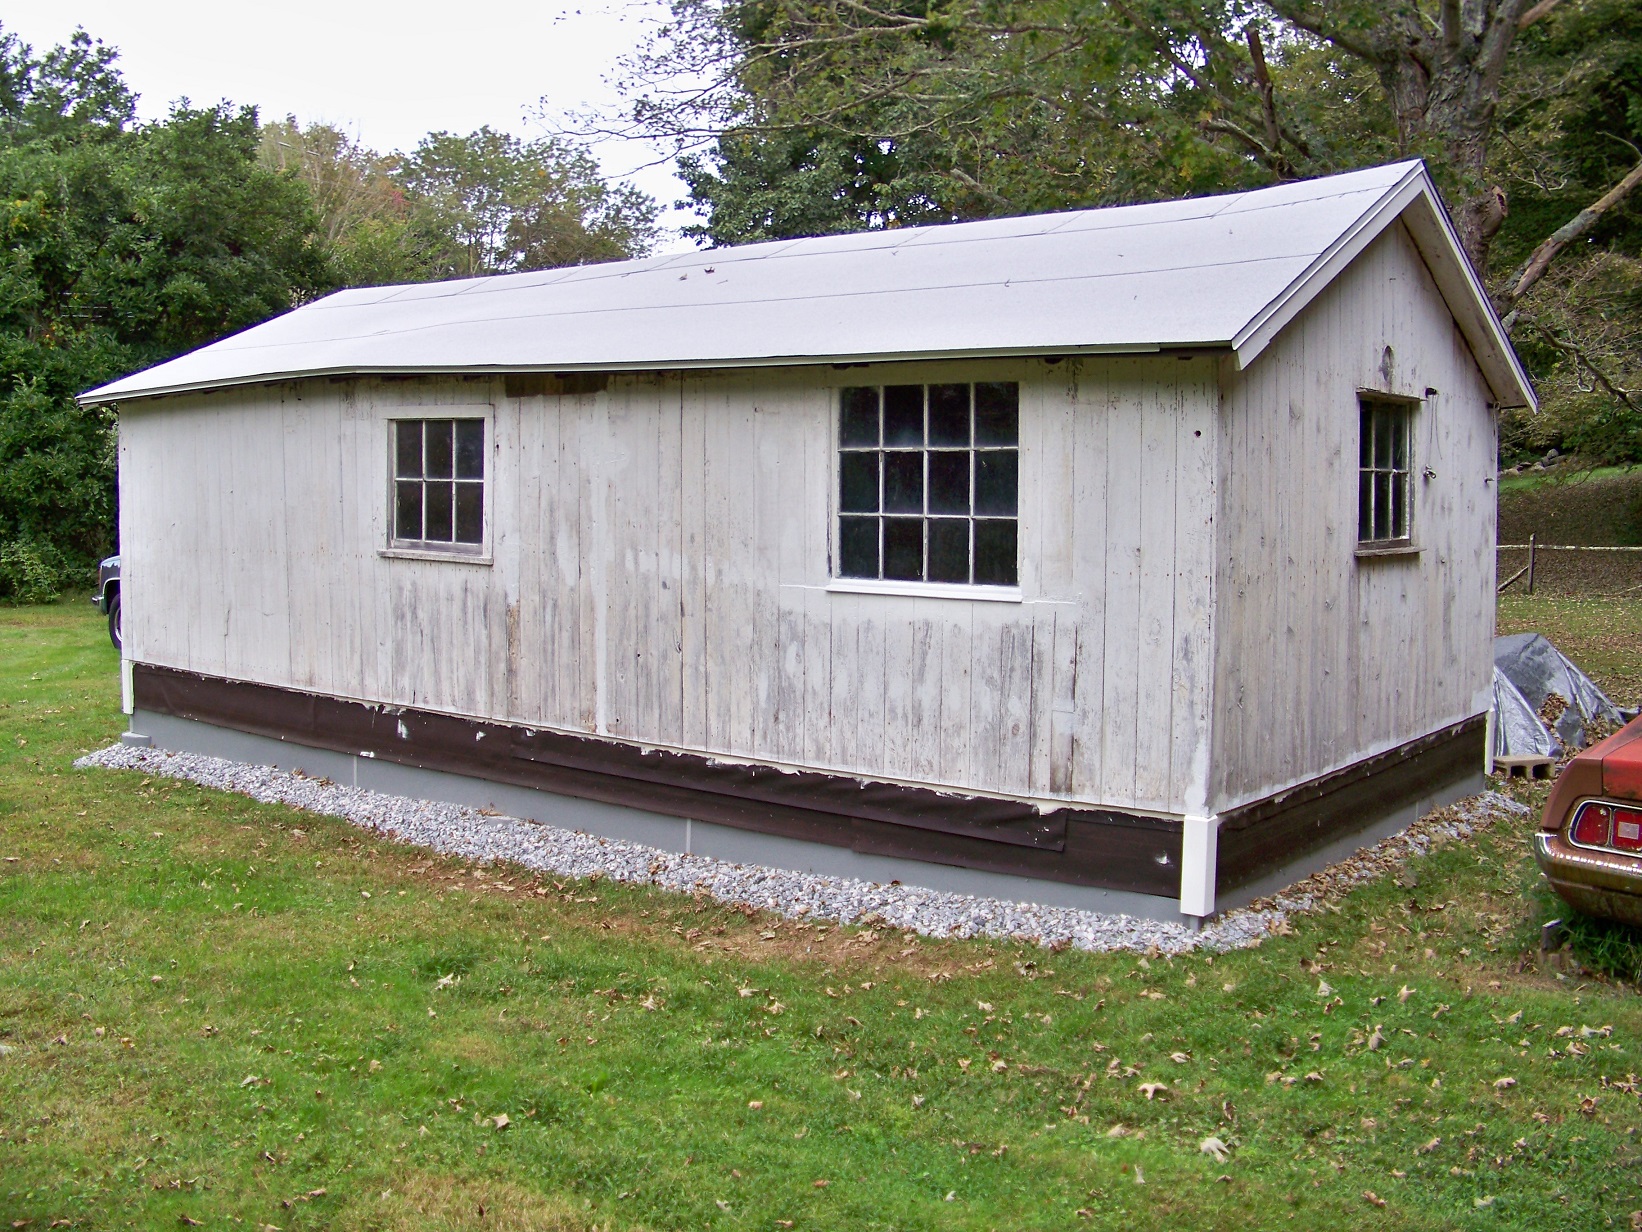
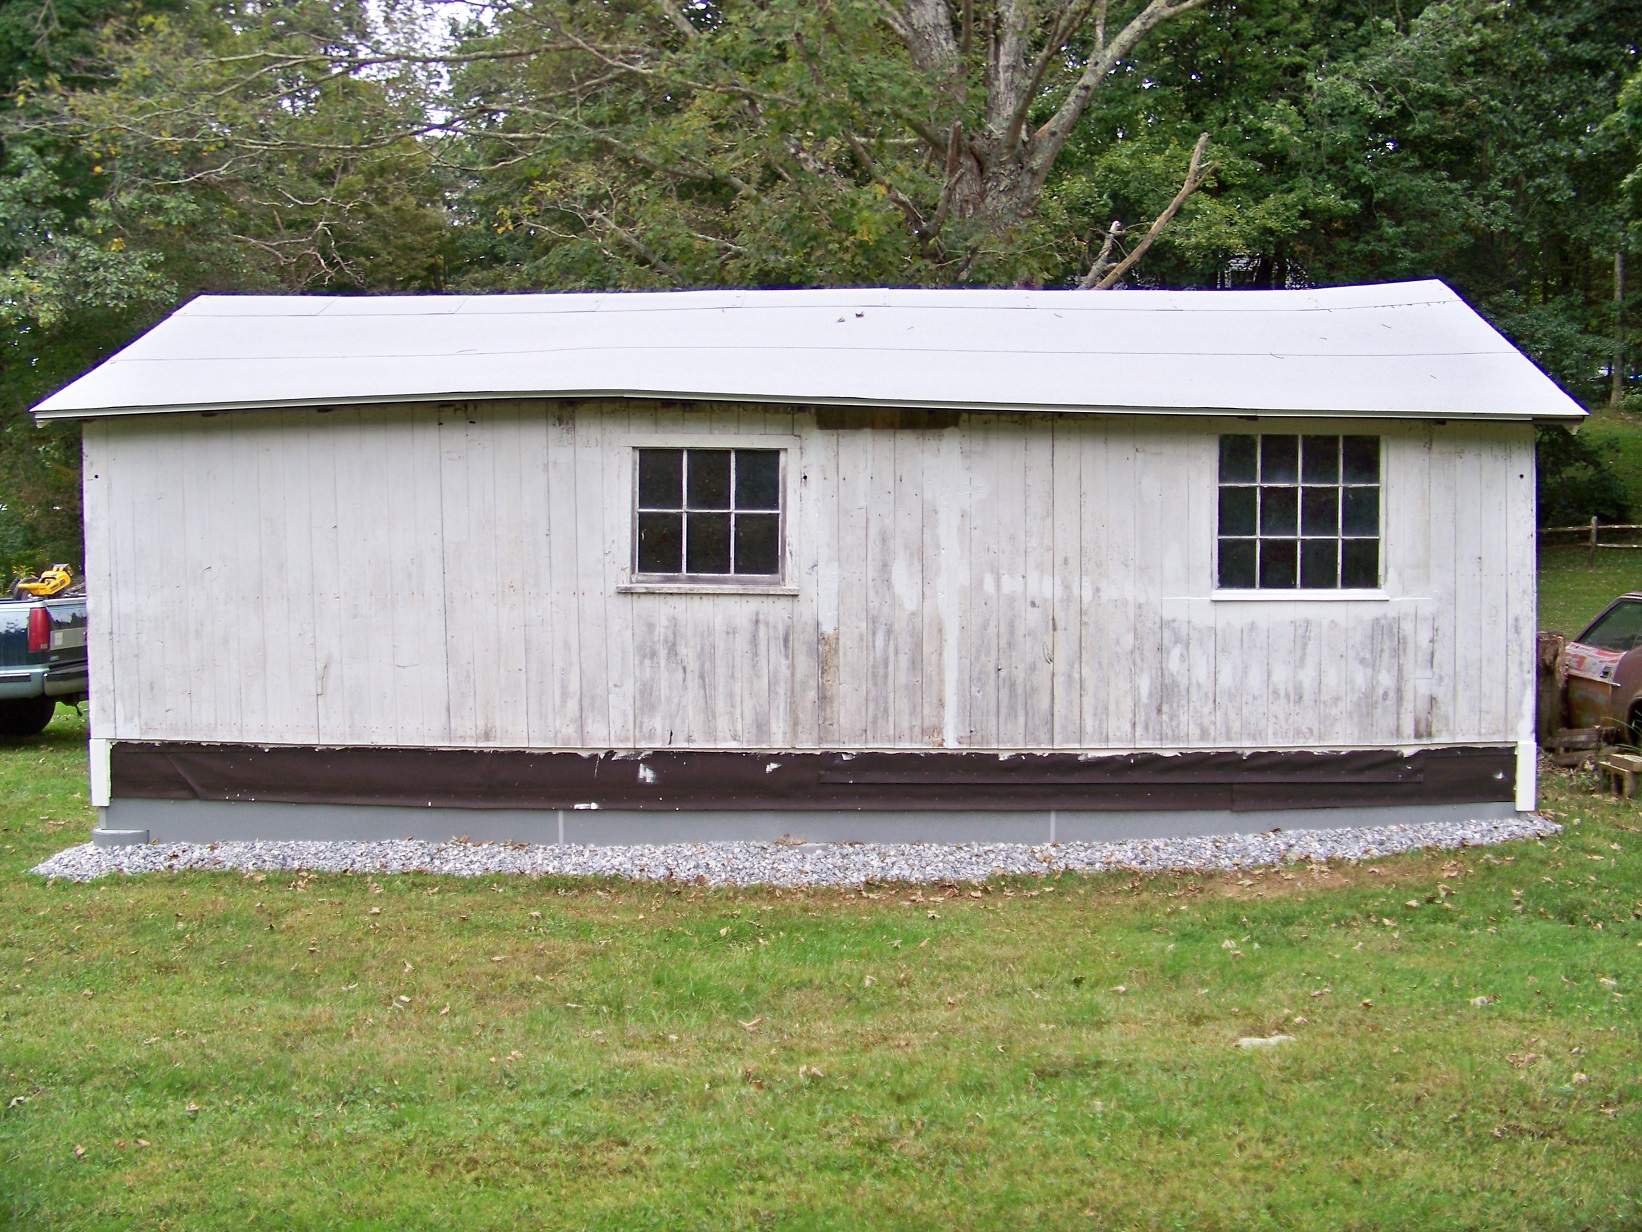
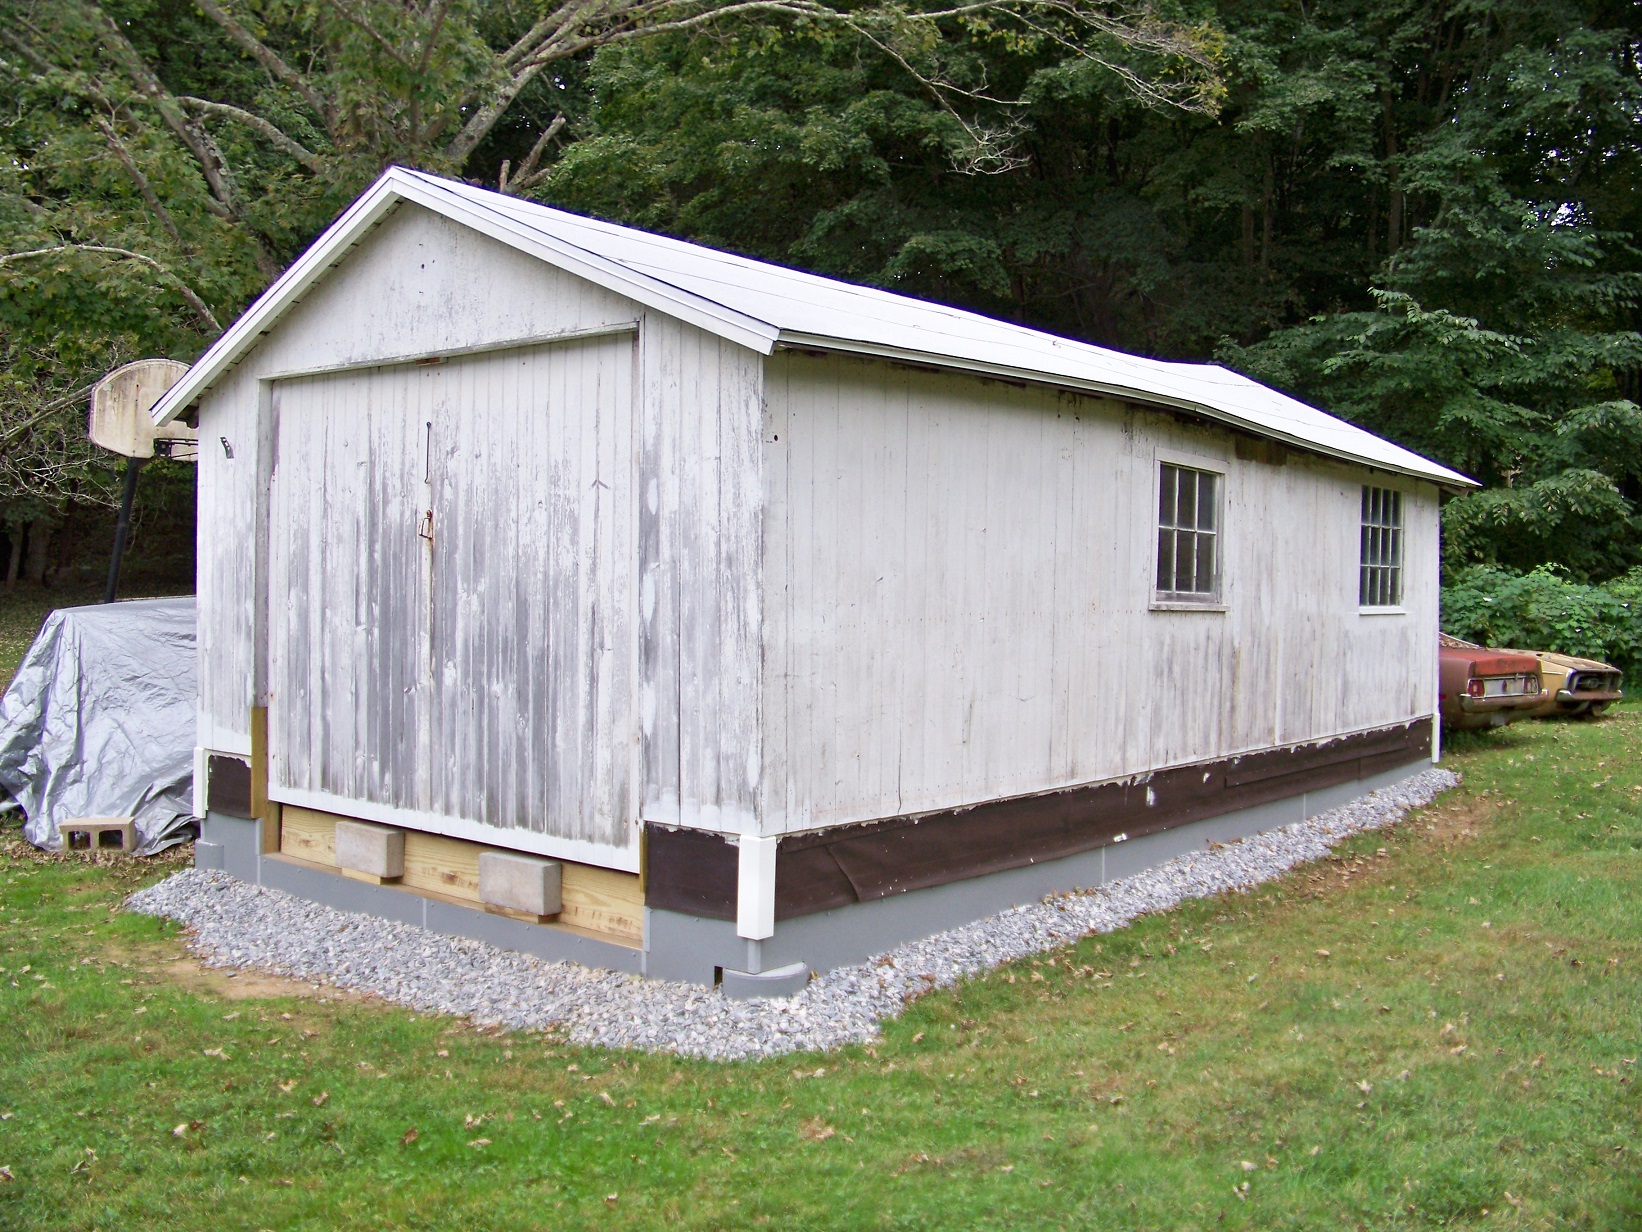
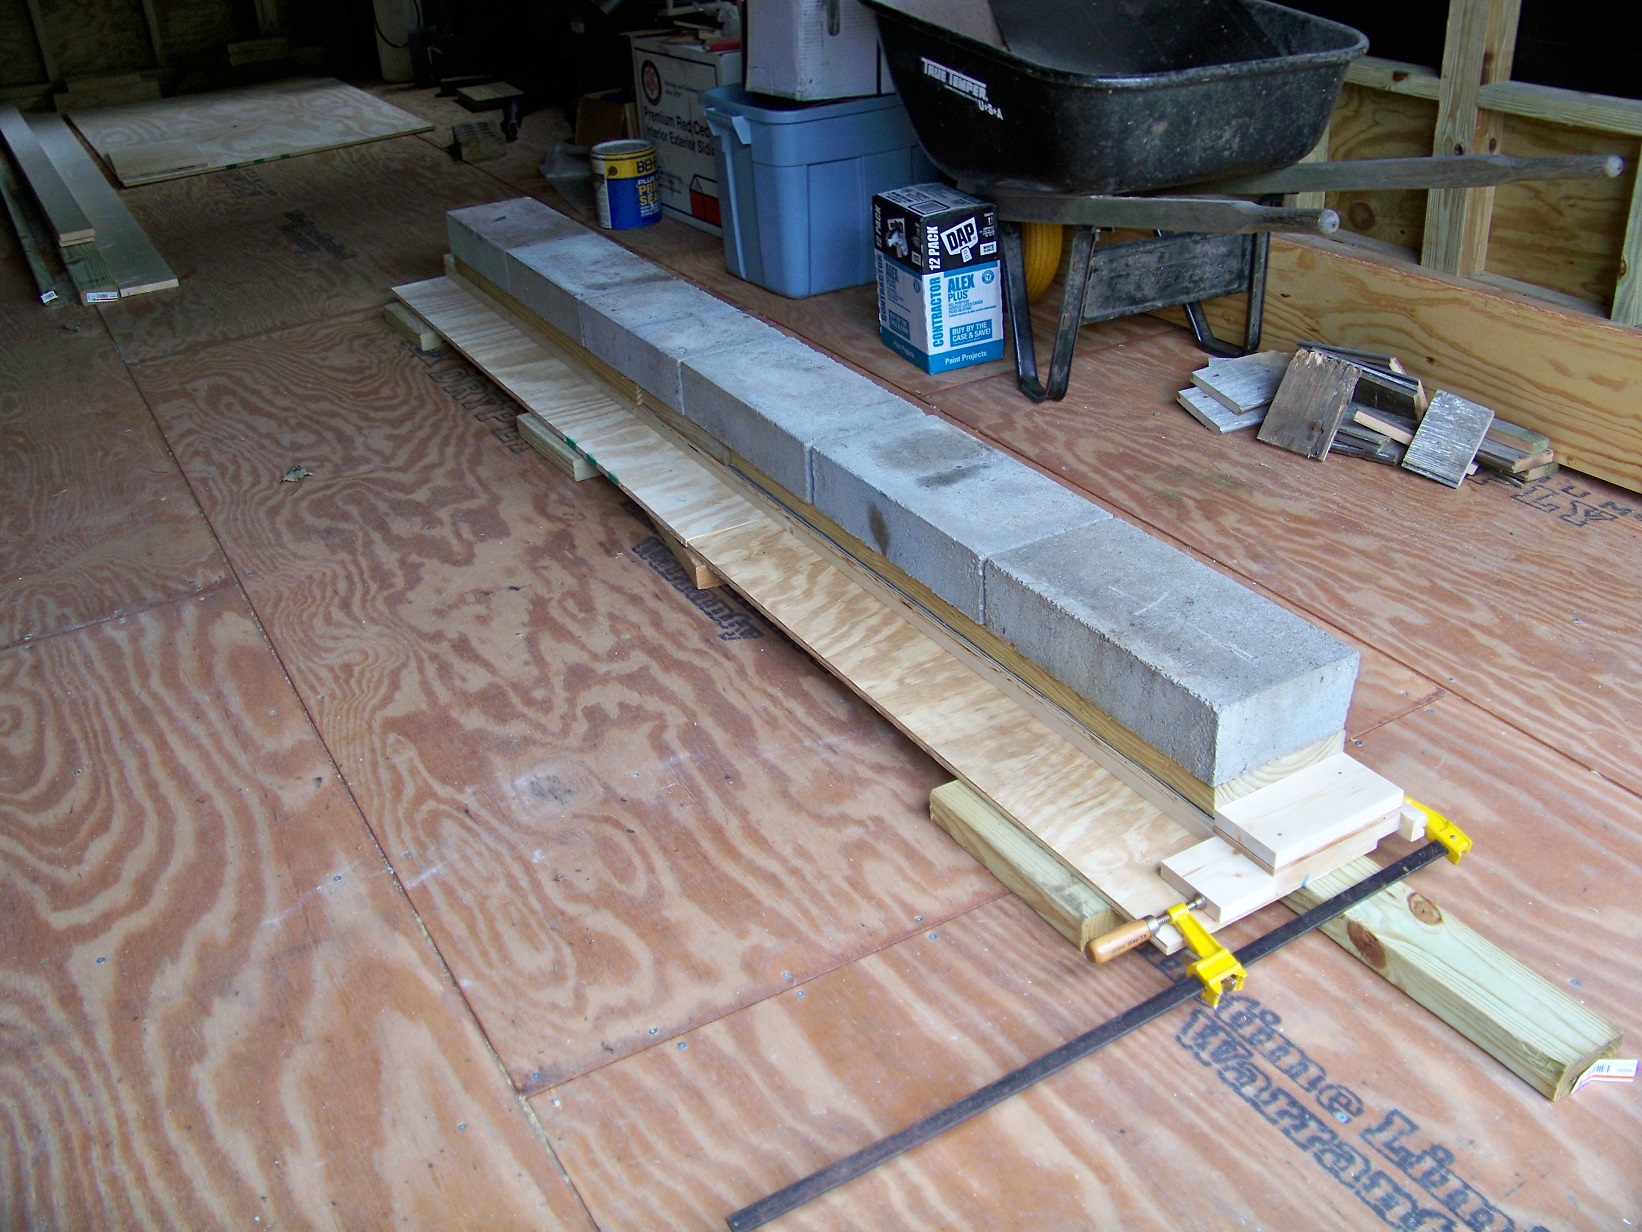
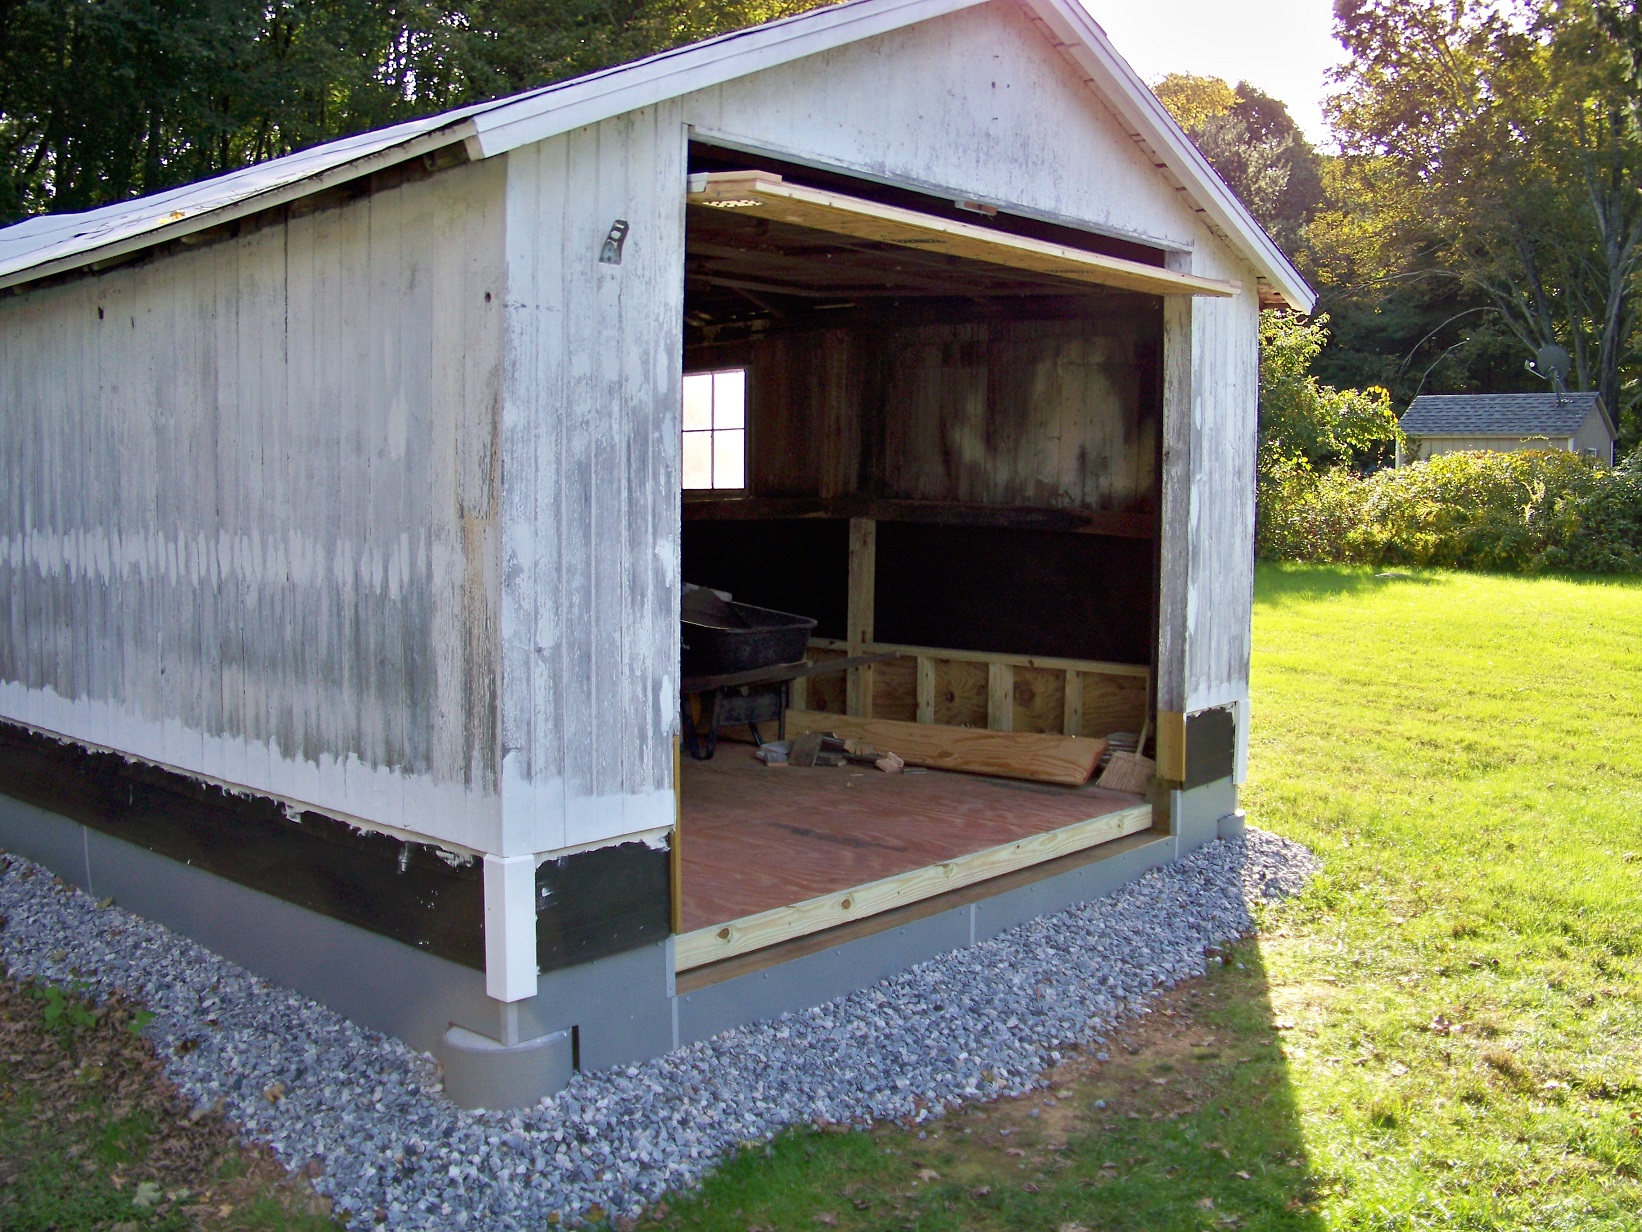
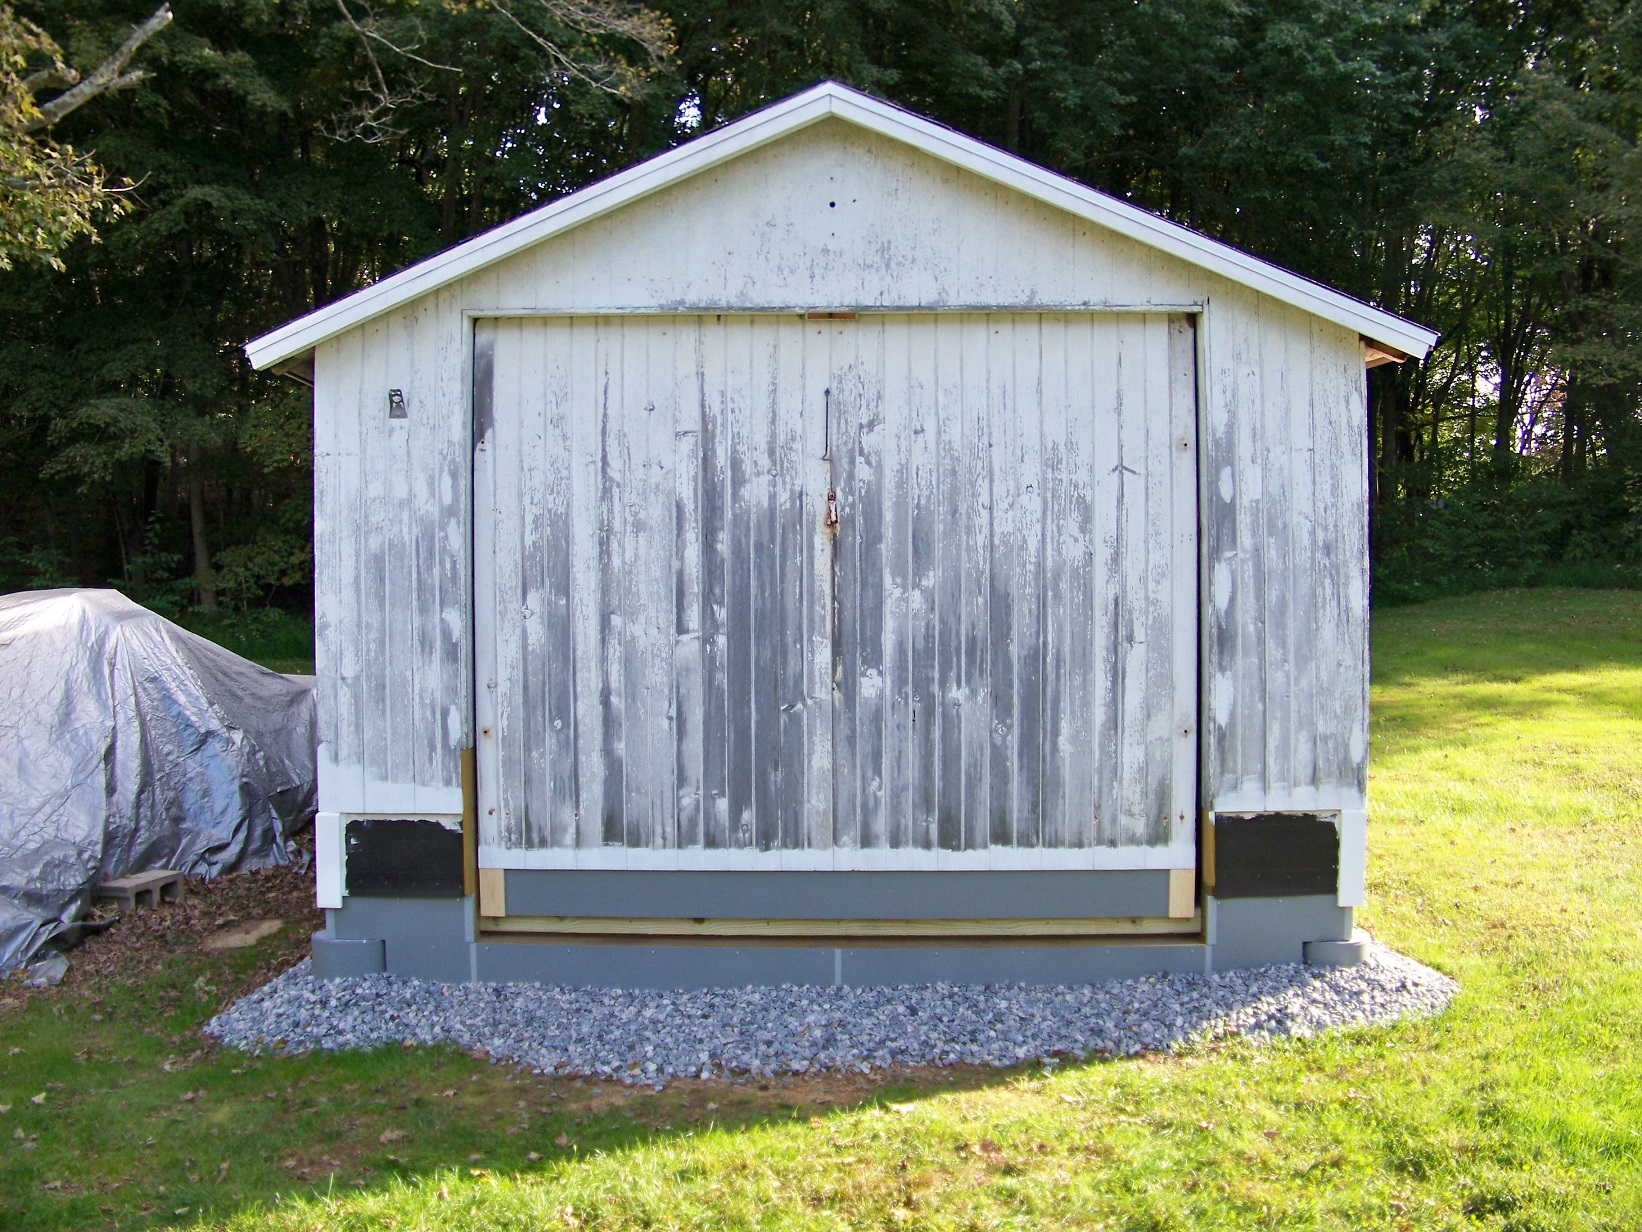
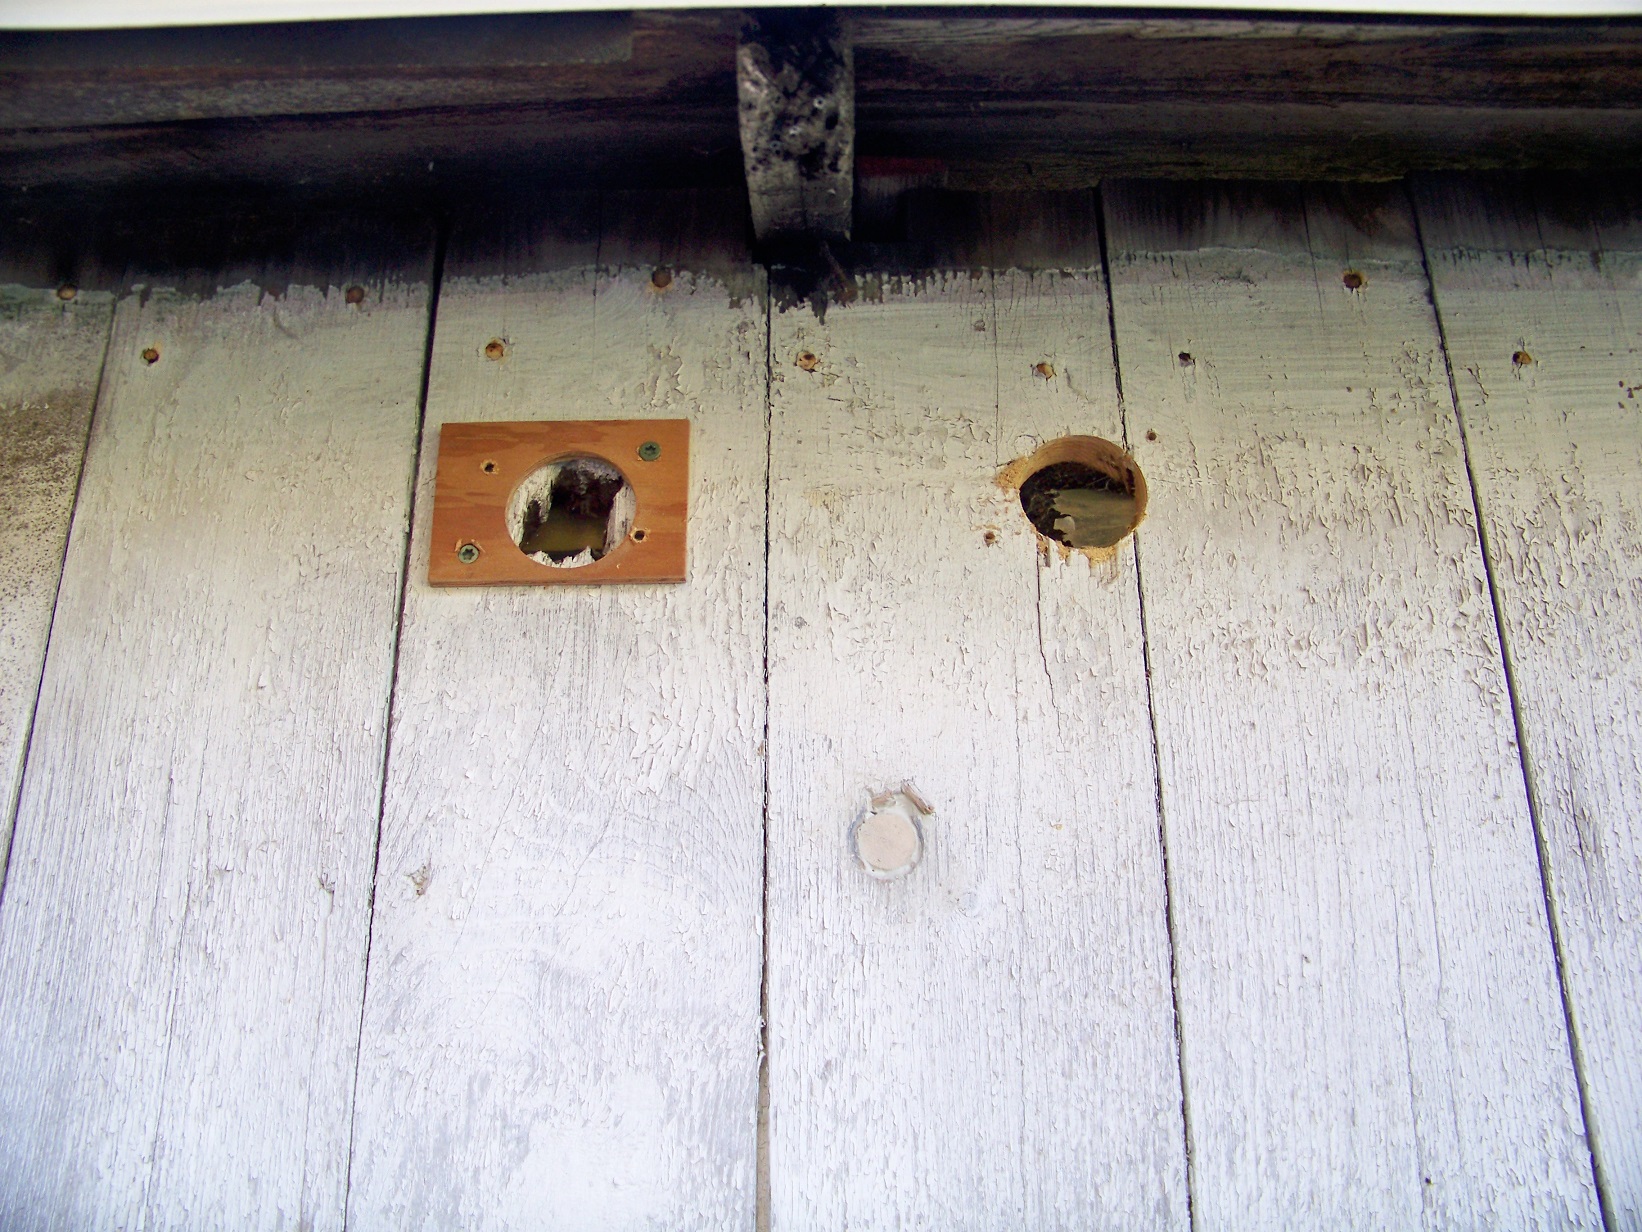
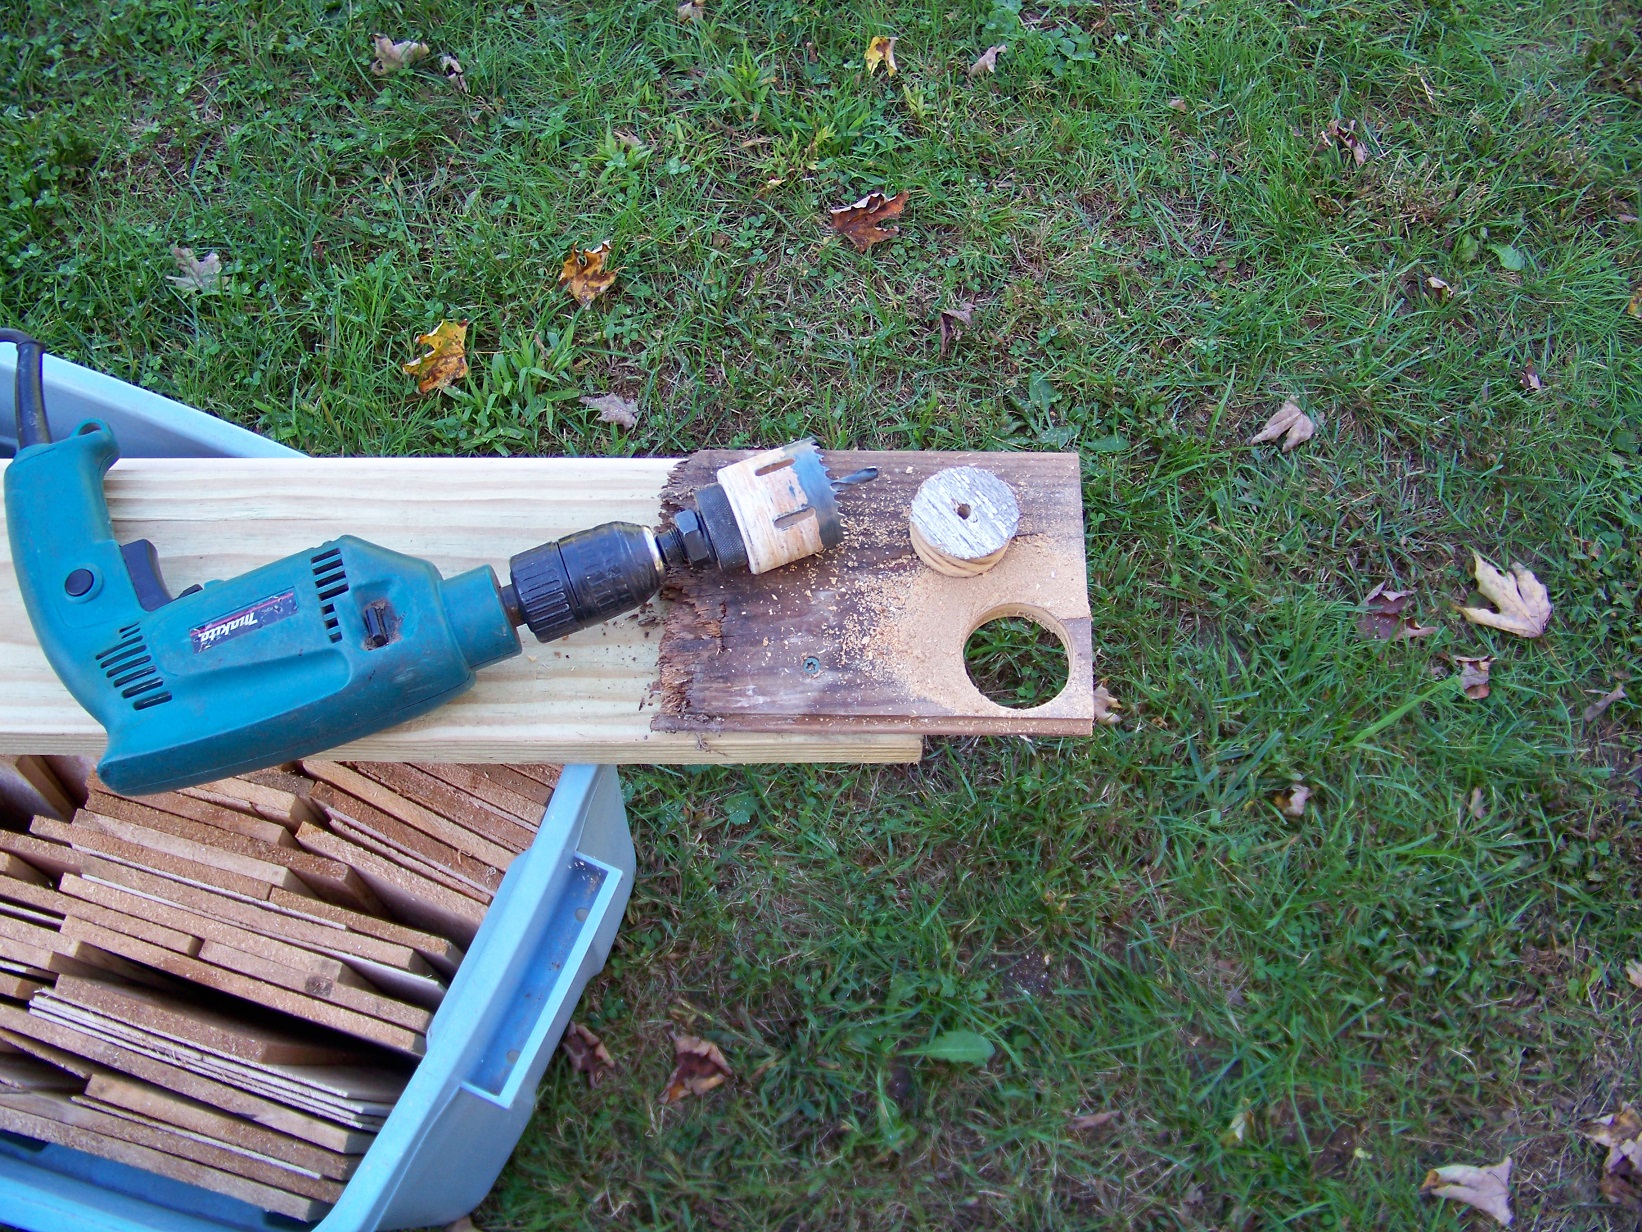
I purchased a 24"x50' roll of this stuff to put over the 4x6s, which is roughly just the lower 12" around the perimeter. Hopefully cutting this stuff in half lengthwise won't **** too bad. (I will still have siding to fill in above the fiberglass to cover the ~1ft plywood strip.) The instructions say:

"Typically, using mechanical fasteners exclusively will suffice, but sometimes a combination of both may be necessary. You should use construction grade adhesive that is recommended for your condition and have 100% coverage when applying. Adhesive should be applied to the entire back side of the liner about 1/4" (6.4mm) thick. Following the adhesive manufacturer’s recommendation for trowel, conditions and application methods. After applying adhesive, it is imperative to secure the GroundBreaker™ protection liner with an adjustable rolling tool to properly "set" the liner to the substrate."

I think it would be wise to use an adhesive in this application. 1/4" thick sounds excessive as I'm not adhering it to concrete. Even at 1/8" that's quite a bit of adhesive. Suggestions on fiberglass to PT adhesives welcome. I'm thinking something in a 5 gallon container, though application could be awkward. Maybe a case of adhesive in caulk tubes would be more manageable as handling a 24' x 12" strip of fiberglass with adhesive sounds very difficult.

and what the heck is "an adjustable rolling tool" ? Google wasn't much help.

I purchased a gallon of Copper-Green (link) to finish the 4x6s in prior to adhering the fiberglass.
 
OP
P

Platonic Solid

Well-known member
Joined
Nov 29, 2014
Messages
3,587
Location
CT-USA
My previous post may seem out of place, but there's a pattern. I'm thinking of buying a new sectional garage door and using the wood from the old door to fill in the 1ft gap between the existing siding and the fiberglass. Might not be quite enough to do all sides, but I'm not too concerned about the back. I'm assuming I'll have to add Z-flashing and drip cap of some variety for the siding transition.

Siding-Transition-Flashing-t.jpg

Unlike the image above, I think both upper and lower siding should be vertical. Though I suppose a horizontal lower would be interesting. FWIW, it is tongue and grove.
 
Last edited:
OP
P

Platonic Solid

Well-known member
Joined
Nov 29, 2014
Messages
3,587
Location
CT-USA
Decided to fix the outlets today. Just replace the old receptacles with new and get rid of the funky outdoor one. Naturally I brought 15A outlets and I should have taken 20A. No biggy, no real need for 20A in a storage shed. Since the breakers aren't marked in the box (entirely my fault) I plugged in my 2 head 500W halogen work-light and used the infrared camera to identify the breaker.

FLIR0380-1.jpg


Old electrical work was actually quite nicely done. Soldered and taped.


JohnnieMo

Well-known member
Joined
Nov 25, 2014
Messages
1,175
Location
Calgary, Alberta
If your breaker is 20A your receptacles also need to be 20A. Unless I am misunderstanding.

Clever idea with the FLIR. Took my a minute to understand what you were up to.
 

rattle_snake

Well-known member
Joined
Jun 25, 2015
Messages
5,140
Location
Chandler, AZ
Breaker is to protect in wall wiring not really limit current to load. 20A breaker does require 12ga wire but can use 15A receptacles.

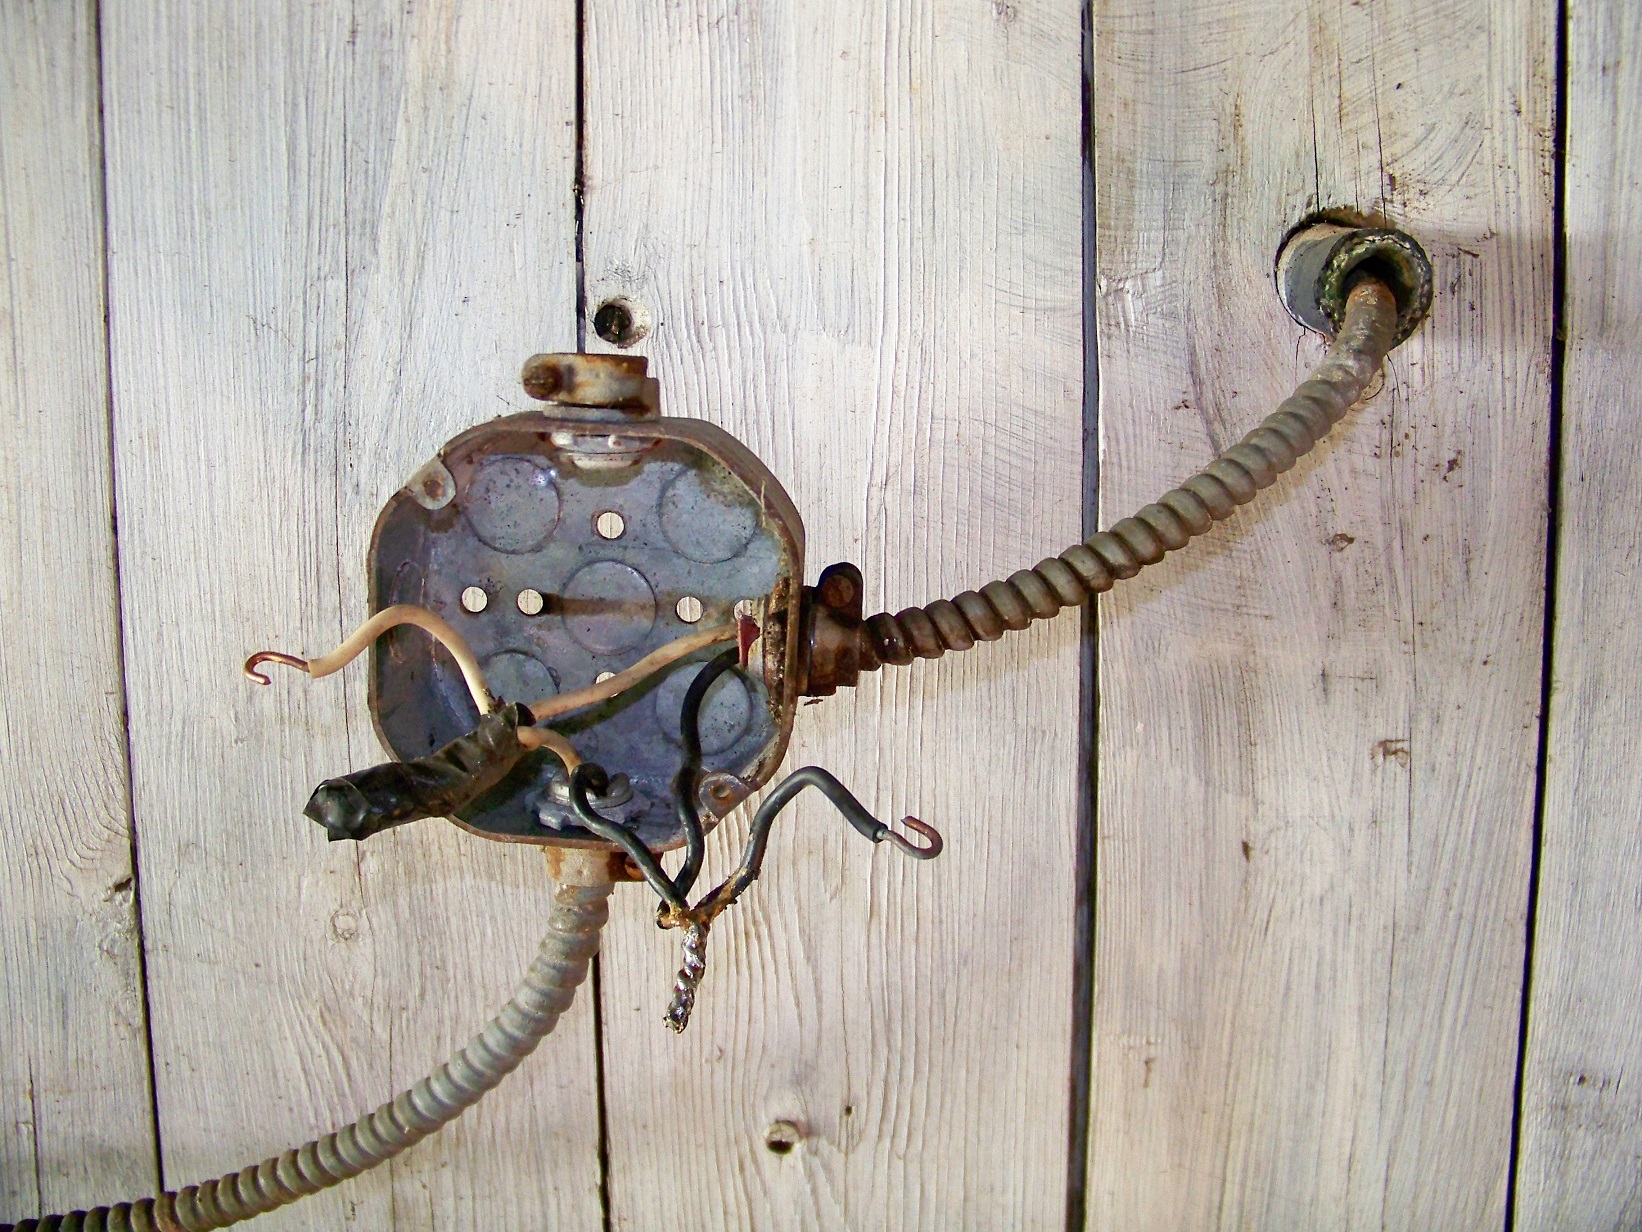
I used 20A GCFIs to feed 15A receptacles, as 15 are way cheaper, but still can plug in a NEMA 5-20 into GCFI.

Rat shack doesn't looks so ratty anymore nice work.
 
OP
P

Platonic Solid

Well-known member
Joined
Nov 29, 2014
Messages
3,587
Location
CT-USA
Progress pics:

Weather is finally cool enough to get some real work done.

Painted the bottom of the shed with Copper-Green Wood Preservative $24.51 (link to HD). 1 gallon was just enough. It's like painting with water. The wood soaked it up faster than I could apply it. 1 completely soaked 4" brush stroke covered a single 1' stroke at most. I just kept applying it until the wood stopped sucking it in.


I started in the front and quickly realized I better stop putting it on the wall or I wouldn't have enough.


Next day I used a pump sprayer to get carpenter ant and termite killer under the bottom 4x6s and all the other crevasses. I used this stuff (link to HD).
 
Last edited:
OP
P

Platonic Solid

Well-known member
Joined
Nov 29, 2014
Messages
3,587
Location
CT-USA
Progress pics:

I ordered a roll of Nudo 24" x 50' GroundBreaker Foundation Insulation Barrier from Menards $160 (link). Cut it into 8ft lengths and laid it flat in the shed overnight as it was impossible to work with all coiled up. Changed the blade in the skill saw to a 60 tooth which works perfectly.


Best method I could come up with to cut into narrower strips is to use a 2x10 as a straight edge and screw it to the floor. Yeah, I'm putting lots of little screw holes in my new floor - I'll just fill those with adhesive later. I do wear a decent dust mask and real safety glasses when cutting this as it is fiberglass.


My only complaint with the Nudo Barrier is that it only comes with two 2' exterior corner trim pieces. Good thing my corners are short, so I can cut them in half. No instructions on how best to install the corner trim since they're just plastic "L" - unlike the **** trim pieces which look like an "H", permitting the panels to hold it in place without additional fasteners.
 

pjmariner

Well-known member
Joined
Jun 15, 2018
Messages
71
Location
Marshfield MA
Just breezed through this thread quite the transformation so far, and an amazing amount of work. I am interested to see how progress continues :thumbup:
 
OP
P

Platonic Solid

Well-known member
Joined
Nov 29, 2014
Messages
3,587
Location
CT-USA
Funky ridge (character?) line stays until the next time I have to re-roof. Painting will happen after I finish the siding and make up my mind on that dang garage door. Turns out a sectional won't fit without losing valuable head room, so the existing door stays. It's actually functioning pretty good at the moment.
 

Finallygotit

ALLIANCE MEMBER
Joined
Jul 6, 2013
Messages
4,076
Location
Tucson, AZ
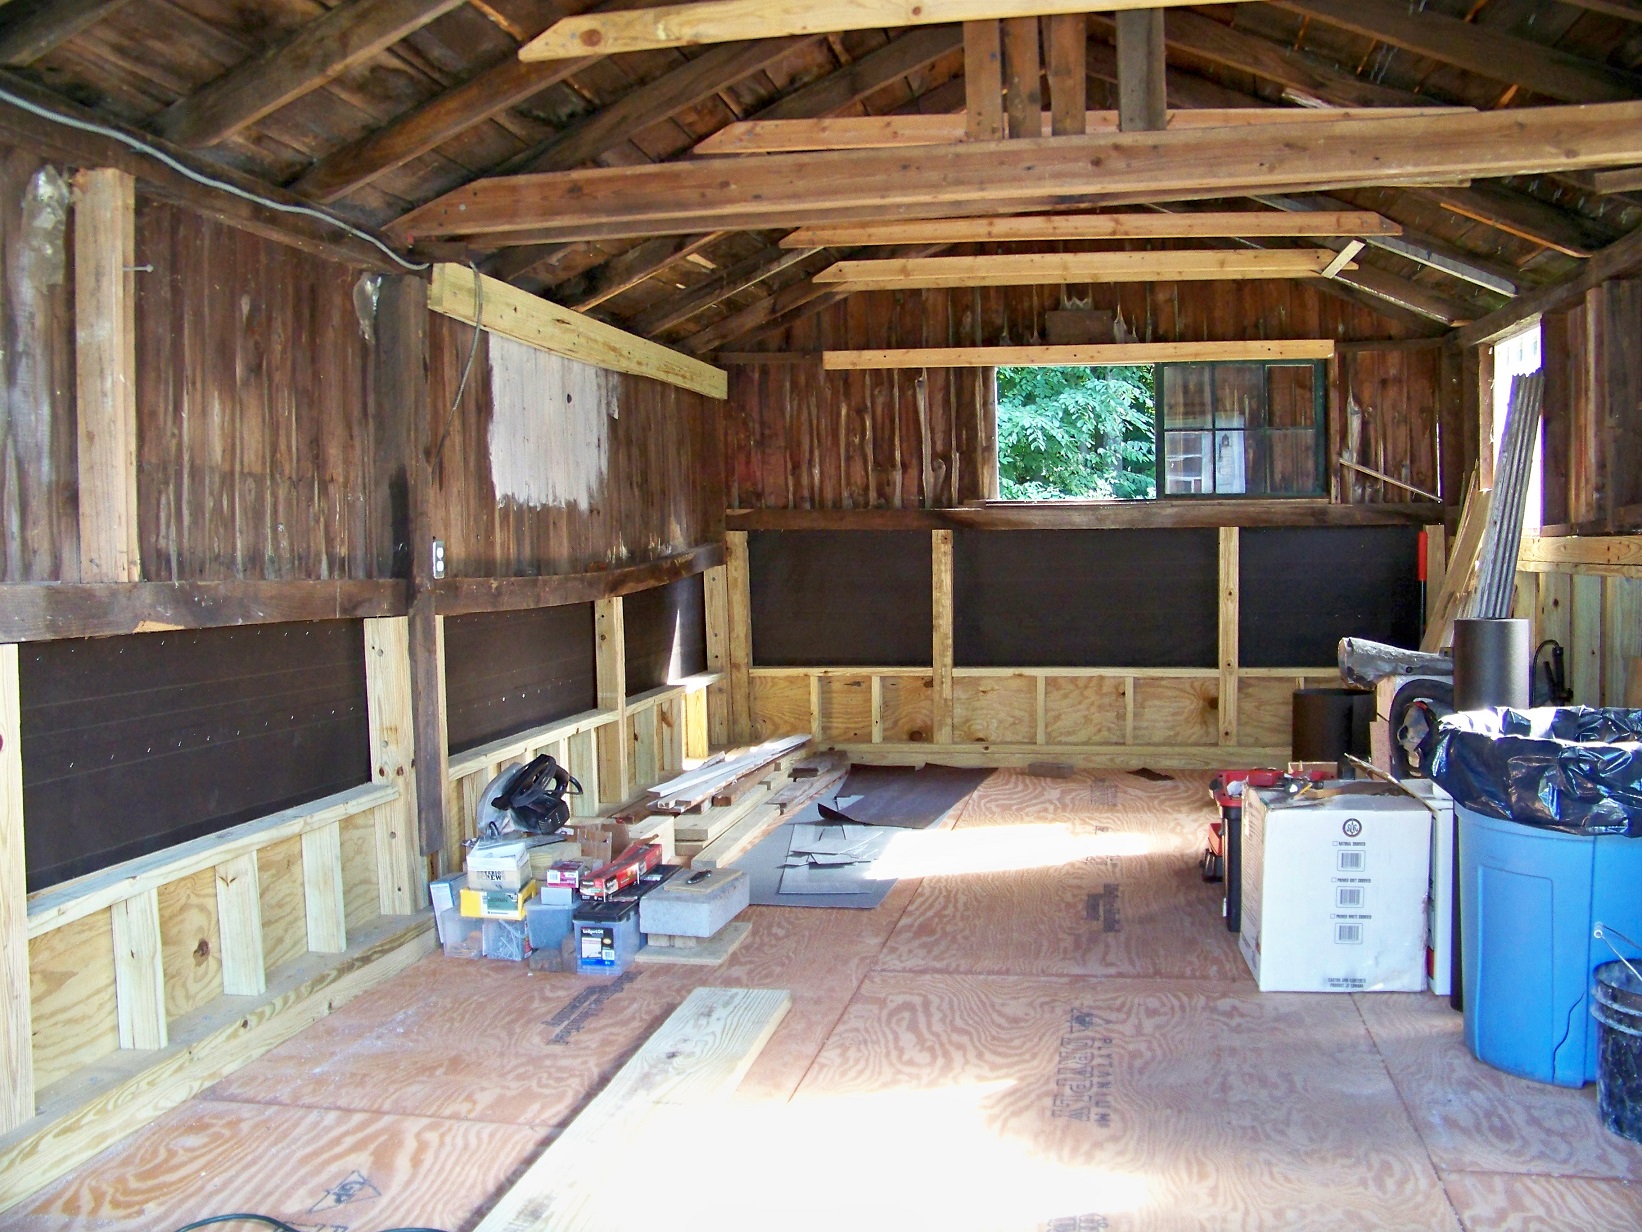
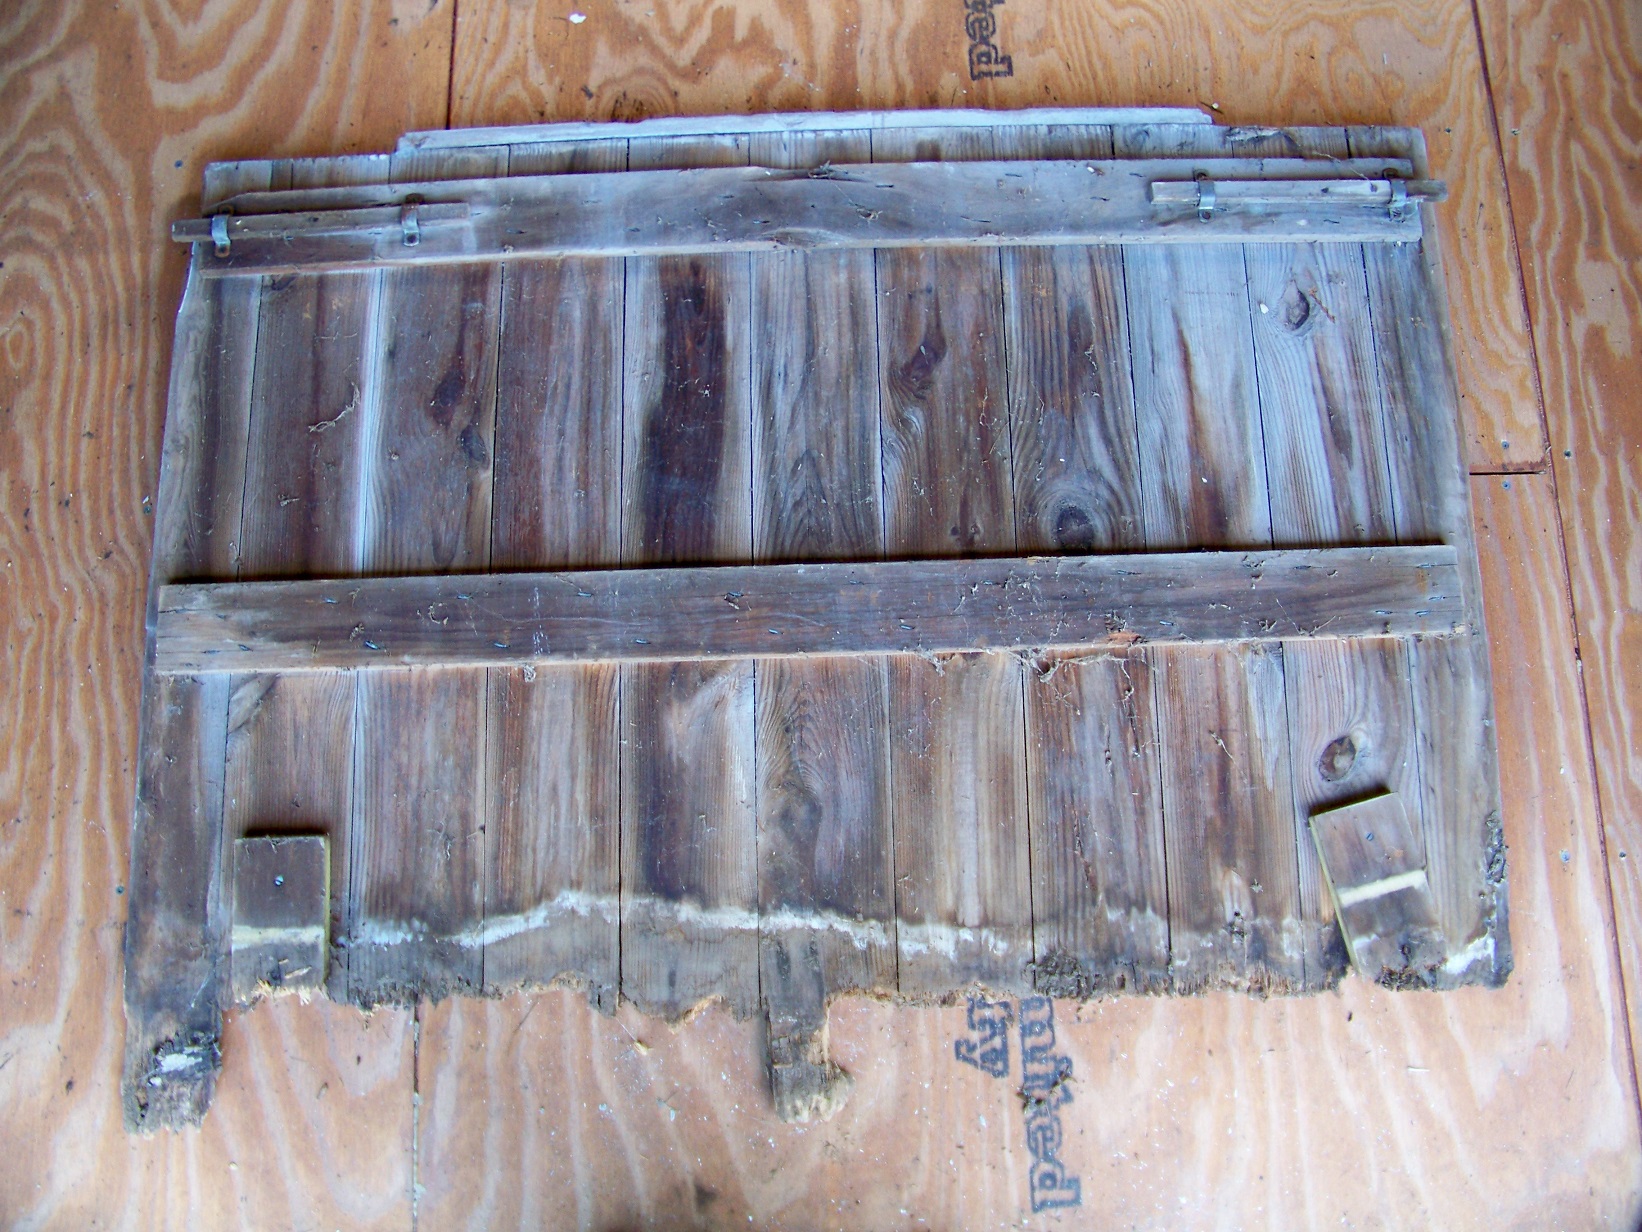
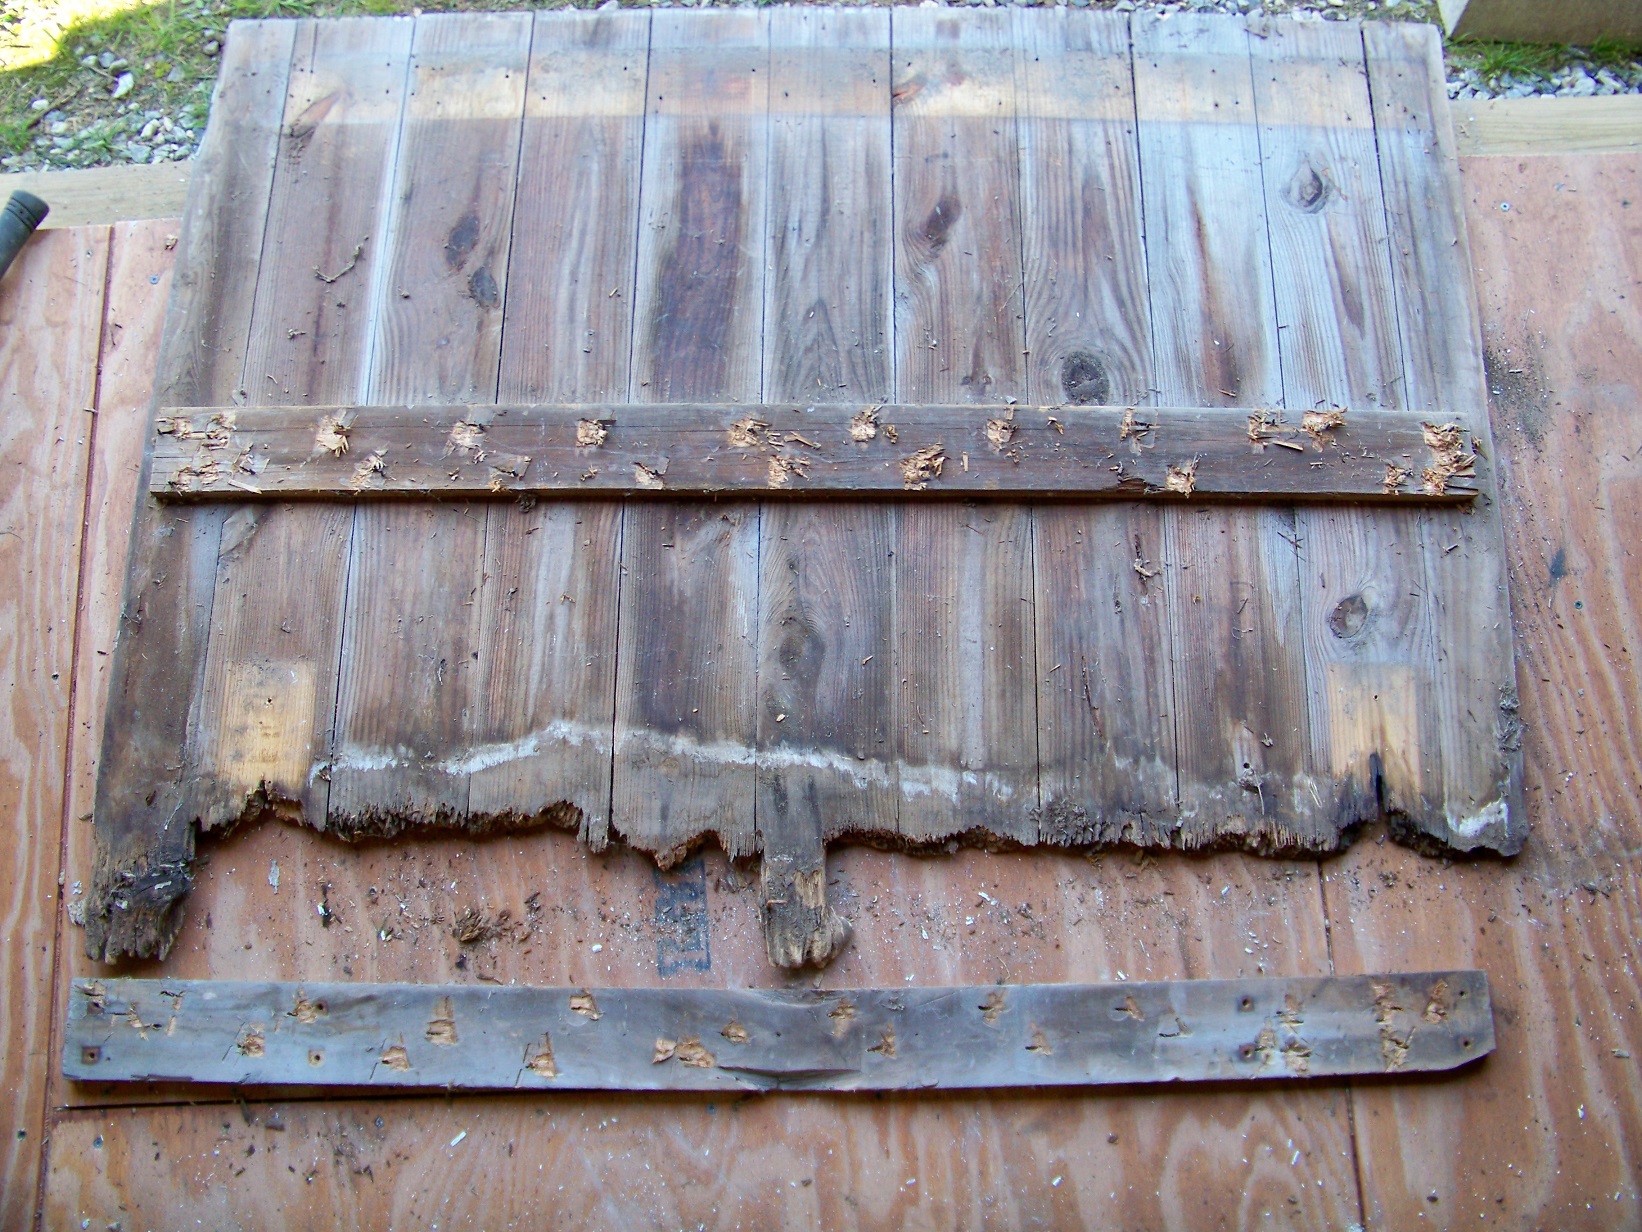
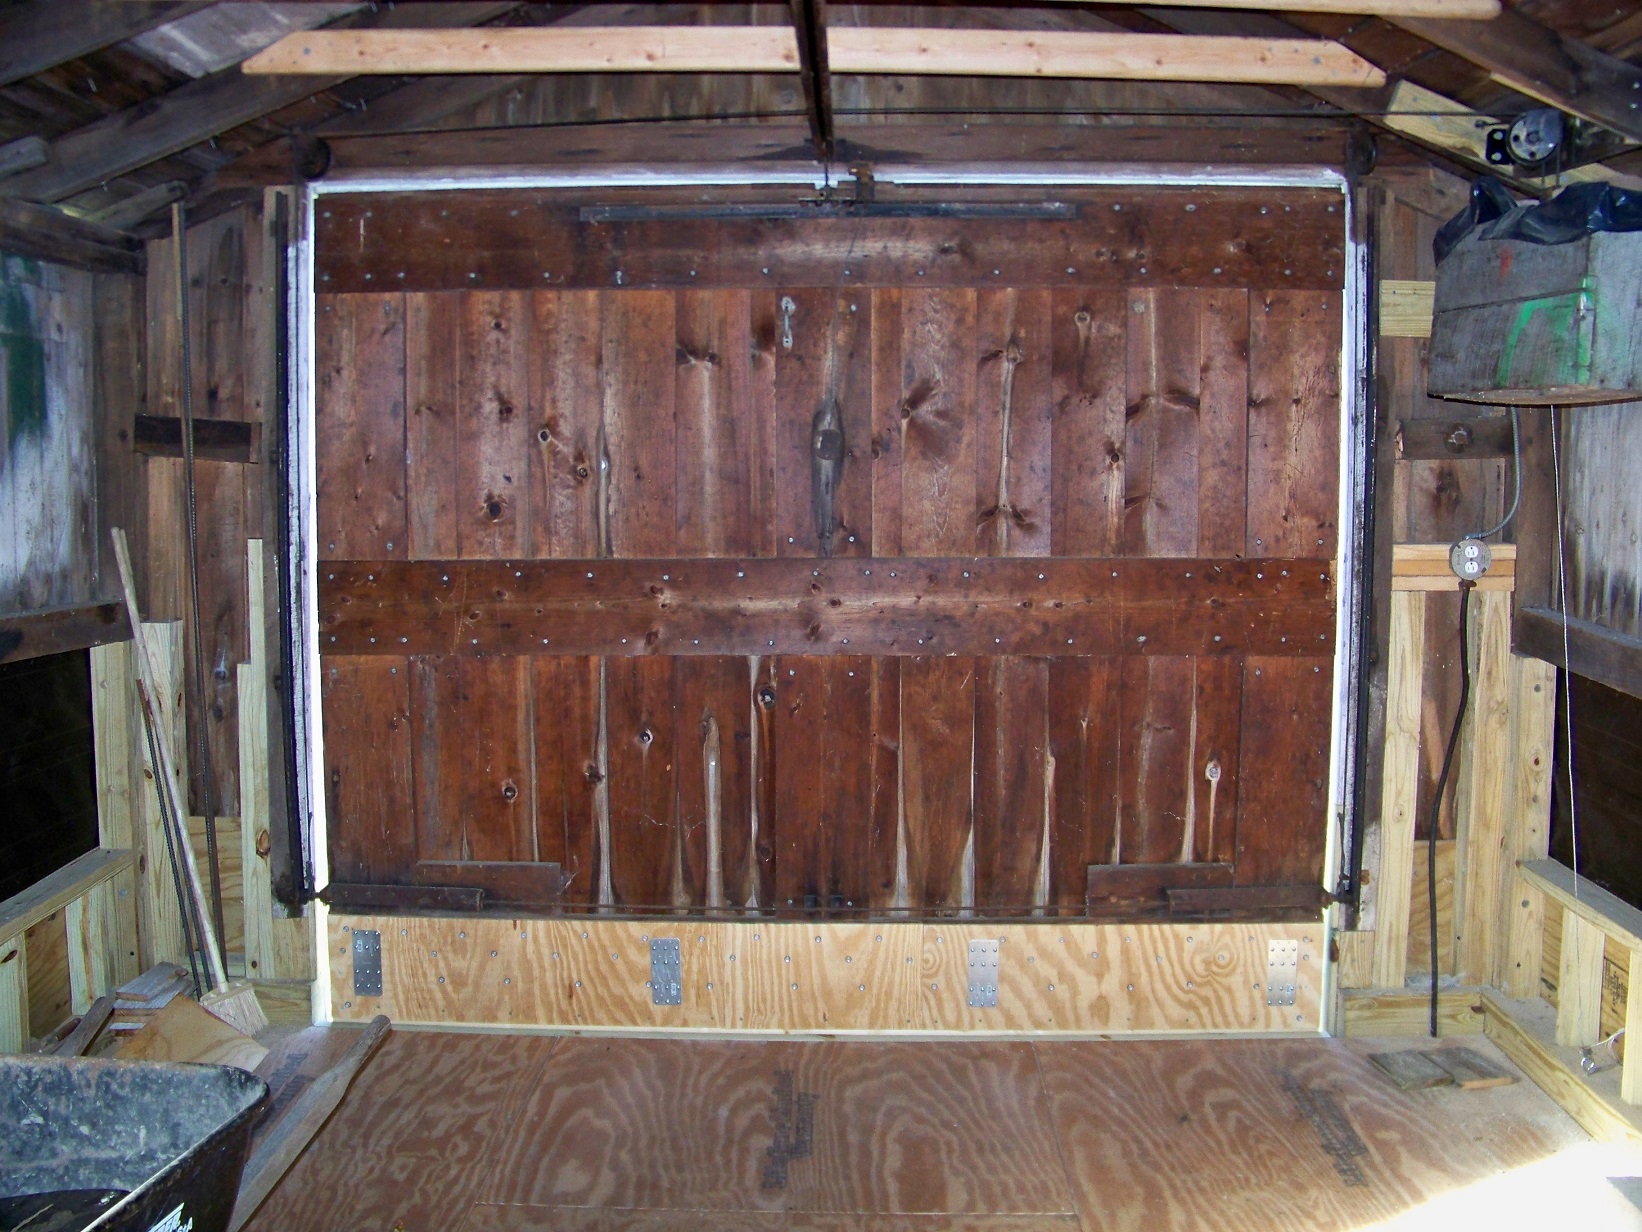
...... Turns out a sectional won't fit without losing valuable head room, so the existing door stays. It's actually functioning pretty good at the moment.


Thought........double doors that swing out?? I had a new garage built and had those installed and it takes up zero interior space.


YMMV


:beer:
 

XJSuperman

Well-known member
Joined
Jan 26, 2018
Messages
3,086
Location
Central Iowa
Im late to the pary as usual, and nothing has been posted for a month, but I agree double doors would be fine as they are already off the ground in this building, and how often are you going to be in there when there is that much snow anyways?

My first thought though was to grab an old garage door off craigslist and make it fit. Gotta be better than the original, and maybe nicer sealing than double doors.

Very well done as others have said. I woulda burned it and rebuilt without telling anyone and hoped for the best. Lol. Will you be needing a ramp as well?
 
To avoid these ads, REGISTER NOW!

RickP

Well-known member
Joined
Jan 15, 2013
Messages
1,547
Location
Annapolis, MD
The shack is looking good! I'll bet it will be another 50 years before it needs another rebuild.

Will the tax assessor be tempted to raise your rate because the shack looks better, even though it's still the original structure?
 
OP
P

Platonic Solid

Well-known member
Joined
Nov 29, 2014
Messages
3,587
Location
CT-USA
Time to play catch-up. I've been working too many projects at once. Installing a shed pad at my primary residence and working the rat shack. Just haven't gotten round to posting progress till now.

Progress pics from 9-3-18

I finished the fiberglass install. Wrapping the cement piers in fiberglass worked out well. Getting the tar paper between the old siding a new walls was a bigger hassle than expected. After the tar paper install I nailed the old siding to the new walls.

 
OP
P

Platonic Solid

Well-known member
Joined
Nov 29, 2014
Messages
3,587
Location
CT-USA
Progress pics from some time after 9-3-18

Finally time to disassemble the old doors so I can fill in the remaining siding. Not technically complicated, just tedious.


How do you make a door that will last 100 years? = Use nails that are twice as long as the material and bend flush so no one gets stabbed. :wtf:
 
OP
P

Platonic Solid

Well-known member
Joined
Nov 29, 2014
Messages
3,587
Location
CT-USA
Progress pics from 9-23-18

Old door/siding planks installed. Made some corner molding pieces to make life easier for the cedar shingle install. They stuck out a little from existing siding so I beveled and caulked the tops - back side is also painted.

Started priming and calking. I'm not going to paint the cedar shingles so that will be the last piece of the puzzle to be installed after everything is painted. I figure the cedar will age naturally grey which should work well for this structure.

 
Last edited:
OP
P

Platonic Solid

Well-known member
Joined
Nov 29, 2014
Messages
3,587
Location
CT-USA
Progress pics 9/30/18

After all my waffling about what to do with the garage door, the existing door is staying. Here is the extension with a piece of fiberglass being laminated to it.


And the end result. I designed this thing in CAD to get it right.


Primary goal was to extend and seal the bottom of the door without adding too much weight. It's glued to the bottom of the door only - not the back. The metal plates may not have been necessary, but it makes me feel better as this is the part you pull and push on. The door was actually too heavy for the counter weight when I had clamps on it (door wouldn't stay fully open). Fortunately door opens fine after the weight of the clamps was removed.

The lip between the plywood and 1x4 is intentional. plywood will be 1/4" above floor. 1x4 will be 3/4" below and in front of floor.

 
Last edited:

mfg0772

Well-known member
Joined
Aug 8, 2018
Messages
146
Location
Northeast CT
Nice mod to the door! Were you planning to add cedar shingles to the door as well? DO you think that will impact the weight enough to make it not say open again?
 
OP
P

Platonic Solid

Well-known member
Joined
Nov 29, 2014
Messages
3,587
Location
CT-USA
No cedar shingles on door. Cedar shingles only going where tar paper is. I will make new vertical boards as used to be attached to the left and right garage door which permit you to slide them out and tighten wing nuts to close existing vertical side gaps. Crude, but workable.

The remaining horizontal gap at the bottom (3.5") is for some variety of threshold. Preferably angled to shed water.
 

TalonFE

Well-known member
Joined
Mar 2, 2016
Messages
191
Location
New Mexico
Brother, I've been following this resurrection of yours for quite a stretch, and you are a bona-fide artist. I think most of us would have been initially stoked about saving it, but in the end would have knocked it down and just called Tuffshed. You're putting your heart into this thing and it shows...you're preserving a piece of history that is a testament to how things were done back in the day....otherwise it would have collapsed in on itself decades ago. I salute you, your skills, perseverance and pure gumption.
 
OP
P

Platonic Solid

Well-known member
Joined
Nov 29, 2014
Messages
3,587
Location
CT-USA
So now the question is: what kind of lighting will our resident expert on the topic be installing? ;)
Regrettably this is a storage shed inconveniently located on a rental property 20 minutes from my house, so I won't be getting carried away with lighting. I picked up a few of these the other day that should fit the bill -

For people in CT, Ocean State Job Lot is selling Maxlite shop lights for $15 - max 6 per visit.


Valid August 30, 2018 - September 05, 2018
Image linked to flyer.​
I hope someday someone will turn it into a proper workshop.
 
OP
P

Platonic Solid

Well-known member
Joined
Nov 29, 2014
Messages
3,587
Location
CT-USA
Slowly getting ready for paint. Tried to buy Zinsser oil base primer at HD and apparently there are some new environmental laws that mean I can't buy it in CT anymore. Ended up getting $10 off per gallon on Zinsser Low VOC since HDs website said what I wanted was in stock. I haven't opened a can yet, but the HD reviews claim the low VOC is really thick and hard to work with. We'll see...

Had a bunch of odd holes in the siding that needed plugging


so I made a crude jig with a 1 7/8" diameter hole saw


cut slugs from scrap siding with 2" diameter hole saw


and used construction adhesive to glue in place.


It took me 6 hours to scrape and caulk the front. I don't think I'll be as picky with the rest or I won't finish in time.

 
OP
P

Platonic Solid

Well-known member
Joined
Nov 29, 2014
Messages
3,587
Location
CT-USA
Almost forgot - I finished the threshold. Used cedar shingles under a 2x6 and 4/5 x 6 to give a slight drainage slope. End result (pictured in prior post) leaves a 3/8" gap between door and threshold. Slope is only 2°, so not noticeable at all.


Sparkynutz

Well-known member
Joined
Jul 16, 2017
Messages
409
Location
Wisconsin
Almost forgot - I finished the threshold. Used cedar shingles under a 2x6 and 4/5 x 6 to give a slight drainage slope. End result (pictured in prior post) leaves a 3/8" gap between door and threshold. Slope is only 2°, so not noticeable at all.

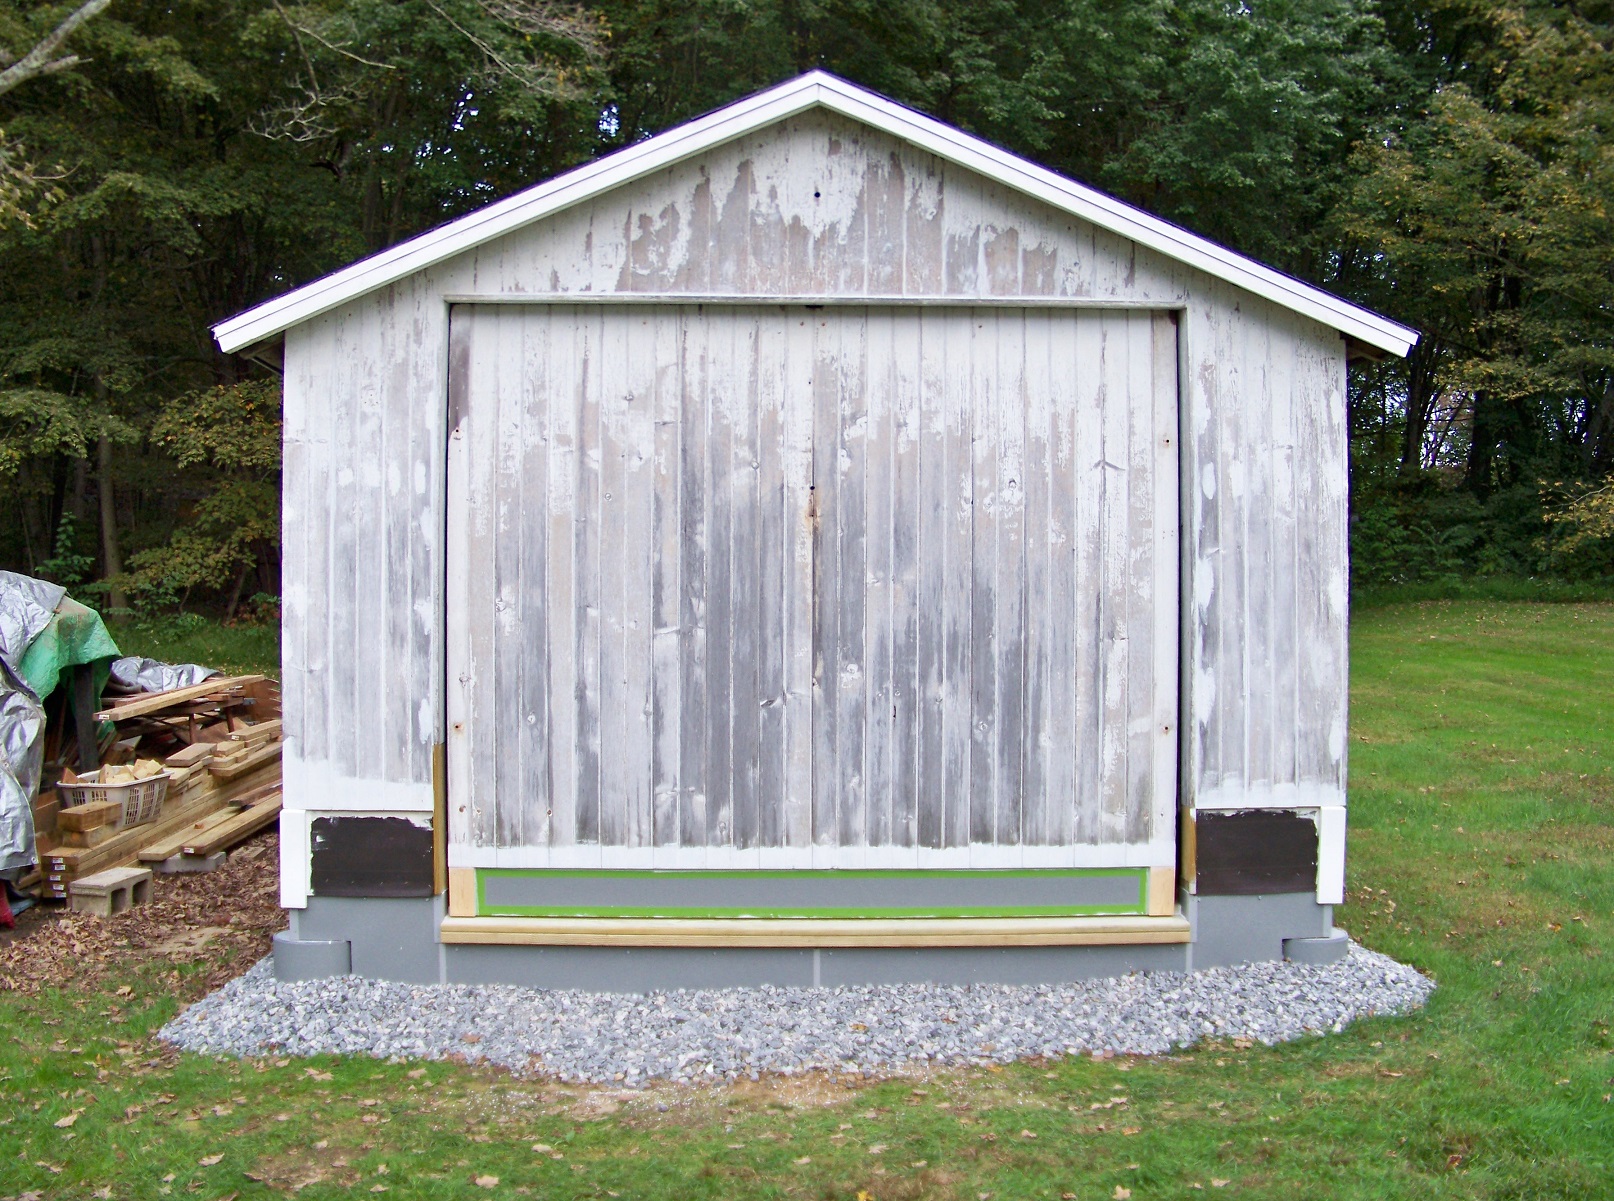
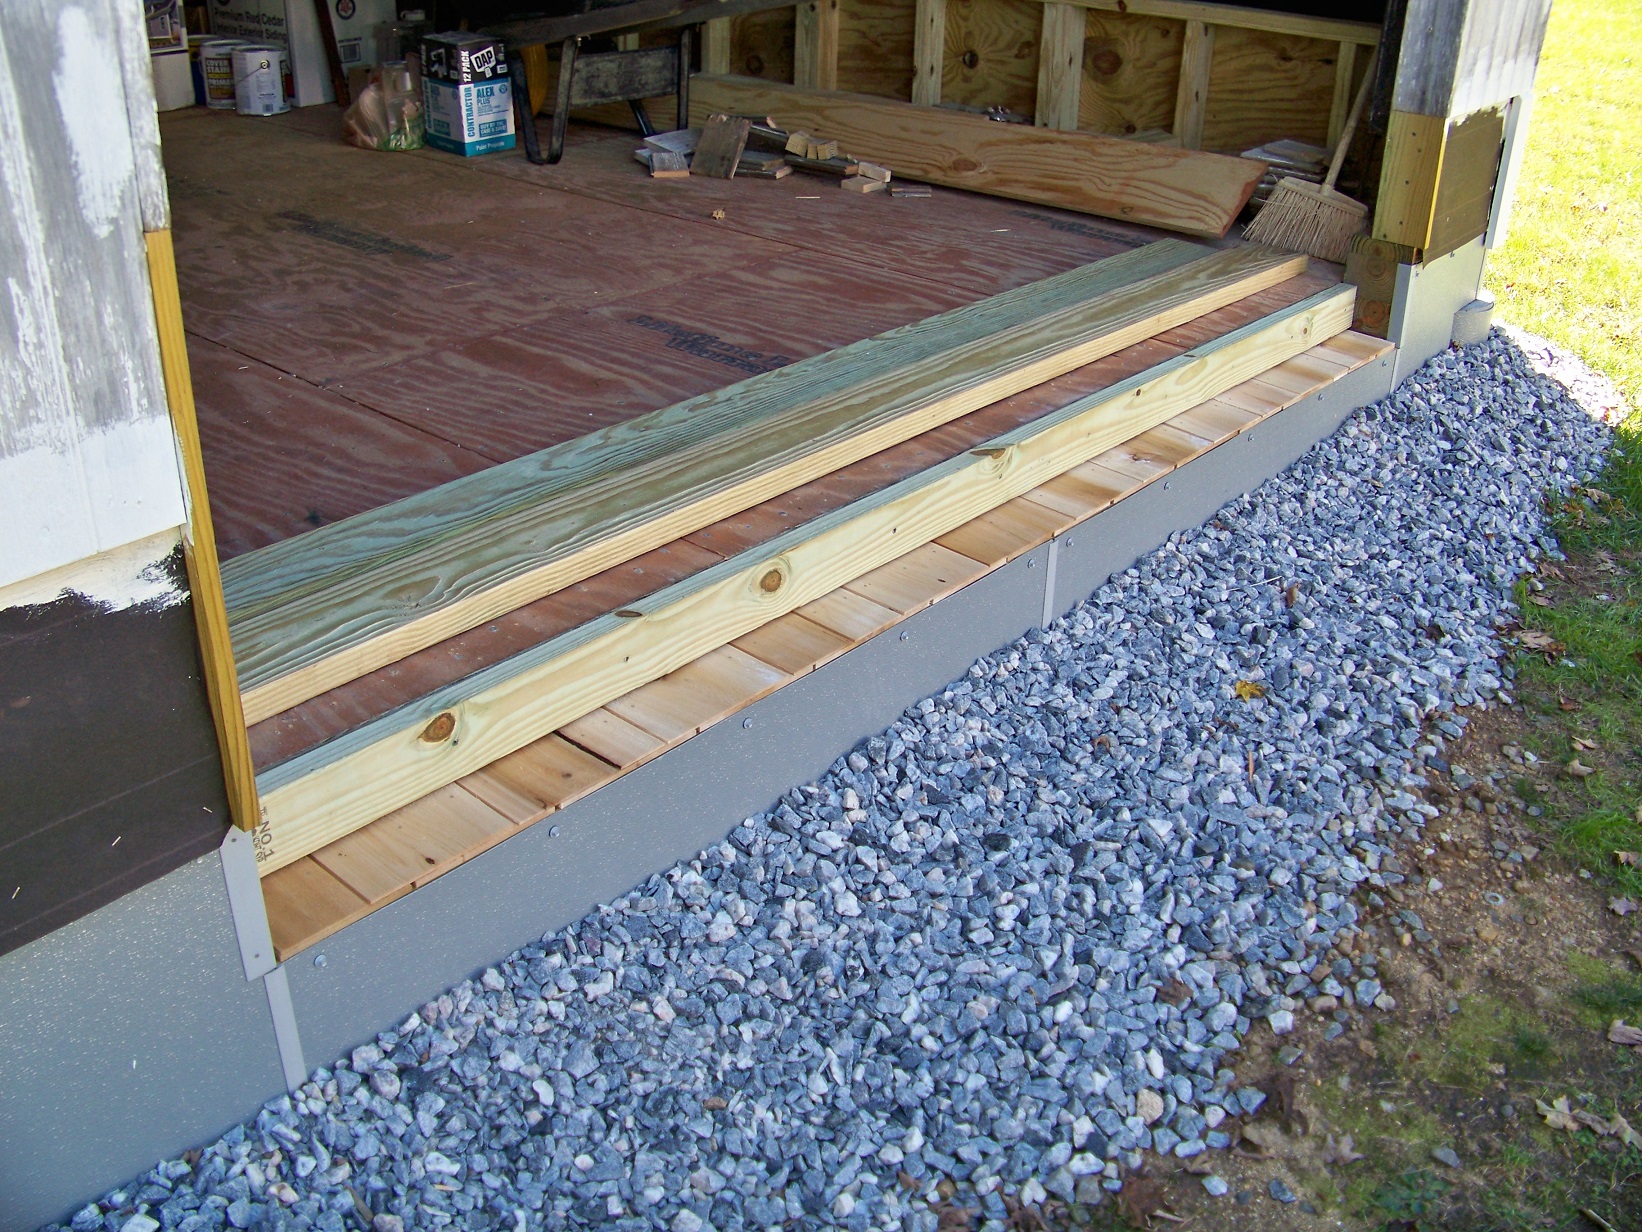
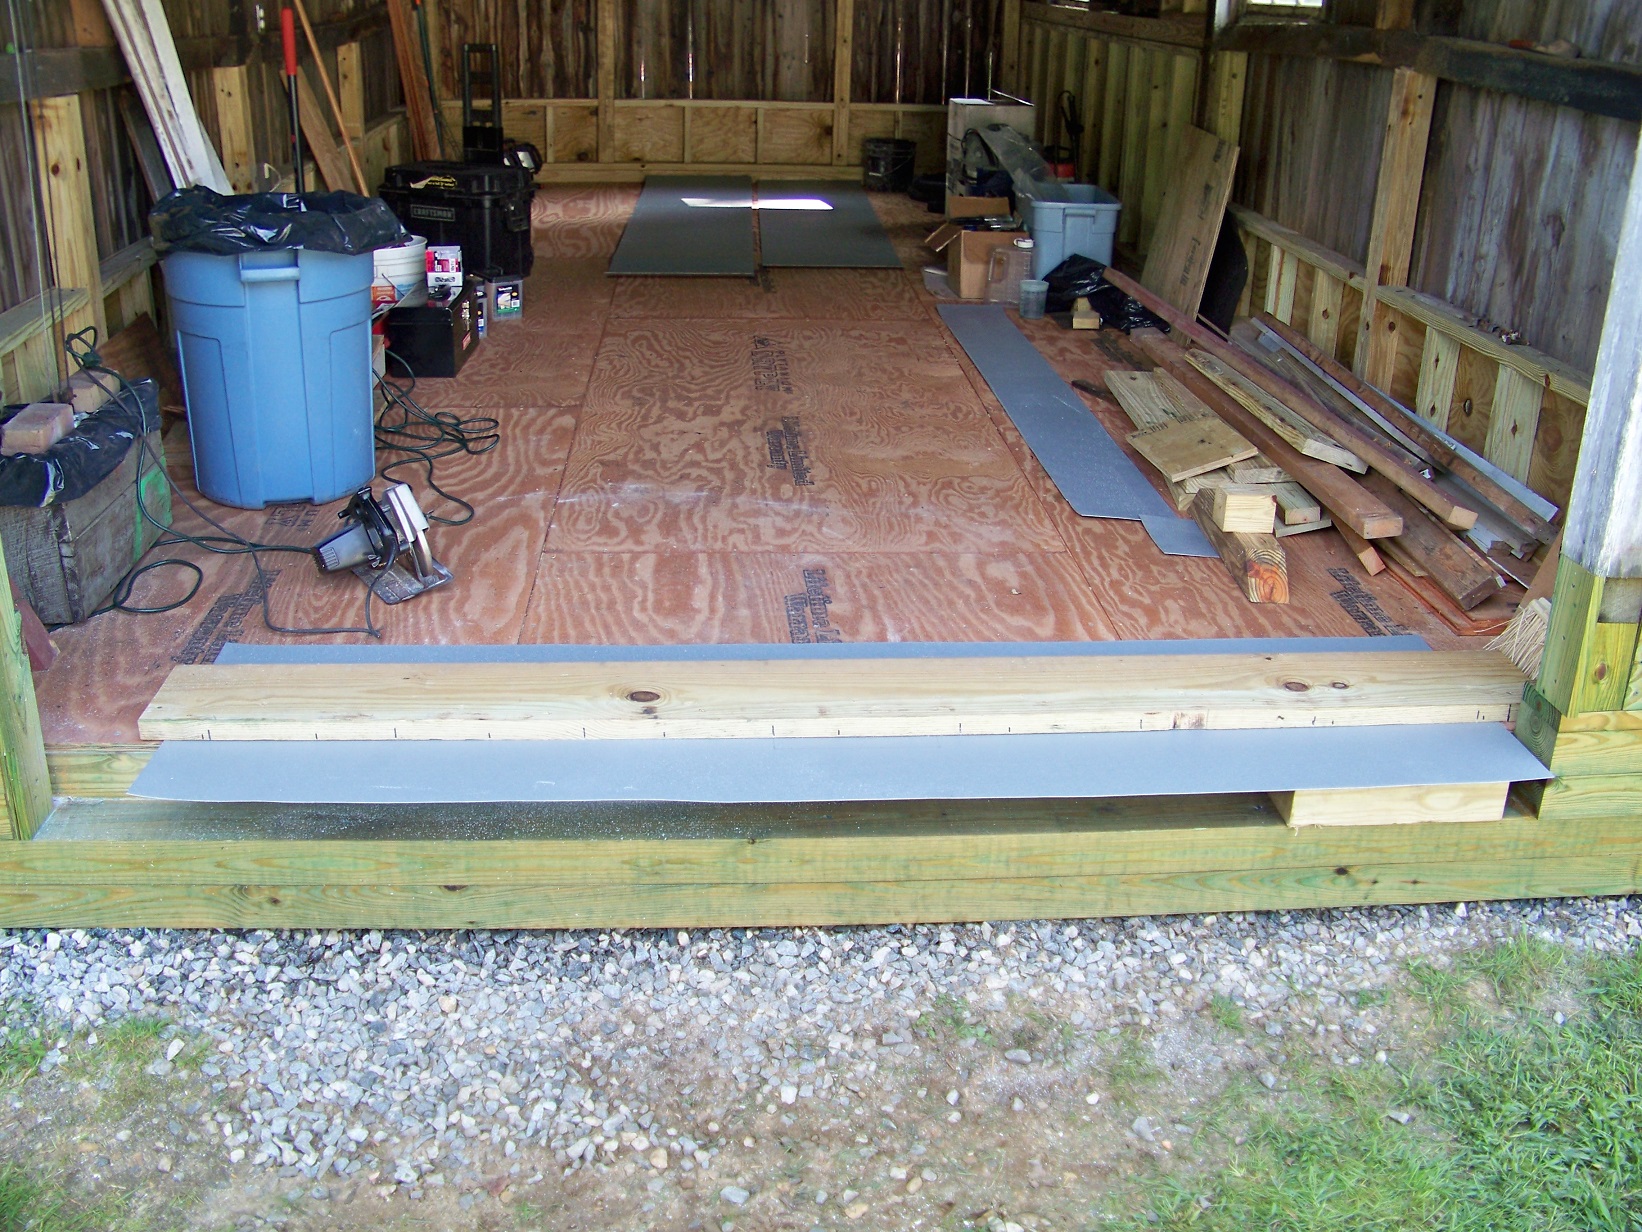
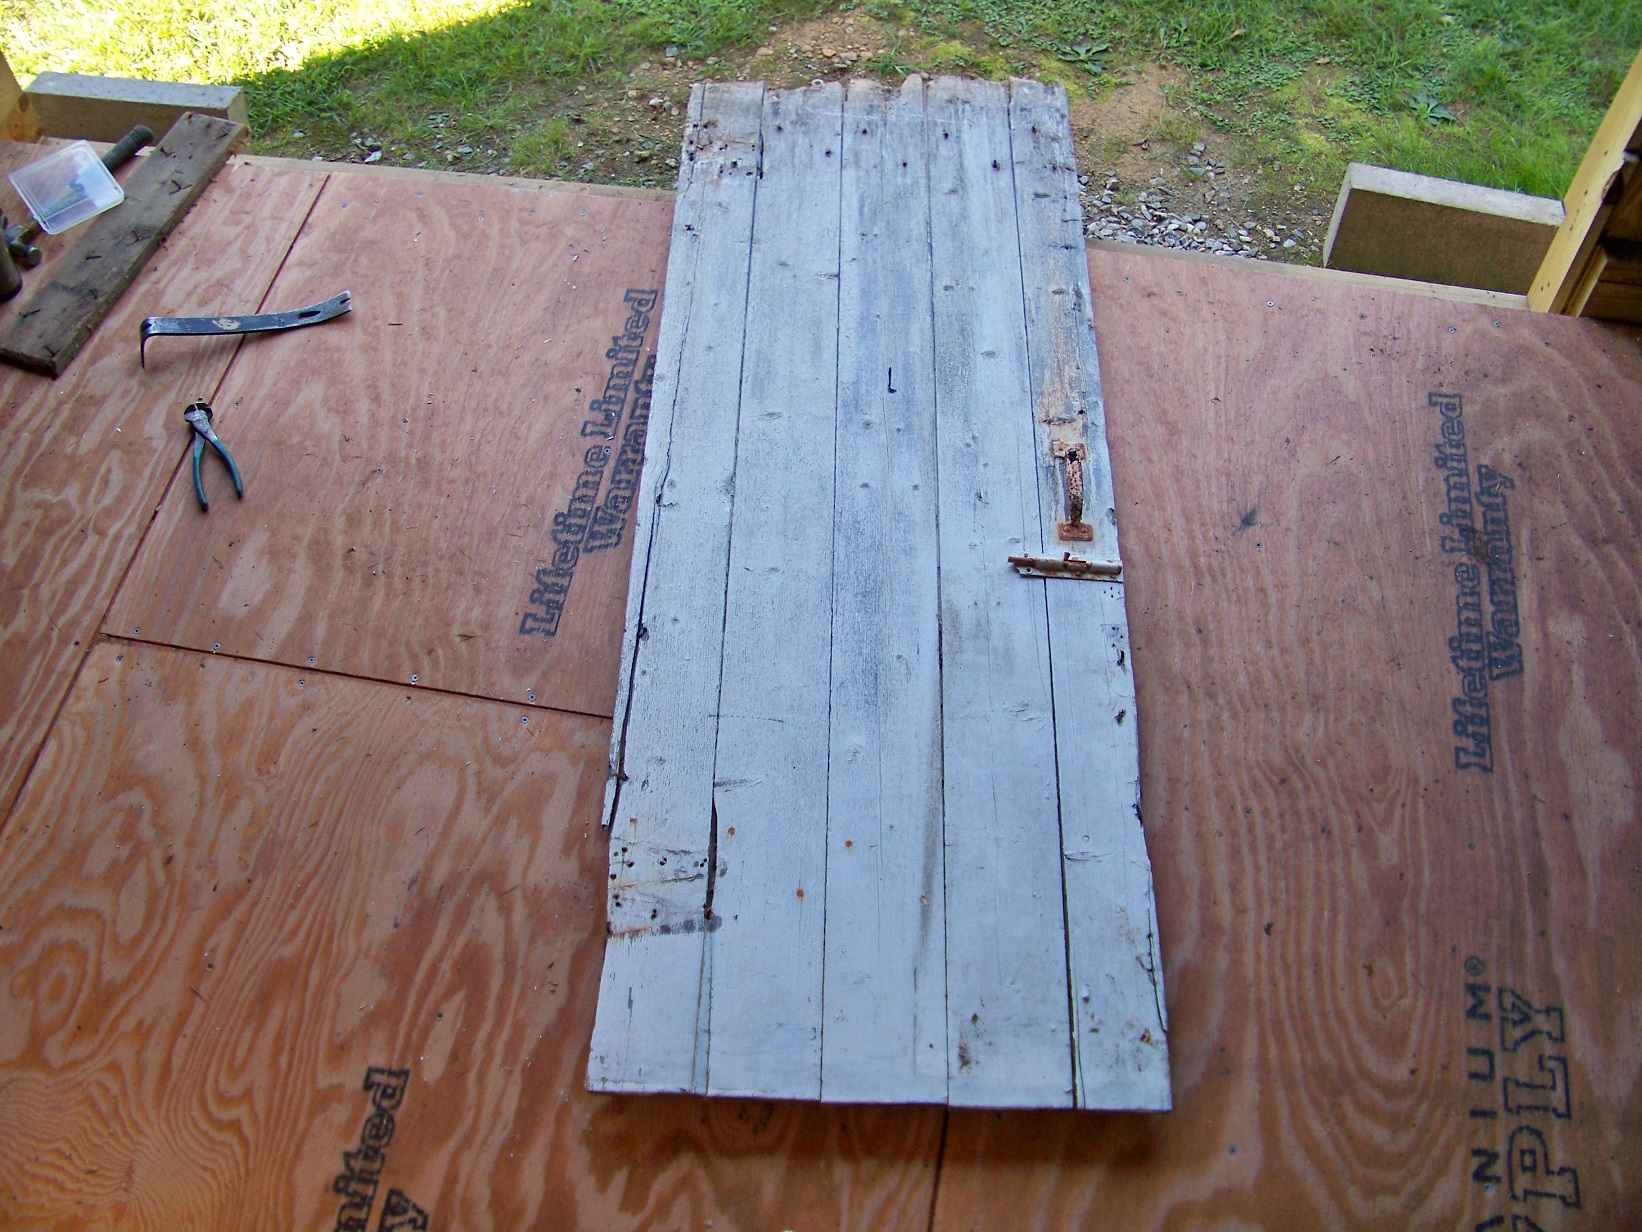
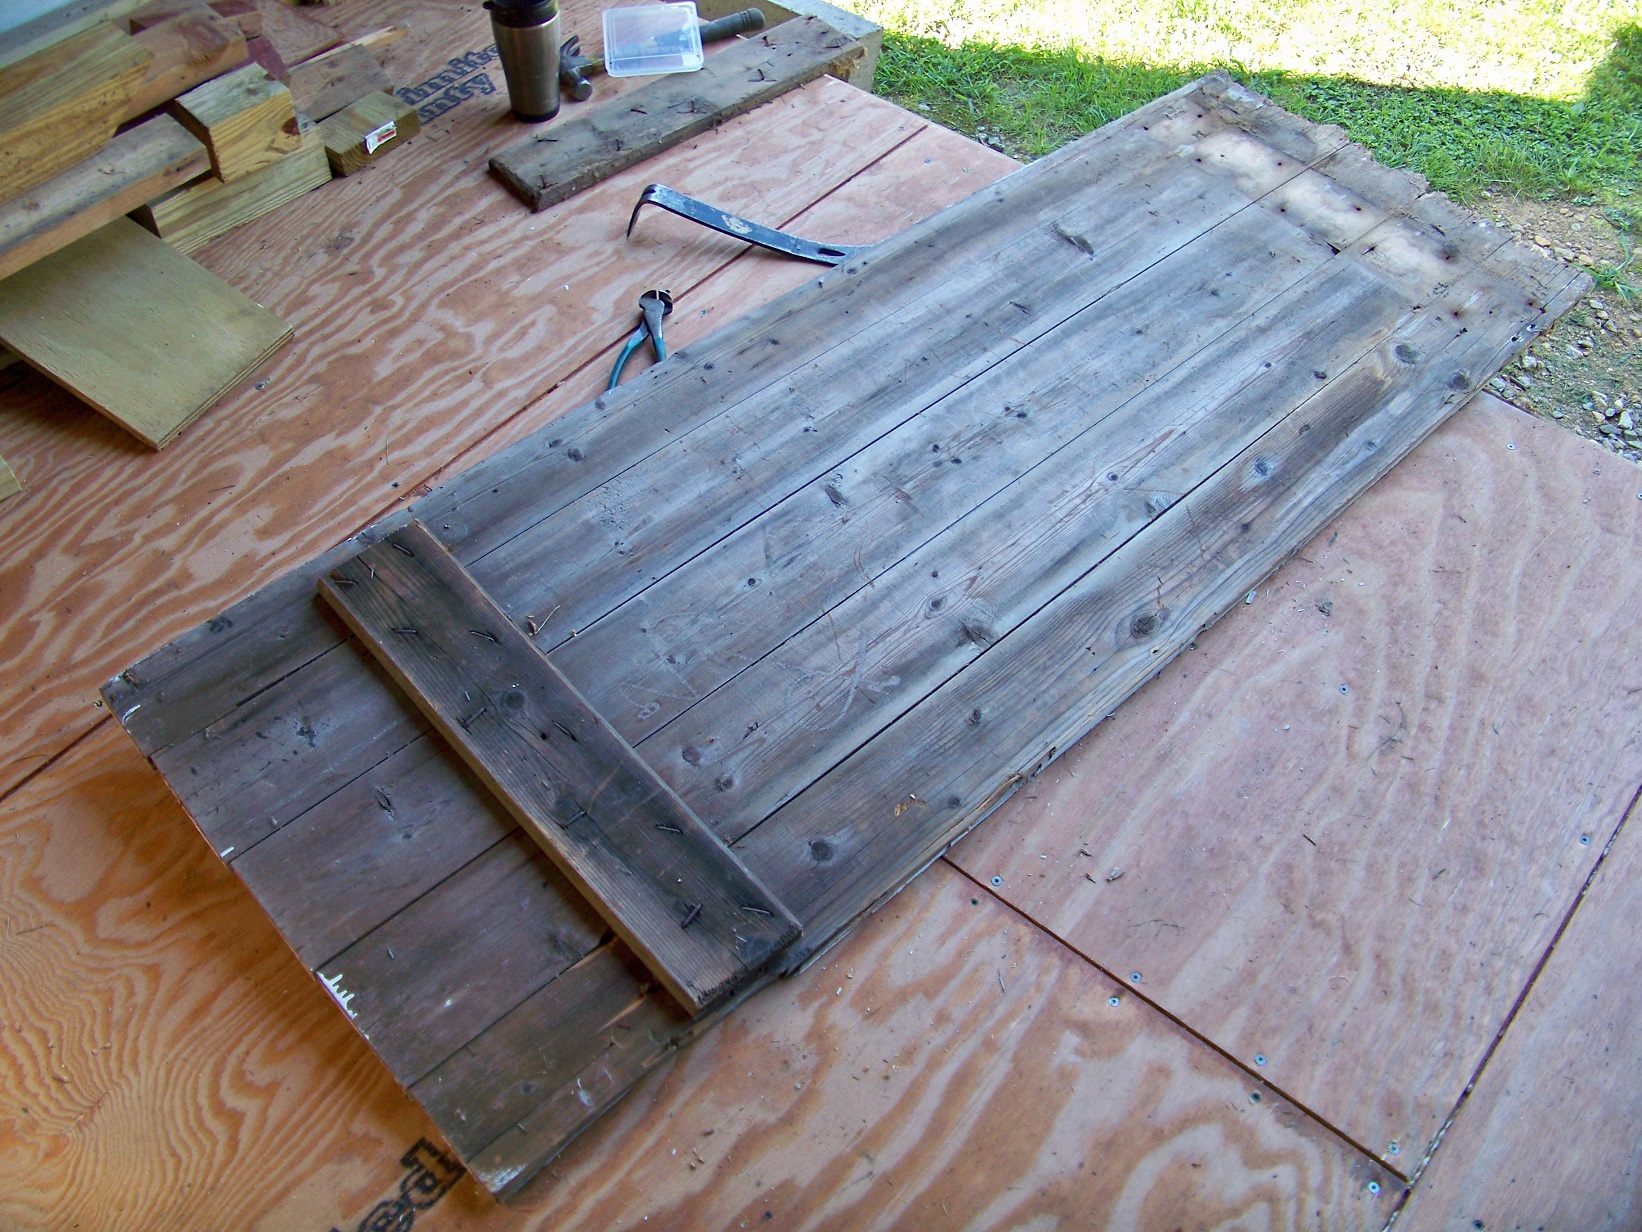
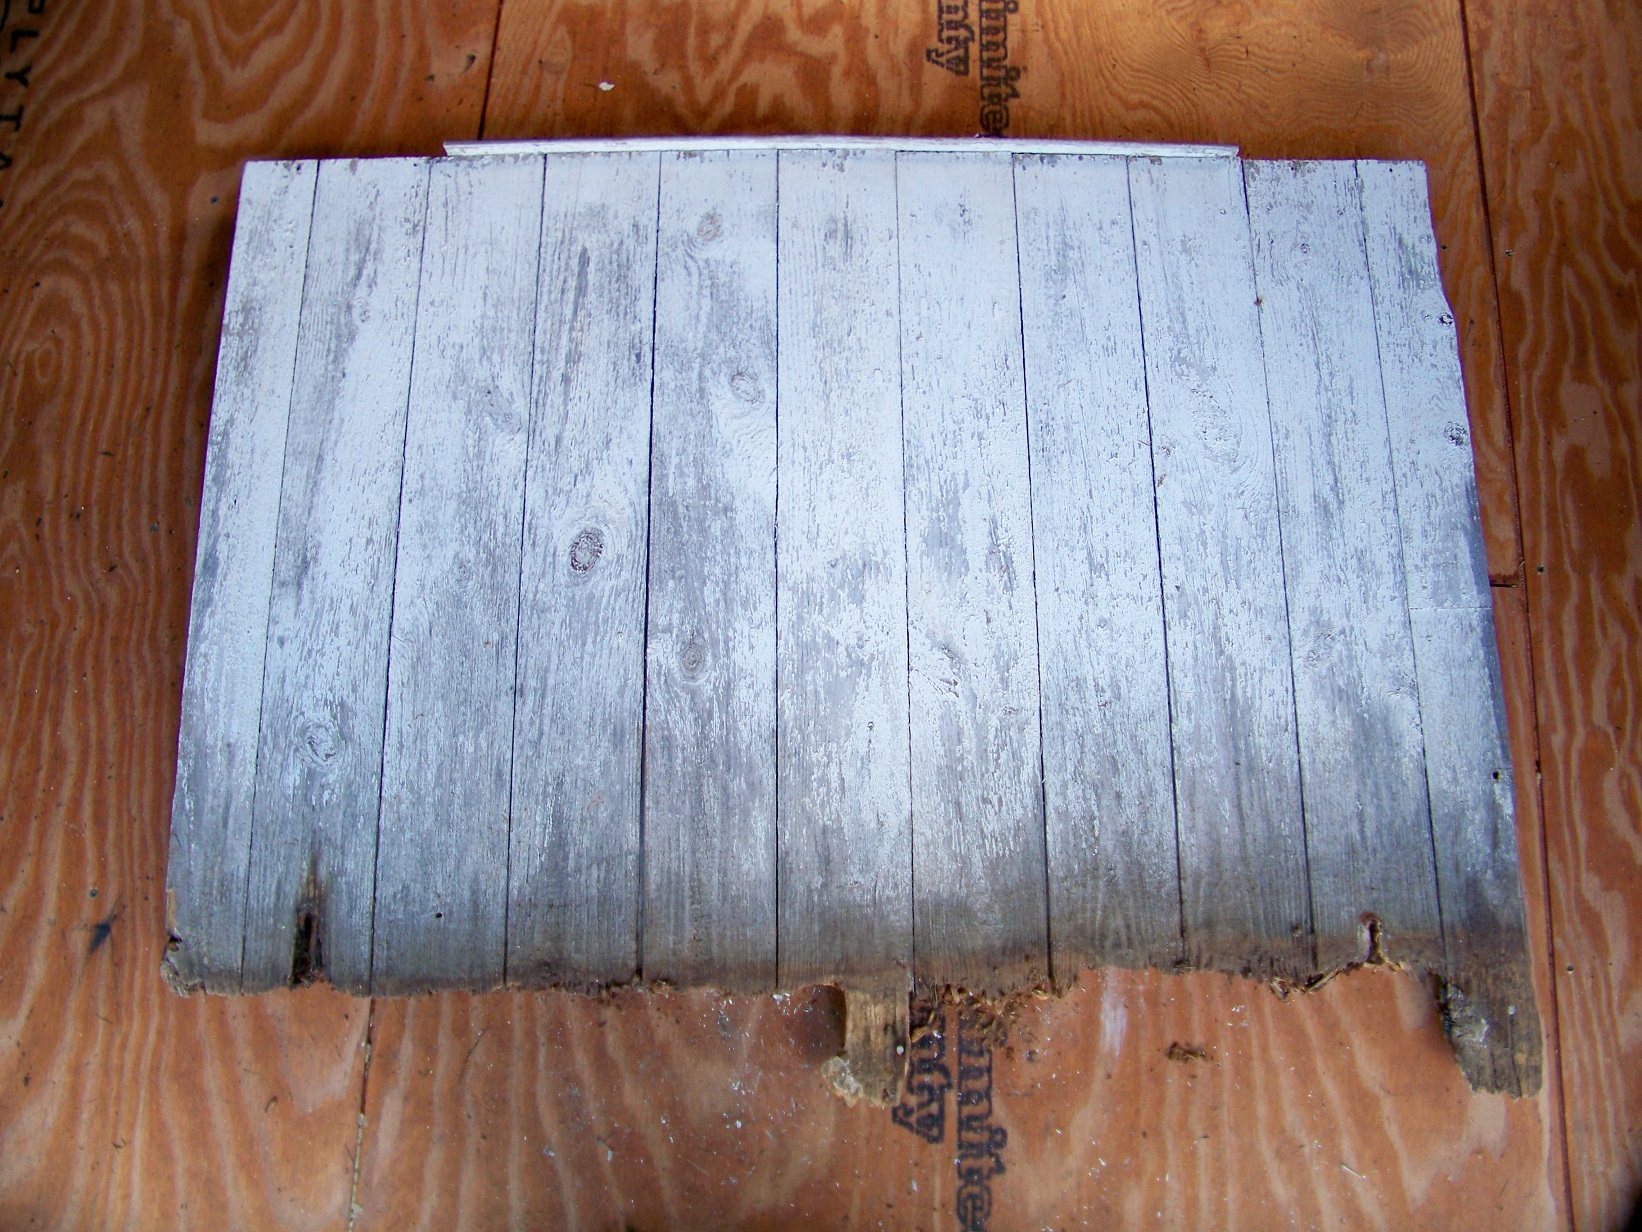
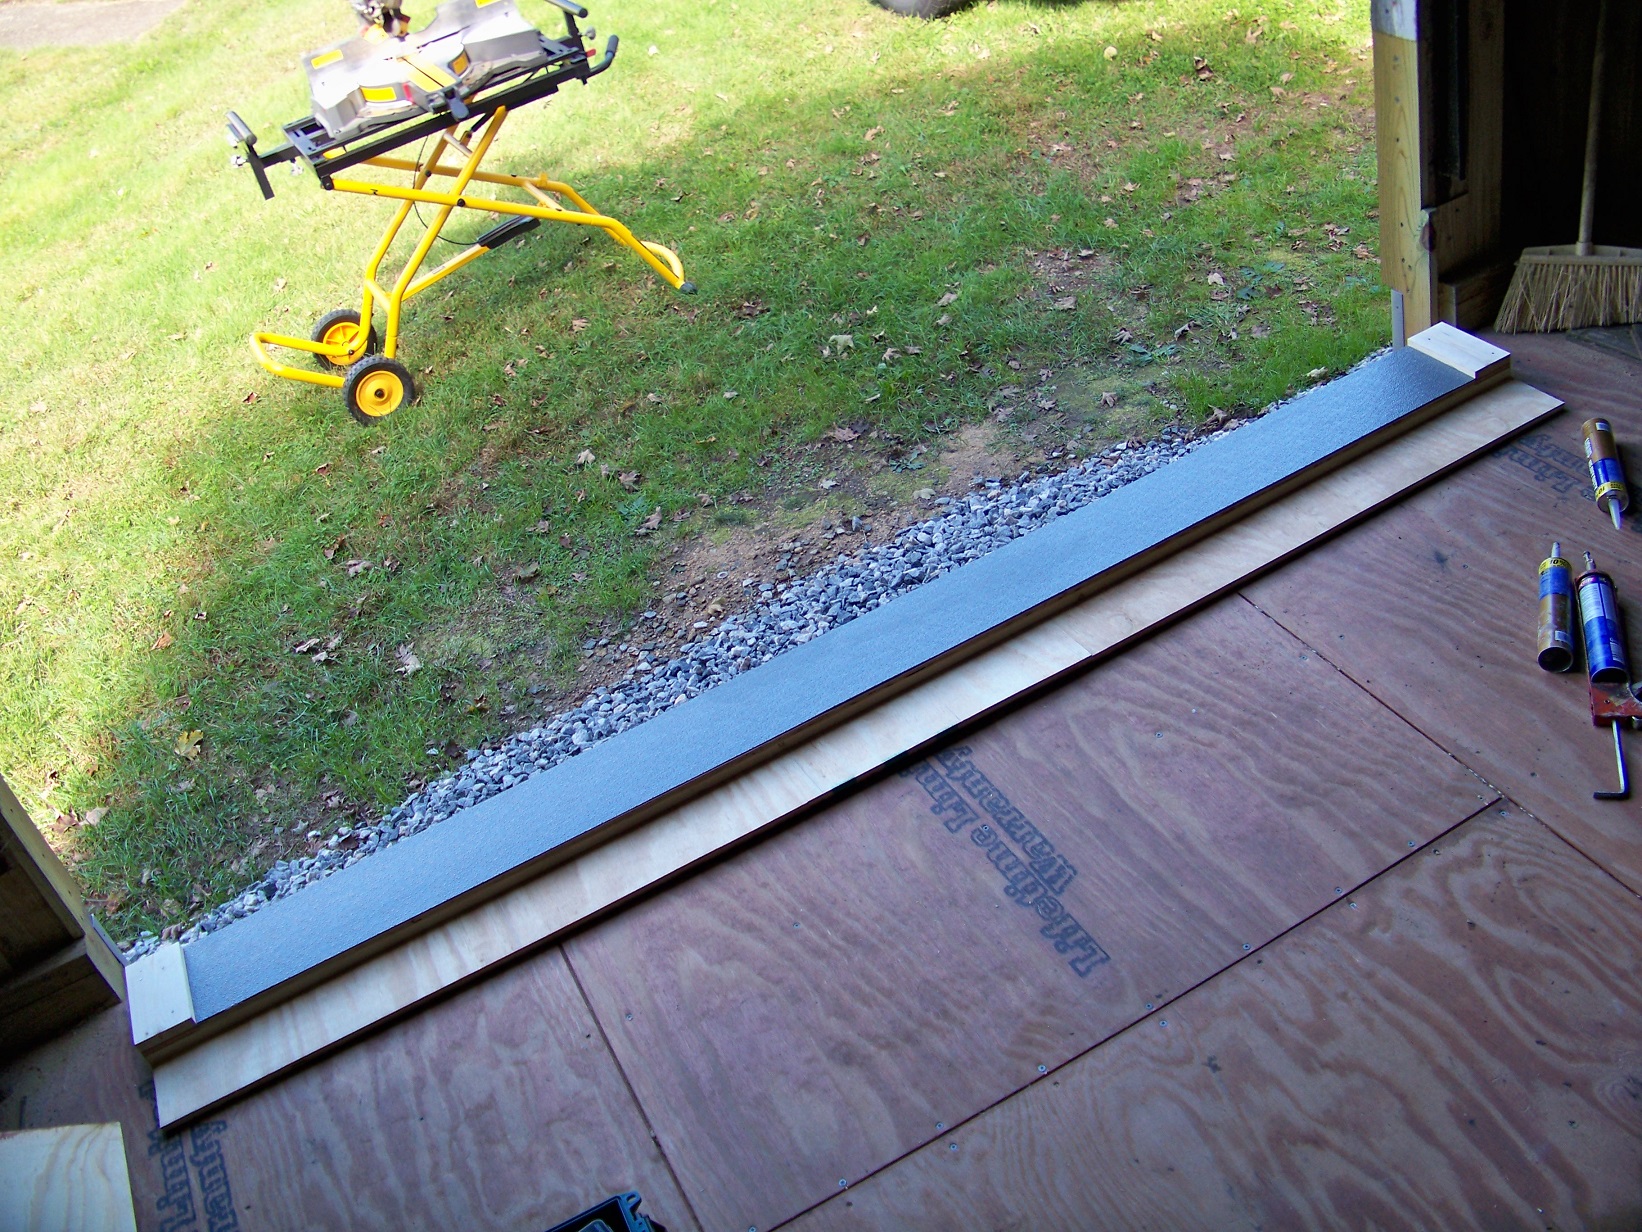
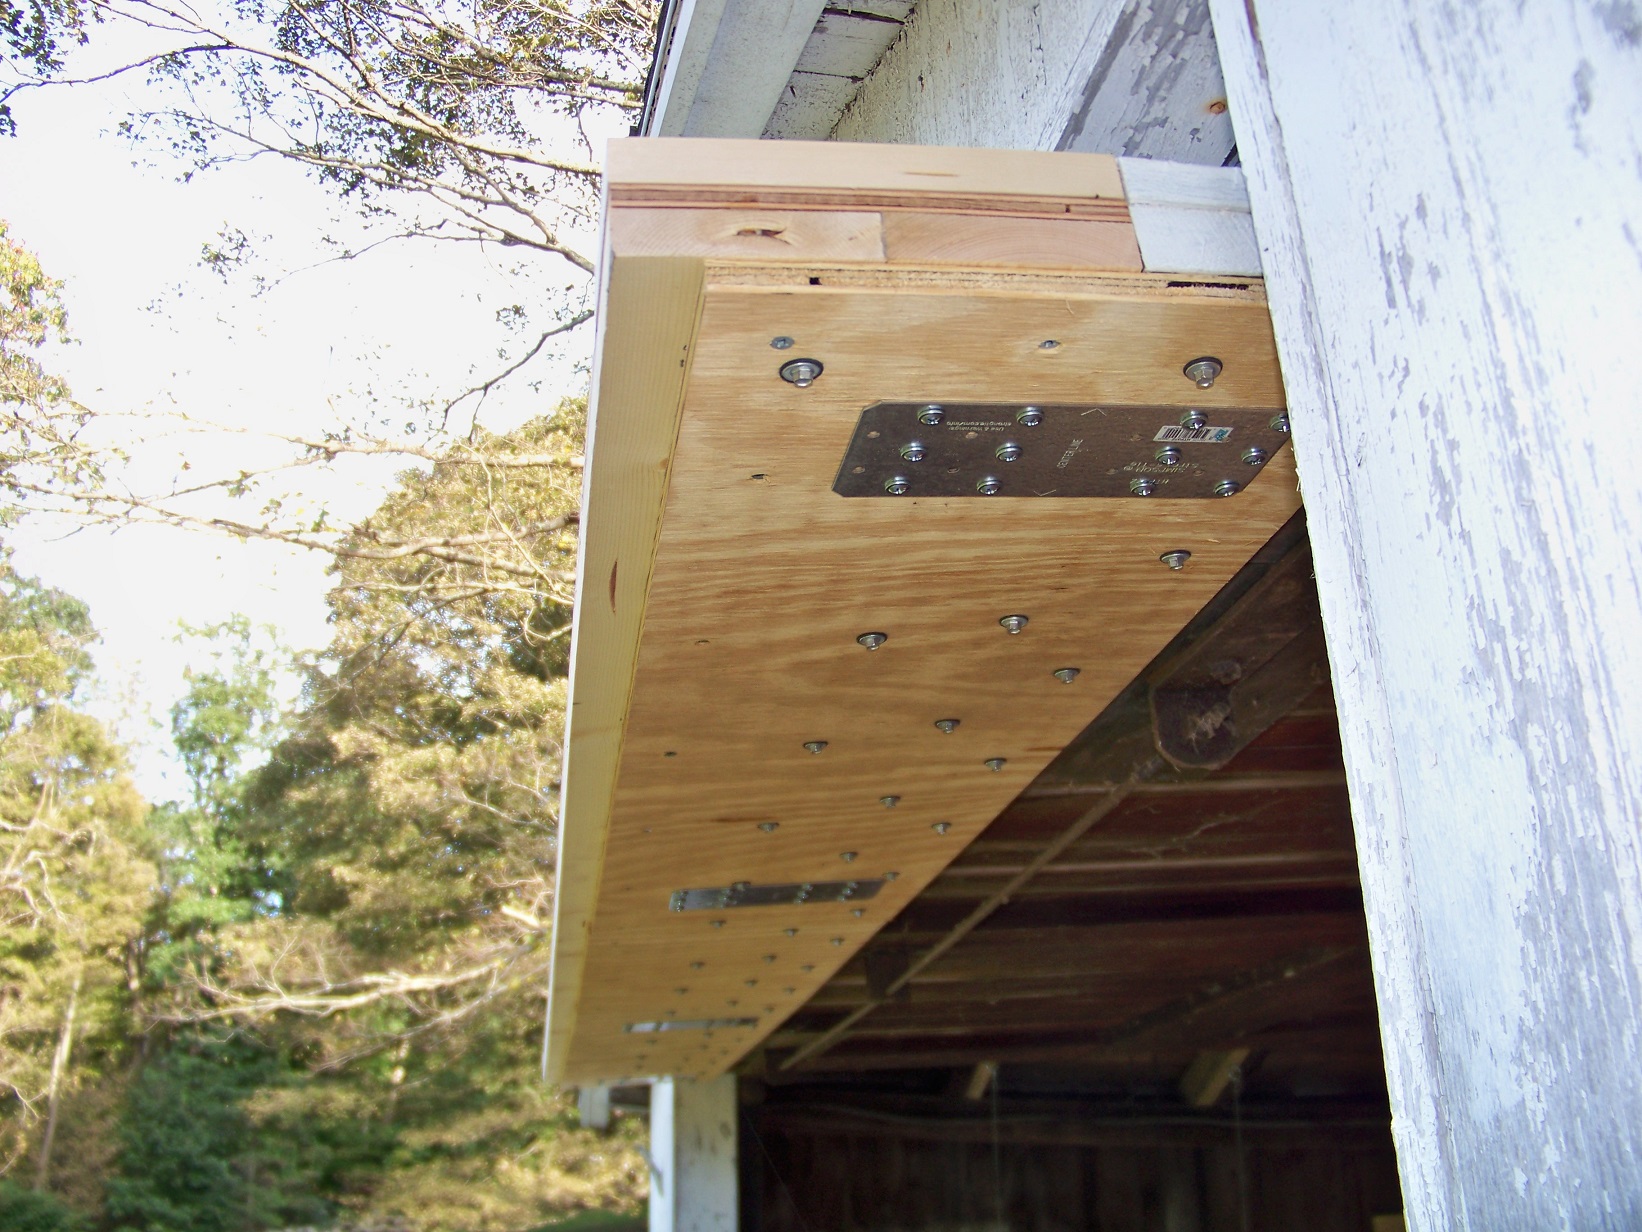
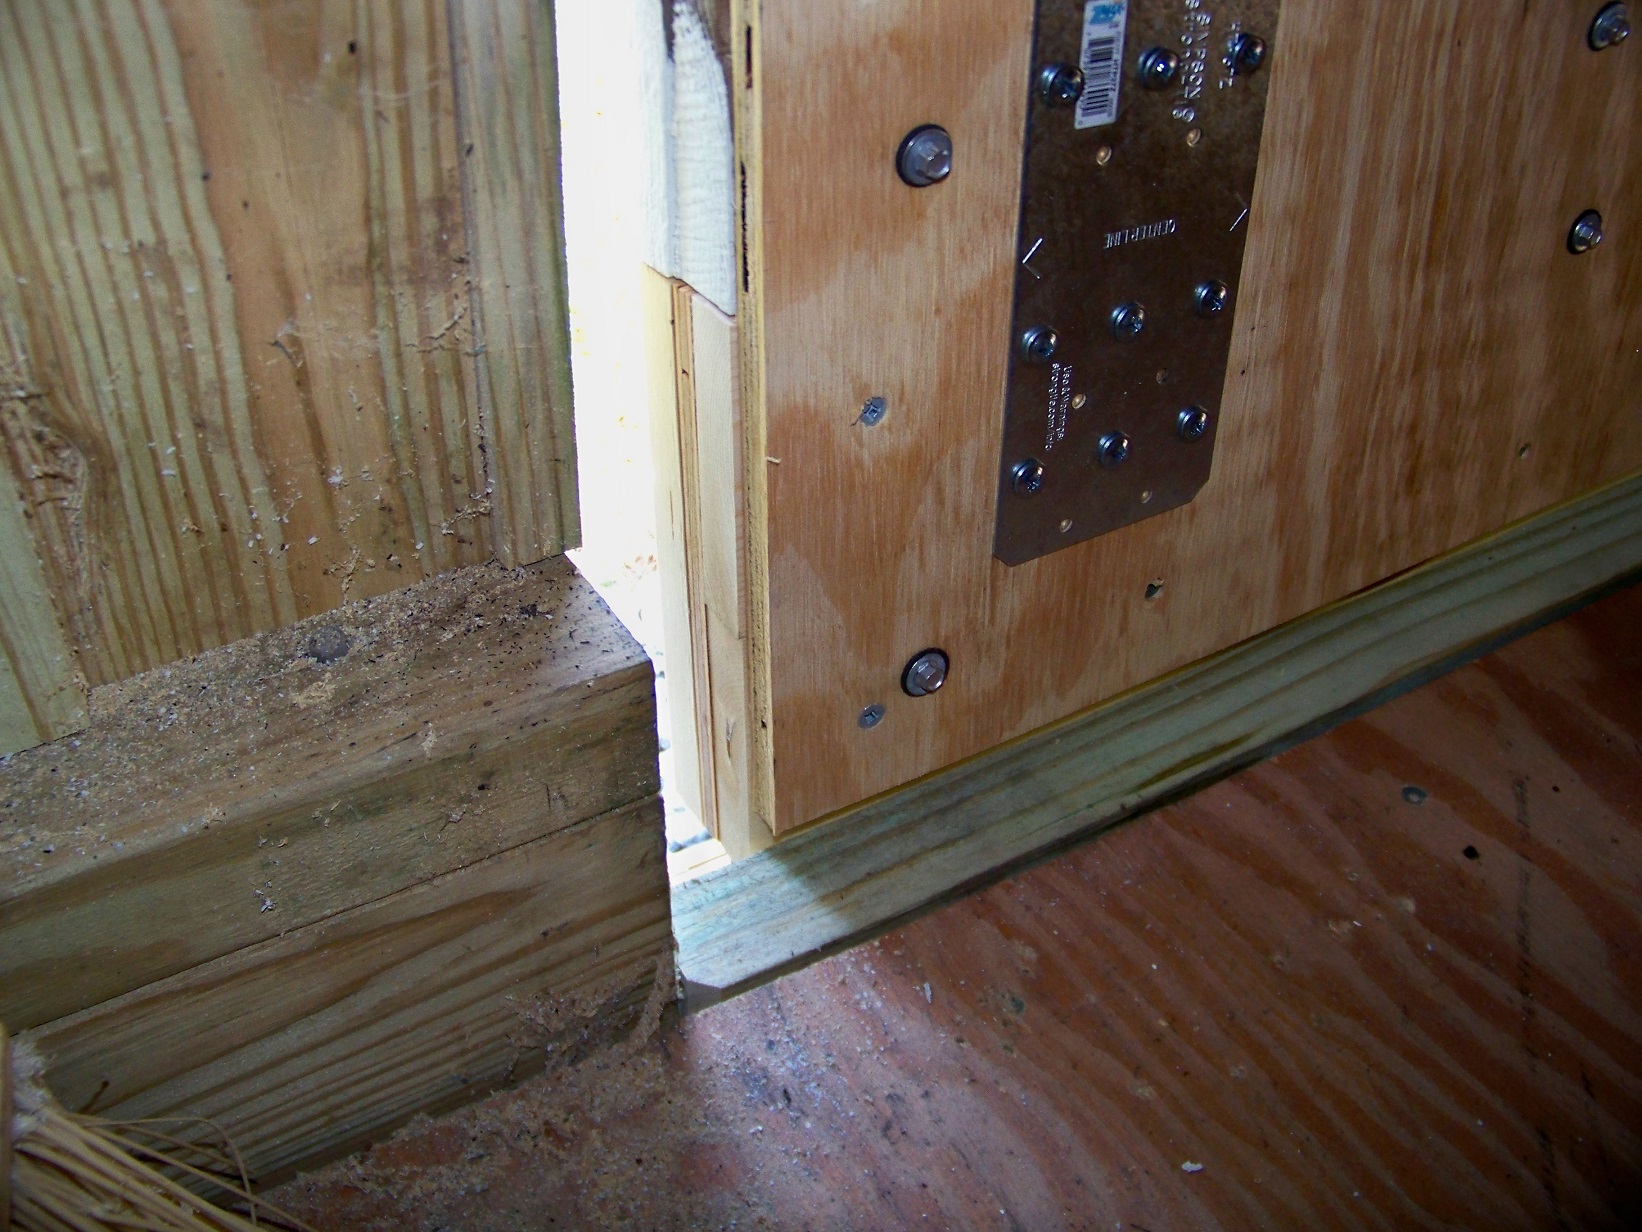
Looks nice. I see you used groundbreaker too. Good stuff just dont hit it too much with weed eater or it eventually chips.
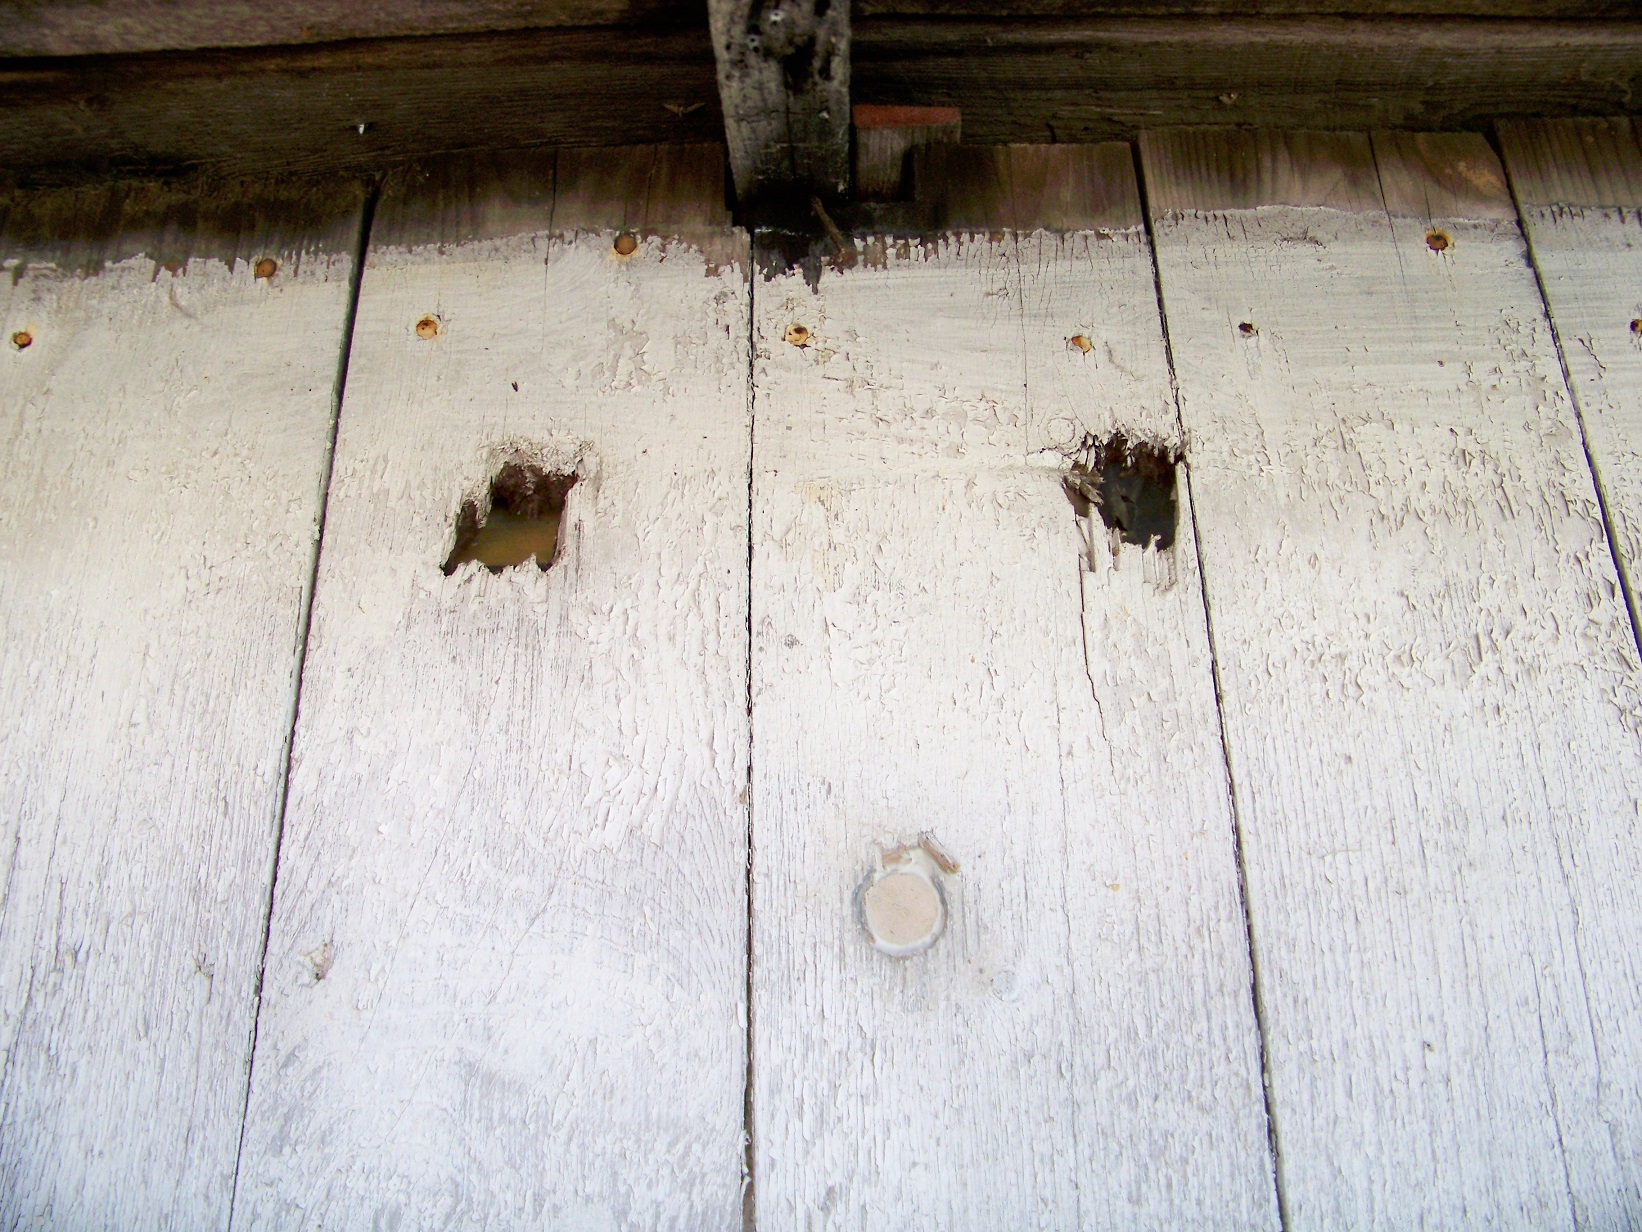
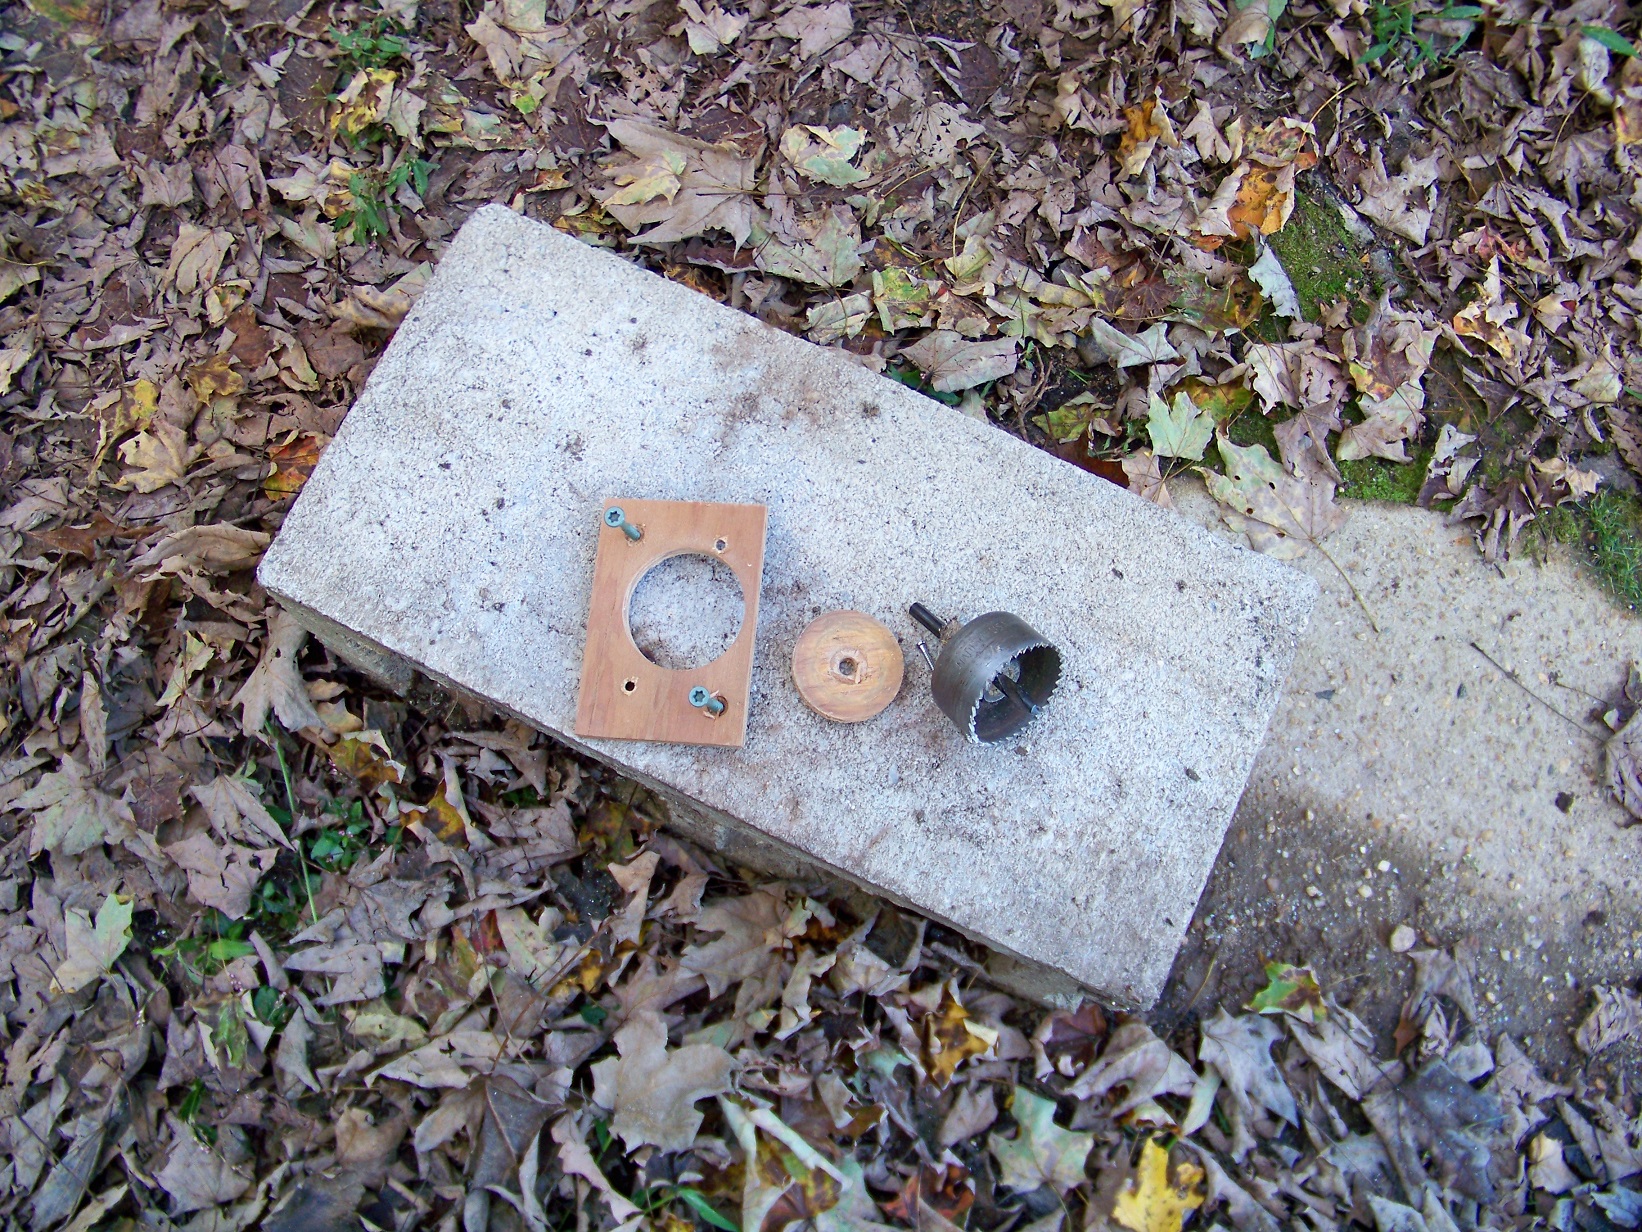
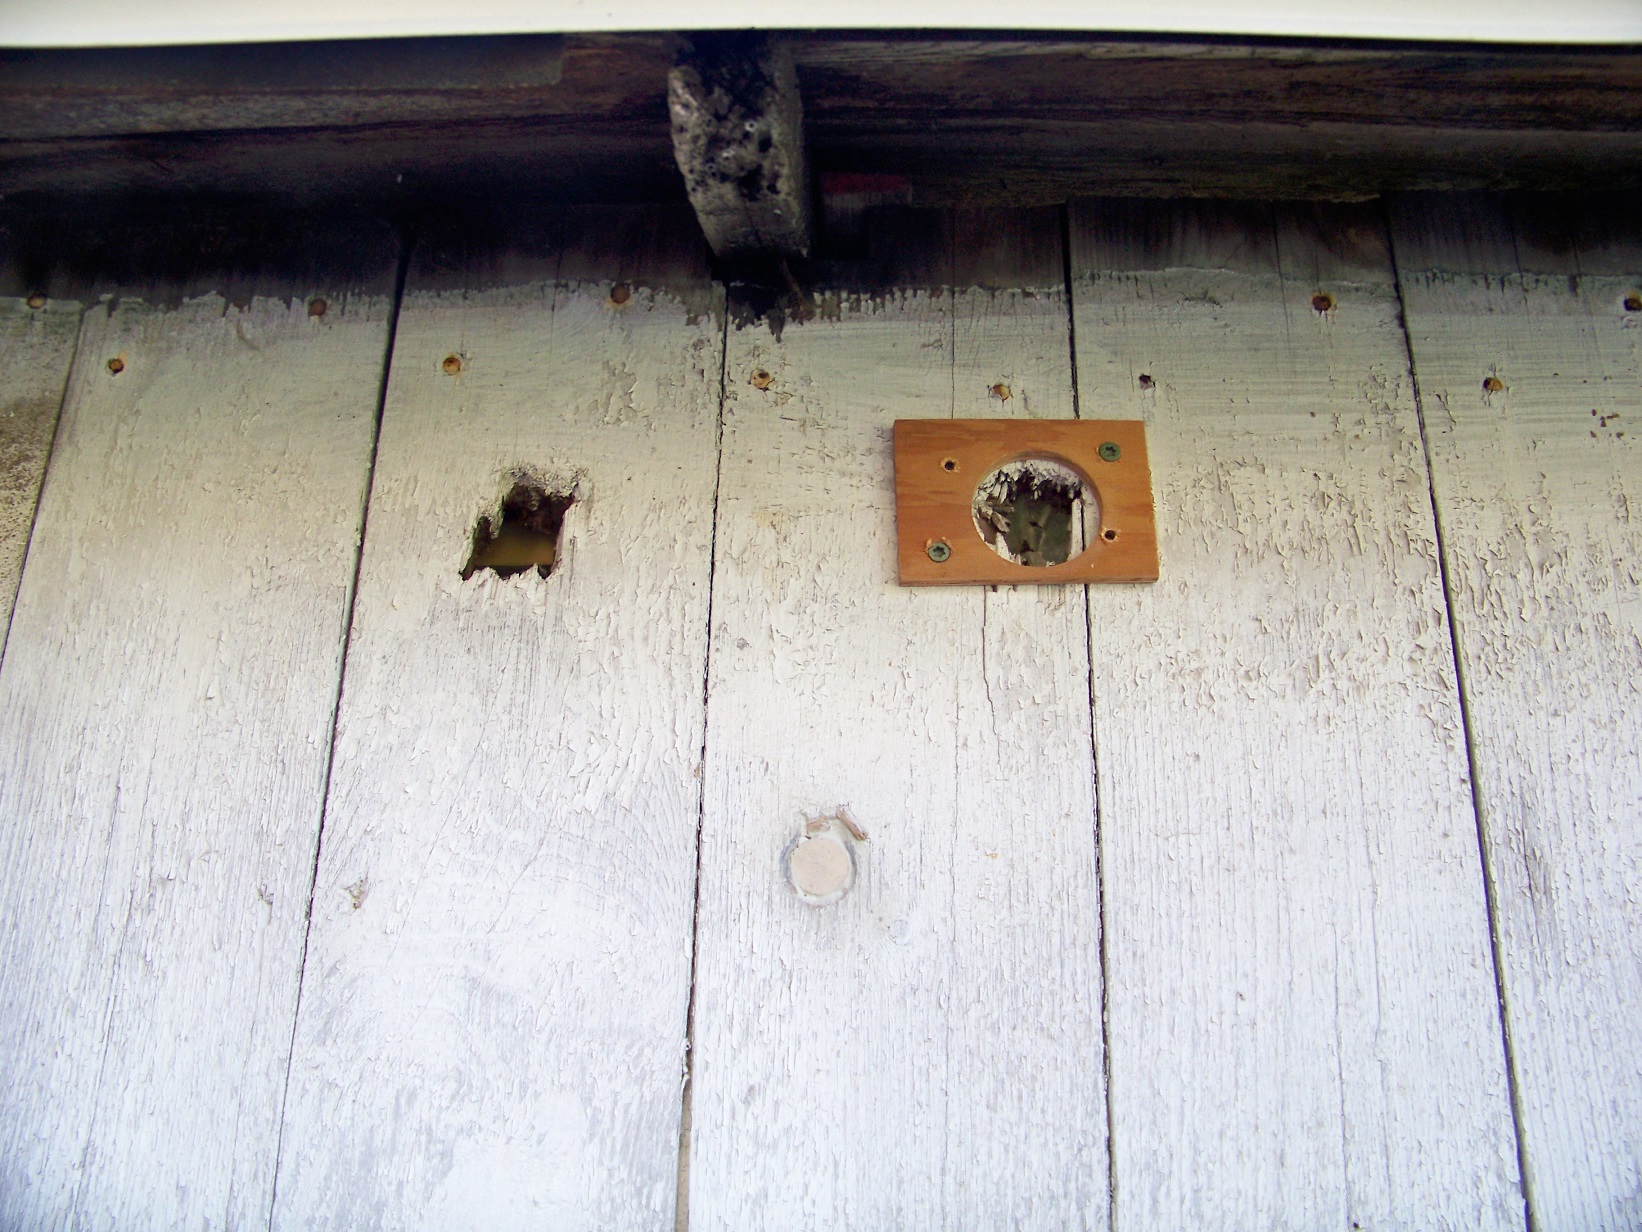
Sent from my SM-G960U using Tapatalk
 
OP
P

Platonic Solid

Well-known member
Joined
Nov 29, 2014
Messages
3,587
Location
CT-USA
Progress Pics

No idea what the rope, cleats and ceramic knob+tube setup was used for.


Sanded and caulked and caulked and ... 5 tubes in all.

 
To avoid these ads, REGISTER NOW!
Top Bottom