Drive- Here is a somewhat breakdown of how I do the box joints, using a sled I made for my table saw and dado blade. You can also make these in the router table or with a box joint jig and handheld router. I call them box joints some people call them finger joints.
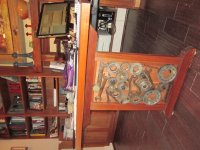
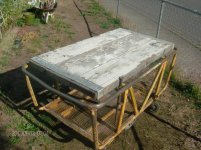
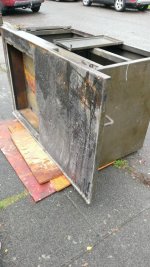
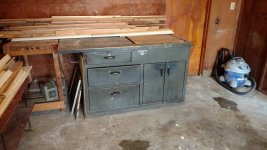
This is the cabinet you saw on the back wall of the 2 car garage side I posted early.
 20161109_191448
 by
bjohnson388, on Flickr
I like to use 1/2" box joints so I mill all my wood down to 1/2" thick on drawers as it makes everything easier. It also make the inside of the drawer bigger. I made this entire cabinet section out of free recycled pine and birch plywood from work that was going into the trash. Only thing I had to buy was the hinges for the upper and lower doors.
I stole this from my woodshop thread. It is in the woodshop at my old house before I got my DC.
Jointed, Planed, ripped and cut to length
 20150122_115544
 by
bjohnson388, on Flickr
There is a sequence you follow for cutting the joints. The sides and the front and back are cut as pairs. I cut the sides first. They go up against the key on the sled. And then after the first cut you move the joint you just cut onto the key and go until all cuts are made. I like to make the drawers a height that is divisible by 1/2" as that way all your joints are the same.
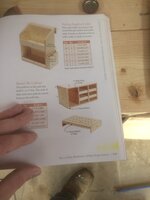
After I cut the sides then I cut the front and back but when you do those you load the sides into the key so that your joints on the front and back will be cut opposite of the sides so that they will go together. These 2 pictures kind of explain it. Not mine stole from google. So A pieces would be the sides and B pieces would be front and back.
 93
93 by
bjohnson388, on Flickr
This picture is where you load A piece against the key so that B piece will cut opposite.
 86
86 by
bjohnson388, on Flickr
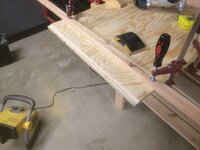
My box joint jig. It mounts onto my crosscut sled. I make a couple of test cuts to make sure my joints are the right tightness. They need to slip fit because if they are too tight you will never get them glued up. I also make the cuts about a 1/16" past 1/2" deep so that the joints will be proud and I can plane them or sand them flush once glued up. I fine tune my dado blade to exactly 1/2" with 2 spacers and I have them marked so its a faster setup. I used a piece of Pecan hardwood for my key it is a very hard wood and stable. I can usually get my cuts setup in 1 or 2 tries. What I really should do is build a dedicated box joint jig and it would stay setup.
 20150122_134454
 by
bjohnson388, on Flickr
320 cuts later...
 20150122_140322
 by
bjohnson388, on Flickr
Some shots of them being glued up. You can see how the fingers are proud.
 20150123_094055
 by
bjohnson388, on Flickr
 20150123_190709
 by
bjohnson388, on Flickr
The plywood bottom actually measures 1/4" thick. It came from a desk that my grandpa made back in 1958. I had the desk as a child growing up. It was falling apart so I took it apart a couple of years ago and saved all the wood. I am glad to be able to reuse it in these drawers. It will live on. It has great patina and will leave that way.
 20150122_171628
 by
bjohnson388, on Flickr
I hope I explained in a manner that is understandable. I am getting ready to make some more drawers so I will be sure to take more pictures this time around.
Bret