OP
jimreed2160
Well-known member
Stanley 1870 Miller Plow Plane
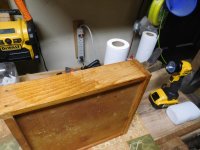
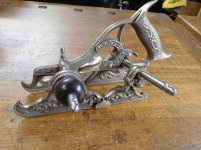
This kit has been sitting on my shelf for a few decades and it finally came up on the TODO list. It is a bronze replica plane kit from Paul Hamler. During the past month I have been filing down the sprue marks and polishing the metal with deburring pads and wheels. Today's task was to attach the blade holder and cam. They are held in place by brass pins which need to be cut to size and peened.
The true test is whether or not I can remember how I did it the first time. I wrote up a nice tutorial that got lost in the ether. But everything went well and that beauty is gleaming like a big gold tooth.
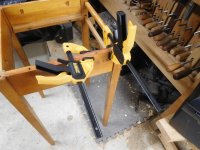
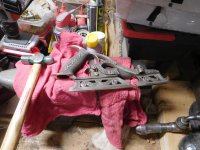
I put the pins in a vise and carefully peened one end by tapping with a ball peen hammer (of course). A thousand taps and it was done. Then I filed down a few light jaw marks and installed the pins. One thing I did have from the past was the 1/16" metal plate with a hole drilled for the pin. Paul recommended this and it worked great the first time. Cut along the face of the steel and you leave just enough brass to peen into a nice joint. I used my coping saw. Another advantage of the steel plate is that it protects the plane from stray saw marks.
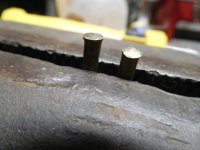
With the pins cut, I worked on the corner of the anvil and pounded out another thousand hammer blows to achieve peening success.
This kit has been sitting on my shelf for a few decades and it finally came up on the TODO list. It is a bronze replica plane kit from Paul Hamler. During the past month I have been filing down the sprue marks and polishing the metal with deburring pads and wheels. Today's task was to attach the blade holder and cam. They are held in place by brass pins which need to be cut to size and peened.
The true test is whether or not I can remember how I did it the first time. I wrote up a nice tutorial that got lost in the ether. But everything went well and that beauty is gleaming like a big gold tooth.
I put the pins in a vise and carefully peened one end by tapping with a ball peen hammer (of course). A thousand taps and it was done. Then I filed down a few light jaw marks and installed the pins. One thing I did have from the past was the 1/16" metal plate with a hole drilled for the pin. Paul recommended this and it worked great the first time. Cut along the face of the steel and you leave just enough brass to peen into a nice joint. I used my coping saw. Another advantage of the steel plate is that it protects the plane from stray saw marks.
With the pins cut, I worked on the corner of the anvil and pounded out another thousand hammer blows to achieve peening success.


![WP_20170201_008[20584].jpg](/forum/data/attachments/605/605223-77253833db87da701c8610fefb74521c.jpg)