shortykorte
Well-known member

Nice use of stands front and rear.


Thanks, I had some 3" pipe kicking around so I whipped up a couple.I bought staging screws for $15 ea....they work great.
Nice use of stands front and rear.

I thought they were supposed to be movable?
My latest vehicle to go up on my MaxJax. I timed myself in setting it up....20 minutes start to finish.Not bad for a guy in a wheelchair!
I have had my MaxJax for 5 years now and can't be any happier with it. I have had a lot of ups and downs with it. It has moved with me to two houses.
Old House set-up:


It even lifted my Ford Flex (which was at the suggested Max lifting)

Now at my new place. Just installed it a few days ago.


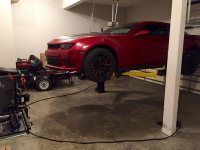
I understand per the instructions you are not supposed to install the maxjax closer than 6" to any crack/seem/edge. I asked in another post and got this answer but this thread is obviously more active. I ran across these pics and cant help bu think this guy did it why cant I? LOL
The main seem/relief cut in my garage does have a crack in it. Is this what makes it particularly unsafe? Here are two pics, one of relief cut and the other of my footing/edge where the other maxjax post would be.
Thanks guys
Whatsup Noah!? Love seeing evom peeps on here...hope your Maxjax is working out well for you! Sorry to derail I'll go back to my corner now...

My handle is on the right side also. I don't think there is anything to worry about.
I called Dannmare and the guy there said I can just shim the front of the post to raise the arms up even with the other side. But then the post wont be plum and seems to me like while lifting the pads will be pulling back because post isn't plum. Am I thinking wrong on this? Or is it no big deal?My garage floor is sloped for drainage. I set the transit up and the floor is about 1/2 to 3/4" higher where one post will mount than the other post. Is this to much? Do I need to make a plate the same footprint to raise the lower post up?
This is a pic of my pump setup to give you an idea of the hose locations.
My whole setup may look different than most, as I have the lift 'semi-permanently' mounted, but the hose locations should be the same as everyone else.
I do have a flow controller installed on the right side's line due to an unlevel lift condition that bleeding wouldn't fix.
I mounted the pump,tank, and flow divider onto the right mast, then ran the left's line up and along the ceiling.
Got mine with the Costco deal had to rework the sloppy China workmanship lift arm spline latches all 4 were less than 50% contact easiest fix was to cut them apart and mill down the center tube re-weld & refinish here are some pics of the before and after rework and the daily driver Dodge up for a oil change.
PM Sent.Finally got mine done.
Since i had to re-pour a part of my slab there was no reason not to use epoxy anchors, had them on hand anyway. Did the holes at about 7" for some wiggle room.
Directions state to set anchors in with 2 direct blows. Well My advice is not to smack the anchors, or you will get epoxy jizzz all over your face. While it sounds ***** and exciting, its not fun. After my 2nd anchor i ended up tapping them in slowly allowing compressed air and epoxy work its way out. While it may be obvious , i must point out, slit on the anchor is where it comes out. So if you do plan to smack it, face it away from you or cover with a rag.
1/3 of the hole(not through slab) is about the perfect amount. Anything more and you will have gobs and gobs squeezing out and wasting epoxy.
It was just 70 outside the day i set them and when i slacked around double checking holes and the epoxy hardened inside the injection tube. Not all the way but enough to make it too difficult to push out. Not even 10 min(when i switched and moved stuff from one column to other)
Had to add anti chatter as some other people have. Maxjax claimed if you lube the blocks there will be no bouncing, sorry but bs. My lift bounced quite bad after 2/3 way up. This hydro system is very picky about the fluid you use. Maxjax need to specify an specific brand/type so people dont have this issue. Simply stating ATF/Hydrolic Fluid is not enough. In fact this agitates me quite a bit, after spending 2k on a lift and no specific fluid req i had to spend 30$ on CAT additive and almost two hours in traffic to get it.
If anyone is looking to save a few bucks i have two laser levels(not a penny more than i paid with 20% coupon just dont feel like going to HF to return) , drill bits, extra epoxy 2.5 tubes and CAT additive. PM me if interested. Oh and Wedge Anchors.
Depite the little issues i am very happy so far. Little Harbor Freight stool is too tall, being 6 1 ft tall is a *****. Will have to find a way to droop the stool couple of inches.


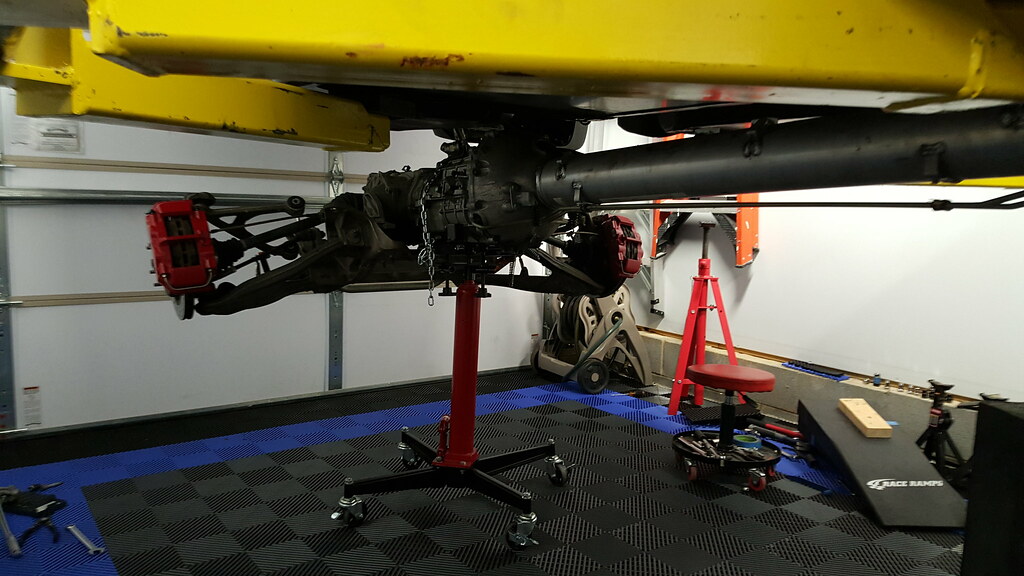


Excellent work! That is a bit tight. How do you get the lift arms in position under the car?
Very nice! So you attached the rear subframe to the jack (or ******), disconnected the torque tube and took down the whole assembly? I have a C6 and Maxjax as well and will need to do the clutch soon. This is great info. Any more details on this?
Steve
I attached the trans jack to the transmission - tied it off with the safety chain.
Take out the center console.
Remove the shifter boot.
Remove the shifter box assembly.
Disconnect shifter to trans cable line.
Disconnect the trans cooler lines.
Remove the exhaust.
Remove the torque tube plate (~40 bolts).
Disconnect the upper control arms.
Disconnect the brake lines from the frame.
Remove the harness from the Diff, trans, ABS sensors, as well as top of the torque tube.
Loosen the front subframe / cradle bolts.
Loosen the engine mount bolts.
Remove the 8 or so torque tube to bellhousing bolts.
Pull backwards on the torque tube and it should slide out of the bell housing.
That should be a good starting guide - I'm not sure if I found a good thread on CorvetteForum to help out or not.
While your in there - replace the slave cylinder on the front of the torque tube - and install a Tick Performance Speed Bleeder - it will help you bleed the clutch hydraulic system when you are done.
Thanks for the details. I have seen a few threads on the forum but like you said none of them are very comprehensive. The slave will be replaced for sure and I have seen several threads on the Tick bleeder so that is going in for sure.
Steve
boneccrusher, any issue with mounting that drivers side post that close to your footing. I am in the same boat you are with installing it in my 3rd bay and was told it would be too close to the footing seam/crack?