To avoid these ads, REGISTER NOW!

Tooling (Re)Organization

Strouty

Well-known member
Joined
Mar 21, 2010
Messages
38,208
Location
Southern Maine
It is an R8 taper, I have some basics for tooling, once I get it up and running, I am sure I will find a need for a lot more stuff. I am also setting up a lathe at the same time, I have very minimal tooling for that, I have a feeling the next few months will be wallet crushers.
 
To avoid these ads, REGISTER NOW!

BoilermakerFan

Well-known member
Joined
Apr 17, 2006
Messages
2,188
Location
Indianapolis, Indiana
It is an R8 taper, I have some basics for tooling, once I get it up and running, I am sure I will find a need for a lot more stuff. I am also setting up a lathe at the same time, I have very minimal tooling for that, I have a feeling the next few months will be wallet crushers.

You could always sell some Lista cabinets! :bounce:
 
OP
L

lilscorpion

Well-known member
Joined
Mar 15, 2010
Messages
3,599
Location
Colorado
Strouty said:
It is an R8 taper, I have some basics for tooling, once I get it up and running, I am sure I will find a need for a lot more stuff. I am also setting up a lathe at the same time, I have very minimal tooling for that, I have a feeling the next few months will be wallet crushers.


Here’s a tip: found this seller on eBay a few years back who imports from China. Sells ER collet chucks in 10-packs. I’ve personally purchased the ER16 and ER25 bulk packs from him and use them for most of my tooling. I’ve read some feedback about Chinese collets not being concentric. If they aren’t, I can’t tell. Can’t remember the last time I’ve built a part that needed to be within half thou anyway. Buy yourself 3 sets of collets off of eBay and you’re tooled up.

Oh yeah, you have to contact him. He may not have them listed but can still get them...or has

IMG_4350.jpg

I’m gonna send you a private message. Read it tonight.


Sent from my iPhone using Tapatalk Pro
 
Last edited:
OP
L

lilscorpion

Well-known member
Joined
Mar 15, 2010
Messages
3,599
Location
Colorado
Building up some parts for the lathe tooling organizer.

IMG_0034.jpg
 
Last edited:
OP
L

lilscorpion

Well-known member
Joined
Mar 15, 2010
Messages
3,599
Location
Colorado
Are those aluminum?

Yes, 6061. Started out with 1x3 bar. Started by roughing operations to square the bandsaw cut ends and then relieve the excess for the dovetail cutter. Before and after dovetail.

IMG_0027.jpg


Dovetail cutting with a single insert cutter takes longer than I like being an impatient person. Hindsight I'd get a more aggressive cutter.

IMG_0028.jpg


Last op is to clean up the ends with a finishing end-mill..

IMG_0032.jpg


Machined a profile into the upper edges. This will make more sense when the organizer comes together. More or less, I needed to clip the corners do I don't cut my wrists putting the tooling away.

IMG_0035.jpg


and then a way to mount them to the organizer - #7 drilled holes followed by a 1/4-20 spiral tap

IMG_0036.jpg


The upside is I got about 16 made. The downside is that I realized I need about 20. I had to order more material and run another batch. The "batch" work isn't difficult, it's just time consuming. What ***** is that I find myself in a situation where I really only need 4 more but I should probably go ahead and make 10 more so I have extras just in case. This way of thinking is a curse if I never need another and a gift if I find myself wanting one or two more a few years from now...
 
Last edited:
OP
L

lilscorpion

Well-known member
Joined
Mar 15, 2010
Messages
3,599
Location
Colorado
Yesterday I got to more bars of 6061 so I could make the remaining holders needed for the lathe tool holders. Though I really only needed 4 more, I decided to make all that I could out of the material (8).

IMG_0045.jpg


The pile slowly builds. At this point I have about 12 hours in machining time.

IMG_0047.jpg


I re-designed the trays that will hold the tooling (thanks to some feedback I realized i was being lazy). This new layout is more space efficient and tips the tools towards me which makes it extremely easy to see which tool I'm going to grab. The laminate will help protect the wood from the oils and fluids.

IMG_0042.jpg


IMG_0043.jpg


Holes were drilled through the surface and counter sunk from behind so that I could attach the holders using 1/4-20 flat head screws.

IMG_0051.jpg


Spacing worked out quite well actually. Five holders per "shelf".

IMG_0050.jpg


Test fitting the tools.

IMG_0052.jpg


I have a lot of right hand tooling so I set the rear spacing to be identical to the front. This allows a total of 10 tools on this one shelf.

IMG_0053.jpg


Get it mounted on the slides in the cabinet.

IMG_0055.jpg


Locked in and loaded.

IMG_0056.jpg


Now all 10 tools are easily accessible and visible. the 5 most commonly used tools are in the front and easily accessible when the drawer is closed. When it's open, I can access all 10 without moving one. Here's the drawer fully extended and locked. The tools sit perfectly over the chuck and slightly ahead of the tool post. For the most part, the tool comes off the rack and nearly straight down to the tool post.

IMG_0064.jpg


On to drawer #2. This one I wanted to make a little more universal. This drawer will have all of my boring tools, parting tools, etc. Since some of these tools are duplicated, I want the drawer to be easily changeable in the future for when I buy new tools so I needed to be a little more generic than I was with the last one with hole placement. Can't assume they're all right hand tools either. front shelf gets drilled for both left and right tooling. The hole spacing worked out perfectly. I can mix and match whichever I want as long as they're the same sized tool holders.

IMG_0067.jpg


IMG_0070.jpg


For now, three lefts and two rights are what I need.

IMG_0071.jpg


Back received even more holes with the ability to move the holders forward or backwards as well. I had a few boring bars that were longer than the others so extra space may also be necessary in the future. Installed the holders and got it loaded up.

IMG_0079.jpg


This new design ended up creating enough room above the drawers to add more shelves for more stuff which is awesome.

IMG_0077.jpg


Now I gotta figure out how to store the lathe chuck keys, calipers, files, etc as well as how to store all of the tailstock tooling. I have some ideas...
 
Last edited:

Strouty

Well-known member
Joined
Mar 21, 2010
Messages
38,208
Location
Southern Maine
That came out great, much better use of the space and more ergonomic!

On a sad note, I missed the auction link you sent, I was driving back to the motel when it ended. I did bid, but should have bid more, just me being dumb.

I am thinking about ordering some way covers for the Bridgeport, looks like new felt is cheap for for the wipers, so do it all at the same time. As far as the collets, you think the ER16 is the way to go? I am not really sure what is what yet, my mill has an air powered drawbar, so changing the collets is not too big of a deal.
 
OP
L

lilscorpion

Well-known member
Joined
Mar 15, 2010
Messages
3,599
Location
Colorado
That came out great, much better use of the space and more ergonomic!

On a sad note, I missed the auction link you sent, I was driving back to the motel when it ended. I did bid, but should have bid more, just me being dumb.

I wondered if you won it or not. Noticed the final price nearly doubled from where I bid on it. No biggie, there will be more.

As far as the collets, you think the ER16 is the way to go? I am not really sure what is what yet, my mill has an air powered drawbar, so changing the collets is not too big of a deal.


I think it depends on what you get into as far as Tooling goes. When I started out I most frequently used bigger end mills because I machined steel most frequently. I was frugal in how much tooling I had and usually only had a couple 4-flute in 3/8, 1/2, and 3/4-inch diameter. Since I hadn’t really played with aluminum much I may have had only a single 1/2-inch 2-flute. With that type of Tooling the best starting place is end mill holders and a couple keyed drill chucks. ER32 is the right size for this pattern.

The more I learned about speeds and feeds, the more I ventured out into smaller and purpose-designed Tooling like roughing end mills, chamfering, radius, indexable/insert, and smaller Tooling (down to as small as .100 end mills). Now I’d bet that 75% of my tools are 3/8-inch or smaller. That’s the sweet spot if ER16.

Now, to the actual question - Over time I’ve found that I really need multiple sizes of ER’s. Today I have 14 ER16, 12 ER25, 4 ER 32, and 1 ER40. I use them for drills, taps, end mills, and workpiece holding. Here’s some chucks I use for a variety of things in both the lathe and the mill making collets even more useful. The big one is an ER40 and the smaller two are ER32's.

IMG_0081.jpg


On a separate but semi-related thread - you may find yourself wanting a second vise if you only have one. The ability to create a workflow that allows for a part to be held in two different ways can be fantastic. A second vise can also enable you to leave a fixture or setup in place yet have another vise for a quick job you need to inject during making the other parts.


Sent from my iPhone using Tapatalk Pro
 

Strouty

Well-known member
Joined
Mar 21, 2010
Messages
38,208
Location
Southern Maine
I saw you had two vises, I have a decent Kurt vise and a really big palmgren.

Last question for now on the collets, what is the advantage of ER series collets? It seems to me if you have R8 collets there would be no real advantage to using them, so I figure I am not understanding the purpose yet. I have looked into the quick attach setups, those seem like a great idea, except really expensive.
 
OP
L

lilscorpion

Well-known member
Joined
Mar 15, 2010
Messages
3,599
Location
Colorado
I saw you had two vises, I have a decent Kurt vise and a really big palmgren.

Last question for now on the collets, what is the advantage of ER series collets? It seems to me if you have R8 collets there would be no real advantage to using them, so I figure I am not understanding the purpose yet. I have looked into the quick attach setups, those seem like a great idea, except really expensive.

Other than the fancy quick-change collets, there's 3 kinds:

Spring Collet - as the drawbar pulls the collet into the spindle, the taper of the spindle closes the spring around the tool. These hold the tools very securely and the tool rarely moves. Downside to them is that the collet no longer hangs onto the tool when it's removed from the spindle (during a tool change). If you're intent is to run a few parts that require multiple tool changes, you'll have to come up with a way to re-set the offset of the tool in the collet. It's very difficult to get it back exactly where it was and, as you'll find out, nearly impossible to even get it close. Another downside is clamping range. The design of the collets allow a very limited clamping range on a single collet. This means that you'd need to have a substantial set in order to be able to hold every size tool. Even the set that increments by 1/32nd won't hold every drill bit I have in my box.

Tool Holders - this is a holder that has a hole machined to to hold tools of very specific sizes. A 3/8 holder can only hold a 3/8 tool. One or more set screws are used to put side load on the drill and lock it in place. Some tools have flats machined on their shank specifically for the tool holder set screws. The problem is when the tool doesn't. The hardness of the tool may prevent the set screw from being able to retain it well and the tool can move in the holder. Up-side, wen compared to the spring collet, is that you can change the tool without worrying about the tool moving in the holder.

ER-Collets - Benefit of the Spring Collet for clamping force and the repeatability of the Tool Holder when pulling it in an out of the machine. Given how the springs are machined, there's a much broader usage range for a single collet than the Spring Collets have. With a "complete set" of metric and SAE, I've never encountered a tool I cannot run.

In my experience -

I have a set of spring collets and don't use them much. They're great if clearance is an issue or the intent is to run a single op where tool location won't need to be repeated ever again. I mean ever. If I think I might need to change tools during an op, I don't use a spring collet.

I will only use tool holders to hold measuring tools (dial indicators or offset gauges that load into the spindle) or tools that have the flats machined on them. I've been burned so many times by a tool moving just a bit in a holder that I don't even try anymore. In fact, I'd probably sell all of mine if I were given the chance.

I use ER Collets for everything that doesn't have a flat machined into it especially drill bits. I also only use ER collets on metric tools. Buying a set of metric collets was the easiest way to add the capability without a crazy investment.
 
OP
L

lilscorpion

Well-known member
Joined
Mar 15, 2010
Messages
3,599
Location
Colorado
Was creeping around eBay and found this - a ER collet that slips inside a spring collet. Guess spring collets can now allow repeatable offsets if these bottom on the face
 

Attachments

  • IMG_0239.jpg
    IMG_0239.jpg
    74.3 KB · Views: 113

Strouty

Well-known member
Joined
Mar 21, 2010
Messages
38,208
Location
Southern Maine
To clarify, the way the ER collets create a repeatable tool location is if you have multiple holders and do not remove the tooling, is that correct?

I have found all sorts of info and have learned a lot, but I still have a ton to learn. My 12" starrett precision level showed up, so now I am going to try and level my lathe.
 
Last edited:
OP
L

lilscorpion

Well-known member
Joined
Mar 15, 2010
Messages
3,599
Location
Colorado
To clarify, the way the ER collets create a repeatable toll location is if you have multiple holders and do not remove the tooling, is that correct?

I have found all sorts of info and have learned a lot, but I still have a ton to learn.


Correct. That’s what I have so dang many.

I probably couldn’t recall all the things I’ve learned but there’s a mountain of experience acquired from the day the mill was unloaded into the shop until today. Significant learning moments are still fresh - like when I had mistakenly programmed part clearance depth with the depth of cut. The z axis essentially went full rapid motion through the material and 3/8-inch into the top of the vise. My brain could not process it fast enough to save the day. That hole in the vise serves as a reminder to double check those key offsets...


Sent from my iPhone using Tapatalk Pro
 

Strouty

Well-known member
Joined
Mar 21, 2010
Messages
38,208
Location
Southern Maine
When you buy collets, do you buy the ones you most commonly use or just buy more sets? I guess I am not as familiar with tooling yet, do they standardize the shank sizes at all?
 
OP
L

lilscorpion

Well-known member
Joined
Mar 15, 2010
Messages
3,599
Location
Colorado
When you buy collets, do you buy the ones you most commonly use or just buy more sets? I guess I am not as familiar with tooling yet, do they standardize the shank sizes at all?

Tooling tends to have shanks equal to the carbide/HSS rod their machined out of. To save on machine time, they cut them out of the closest size larger than the final dimensions. So, if we're talking about end mills, you'll see a lot of 1/8, 1/4, 3/8, 1/2, 5/8, and 3/4-inch tool shanks. You can get a 5/8" end mill with a 1/2" shank but it will cost more than a 5/8" end mill of comparable quality do to the additional machine time necessary to grind the shank down the smaller shank size. Indexible tooling (which use replaceable inserts) are typically machined to fit the most common holder sizes a machinist would have for end-mills - some 1/2-inch (itty bitty for insert holders) but mostly 3/4, 1, and 1 1/4-inch in diameter shanks.

Where you start totally depends on how you intend to use your mill out of the gate. Machining aluminum and plastics with a CNC, you can make really big holes with a really small end mill (sweet). For that reason, I most frequently used the 3/8, then the 3/16, 1/4, and 5/16, with all other sizes used only for drill bits. I started out with two 9-piece ER16 collet sets. Something like this - https://www.ebay.com/itm/NEW-Precis...-16-1-4-5-16/310727295364?hash=item4858ca4184

Make sure the ad discloses the runout... something like half a thou (.0005/6). That multiplied by 2/3rds the length of the end mill (or however much hangs outside the collet) and doubled will tell you how the TIR impacts your cut diameter. 2.25L end mill X .66 X .0006 X 2 = .00178. A hole drilled with a 1/2-inch end mill will, theoretically, measure .50178. Unless you buy the big dollar end mills, they usually run a fraction of a thou undersized...which may compensate the right direction...I'm getting side-tracked. .0006 TIR is plenty good.

Sets can be had in 1/16, or 1/8 increments.

ER16 collet range: 1/(8 or 16) - 3/8"
ER25 collet range: 1/(8 or 16) - 5/8"
ER32 collet range: 1/(8 or 16) - 3/4"

The way you grow your capability really depends on you and how frugal you are. If you do the math, a 9-piece set at $20 makes each collet $1.10 each. You can't buy singles for less than $5 shipped and, most frequently, they're more like $7 shipped. Really it's exactly the same as the old craftsman socket set vs individual socket pricing - they stick it to you when you only want one. Lose/damage a couple, a smart many just buys another set.
 
OP
L

lilscorpion

Well-known member
Joined
Mar 15, 2010
Messages
3,599
Location
Colorado
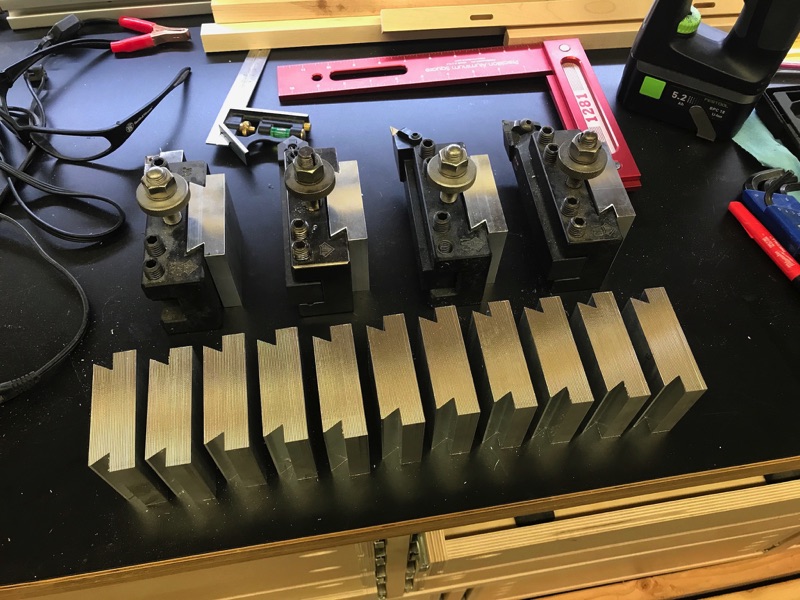
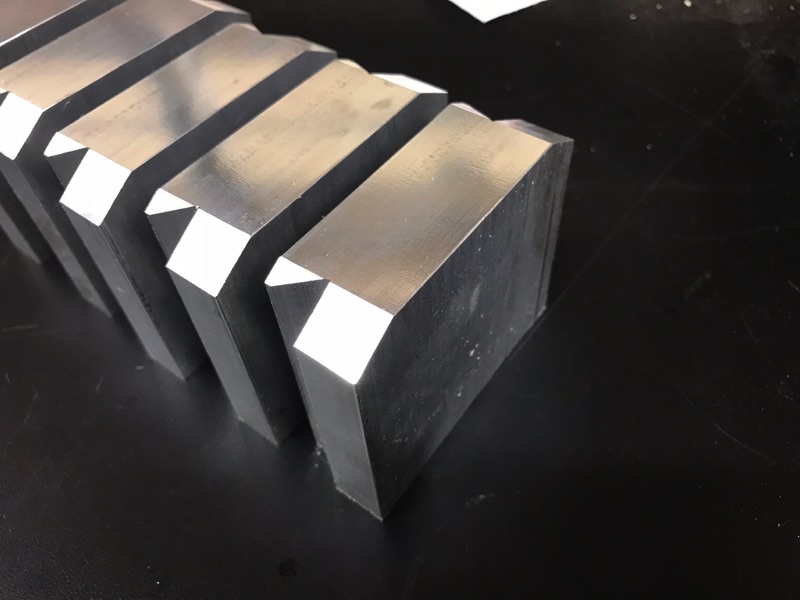
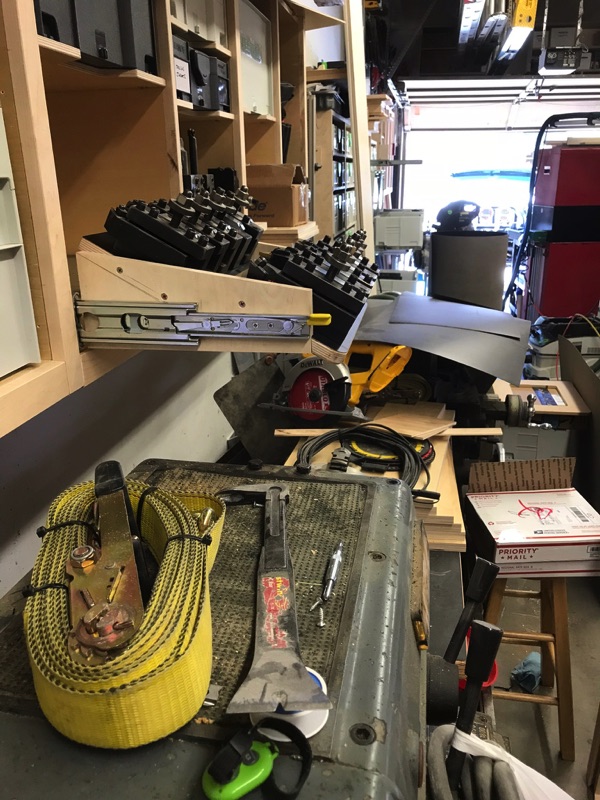
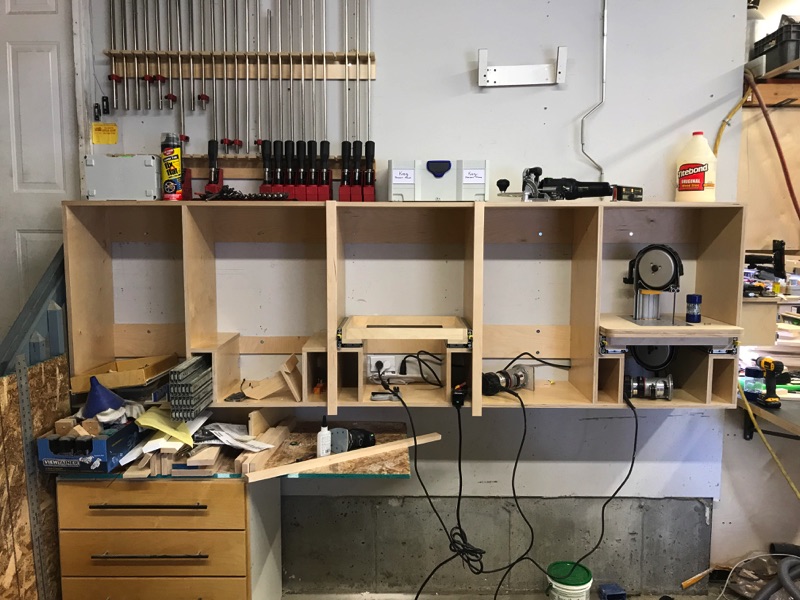
Picking up where I left off - Router Buddies Mk2 - I had gotten the cabinet assemblies hung on the wall, re-assembled the prototype (aka #1) and got the slides and frame built for #2 before I ran out of parts and couldn't go any further. I needed 2 more sets of the Kreg router plate levelers, another pair of locking drawer slides for #3, and 2 more switches. This week everything was delivered but one of the switches and the locking slides which I found out on Friday were backordered (*****).

IMG_3651.jpg


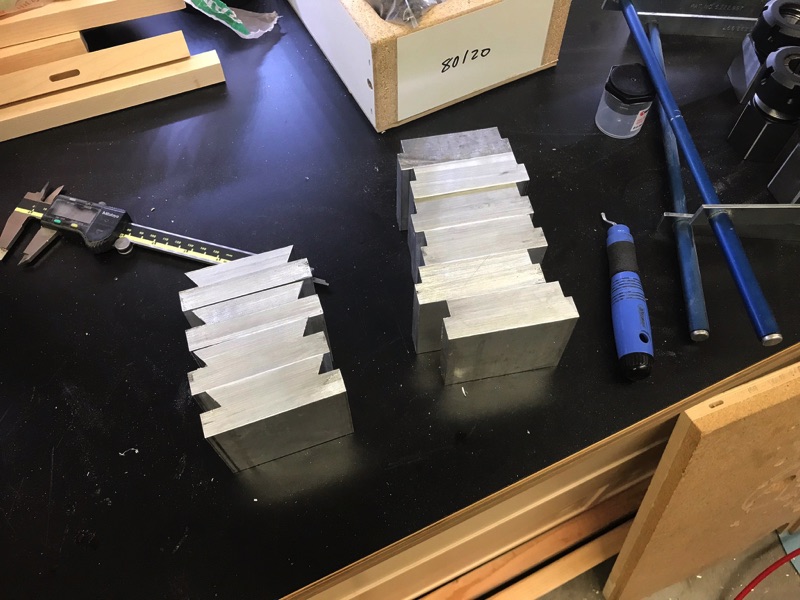
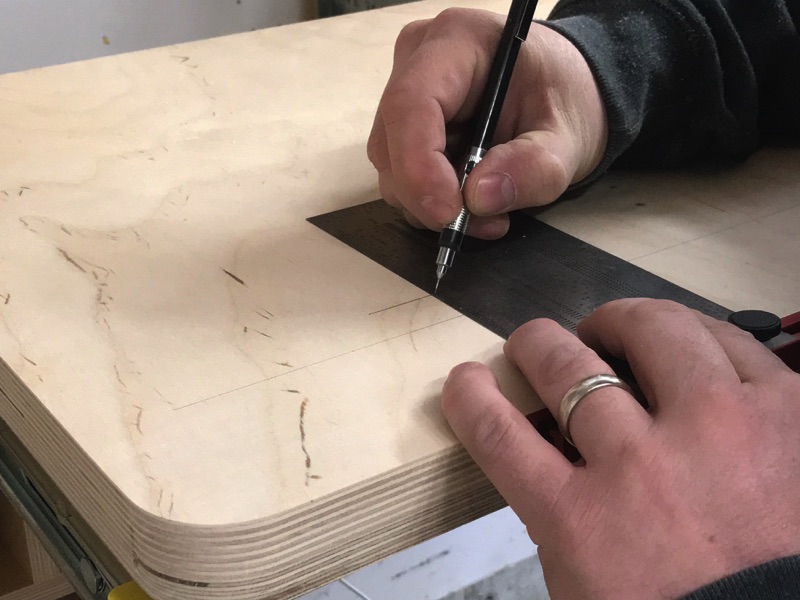
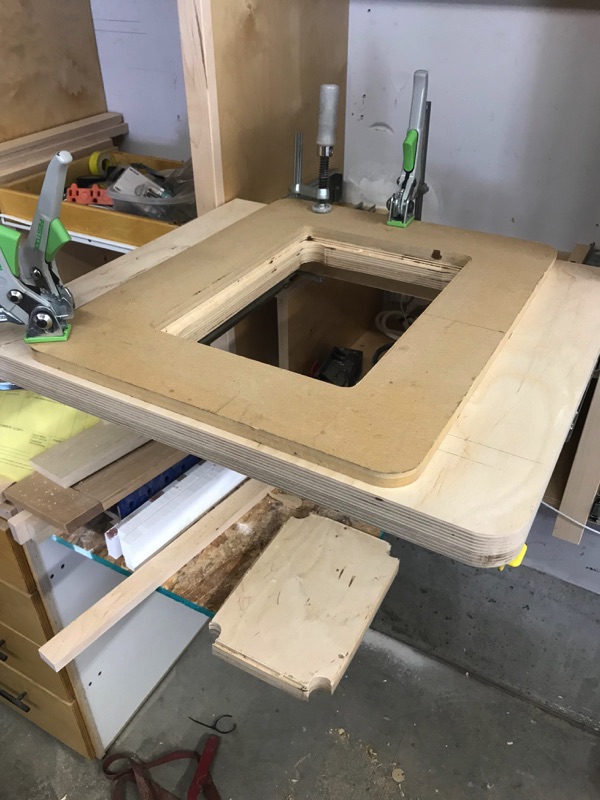
I had glued up two more tops last night in prep for today so all I needed to do was square them up, cut them to size, and machine the radii into the fronts.

IMG_3700.jpg


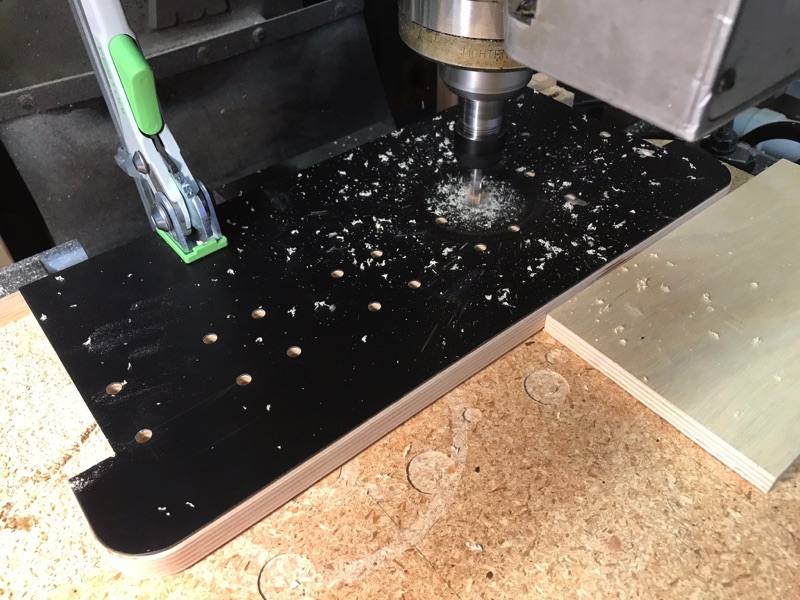
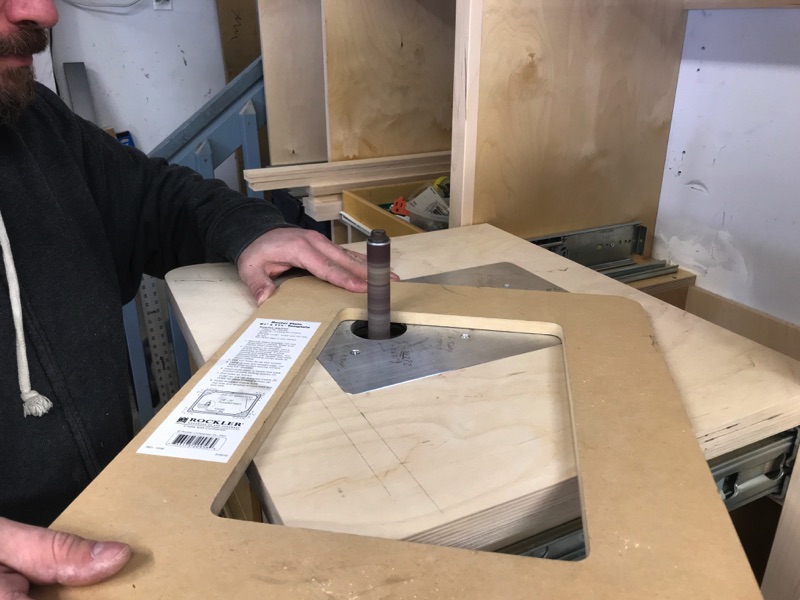
I then mock up the top to figure out where I need to place the template for the router plates. Since I want all three to be the same, I use the first as a pattern and mark it the same on the second and third. I through-drill the corners with forstner bits so that the router has an easy place to plunge and it's less effort to change directions in the corners.

IMG_3726.jpg


With the template in place, I make 2 passes with the router to prevent the surface from chipping and splintering when rough cutting the profile with the jigsaw.

IMG_3735.jpg


Now a finish pass is all that's left to leave clean cut.

IMG_3736.jpg


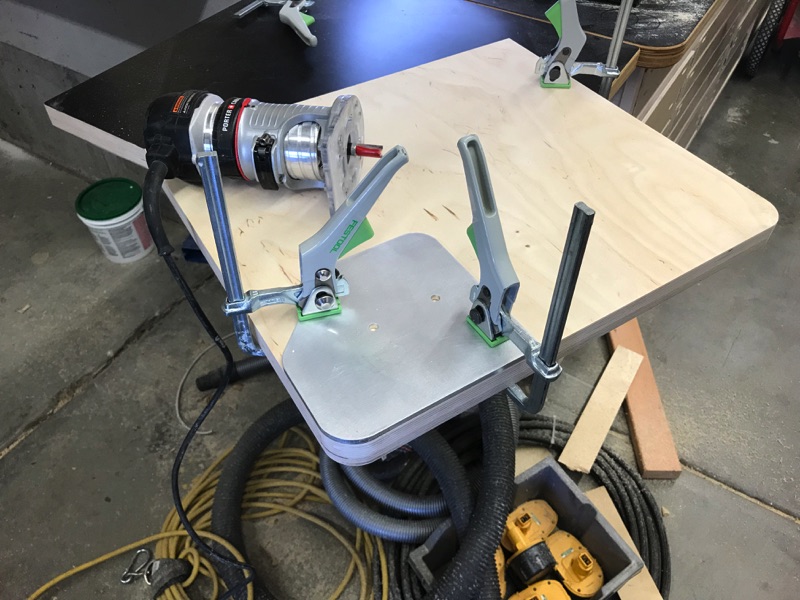
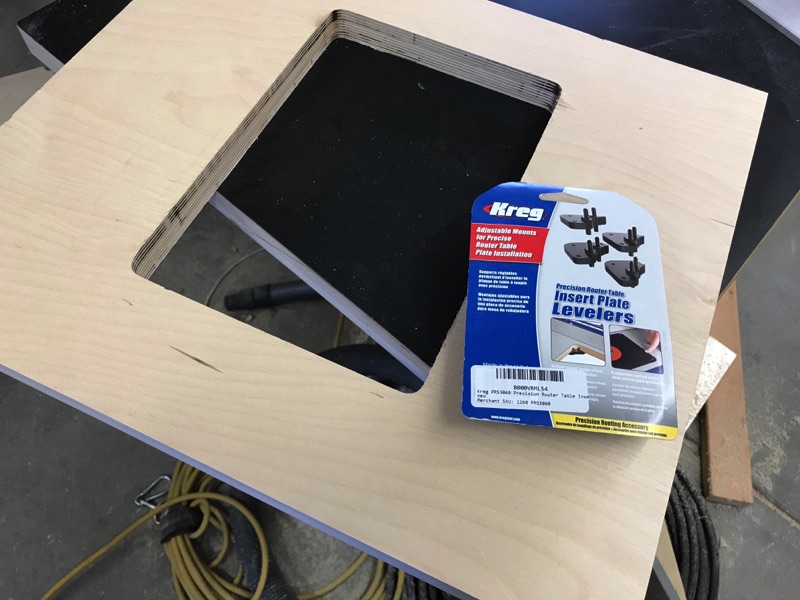
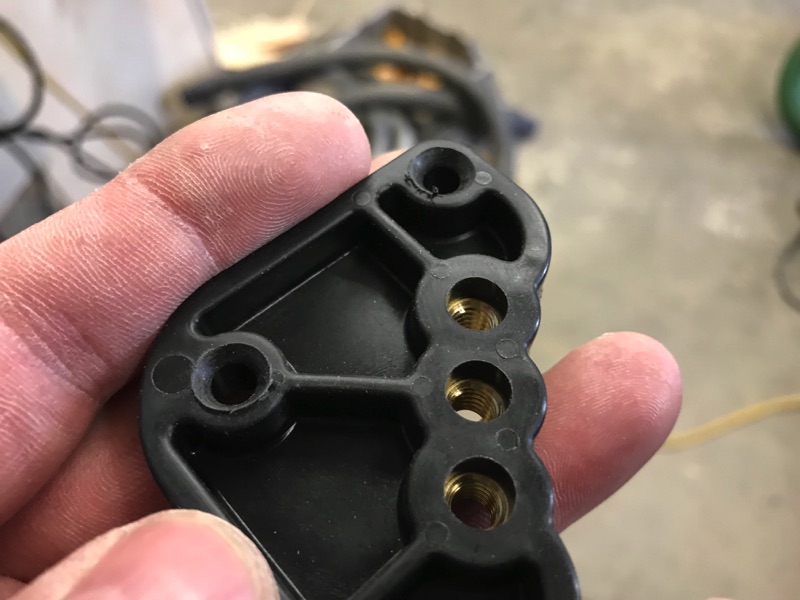
Now for the Kreg router plate levelers. Normally these are really easy to install. you just push them up from the bottom in each of the corners and screw them in place.

IMG_3739.jpg


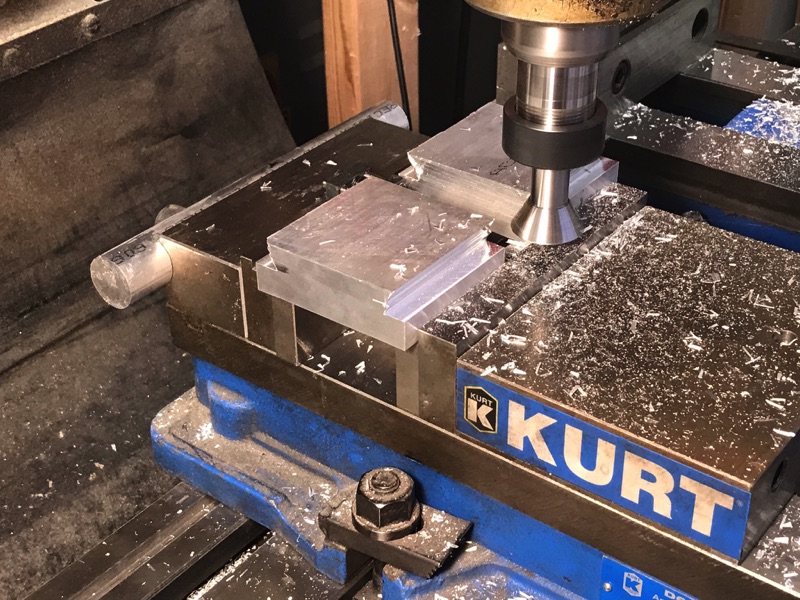
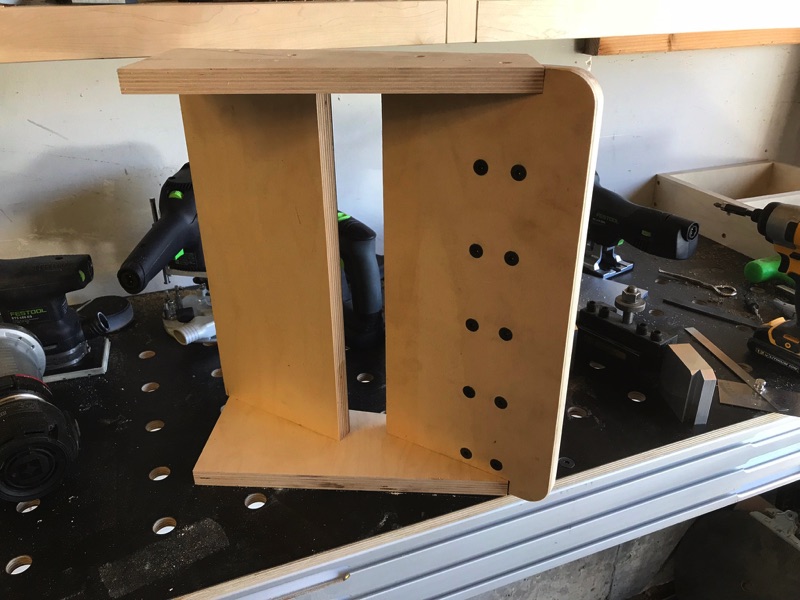
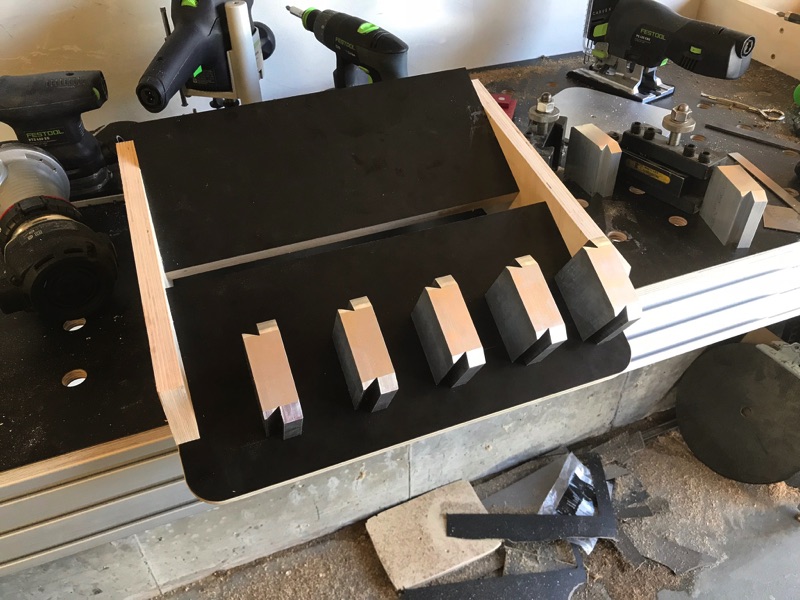
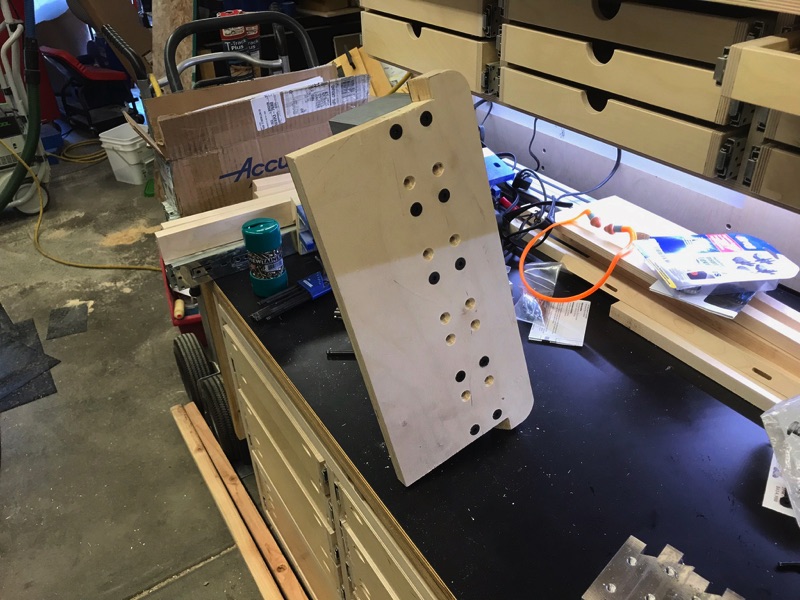
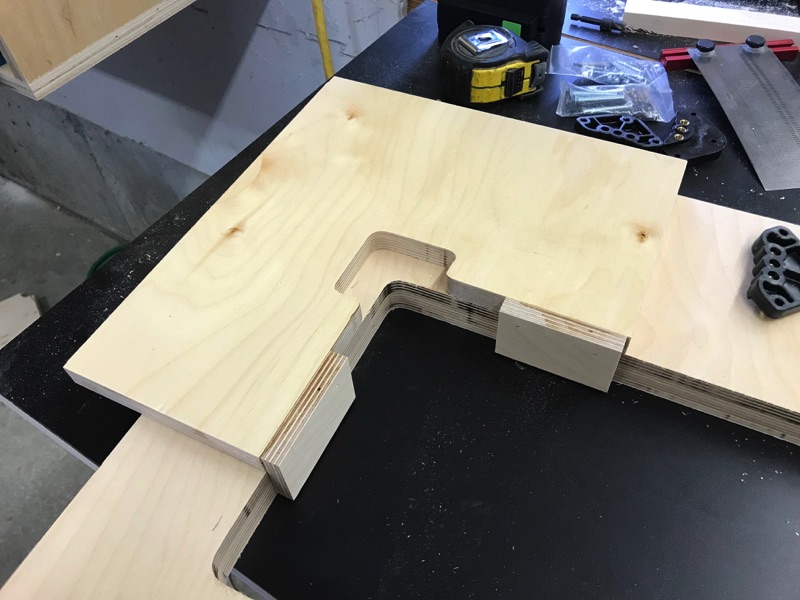
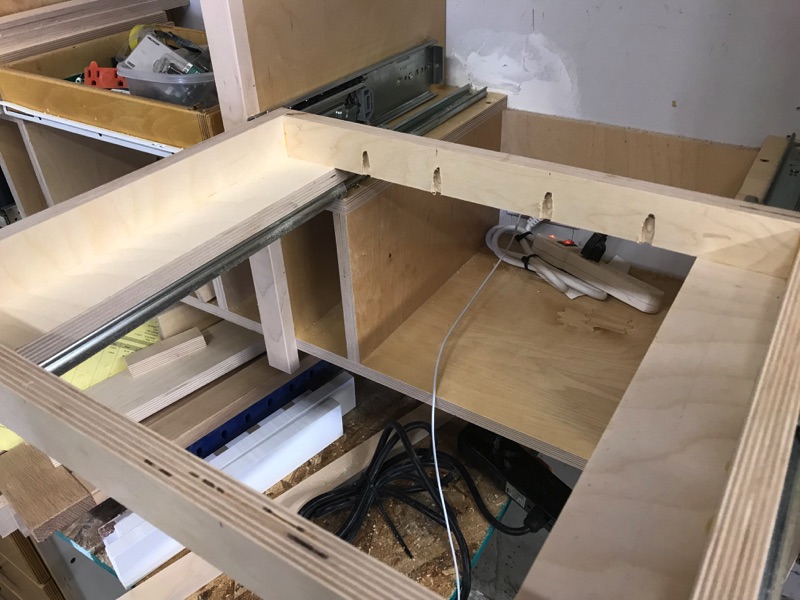
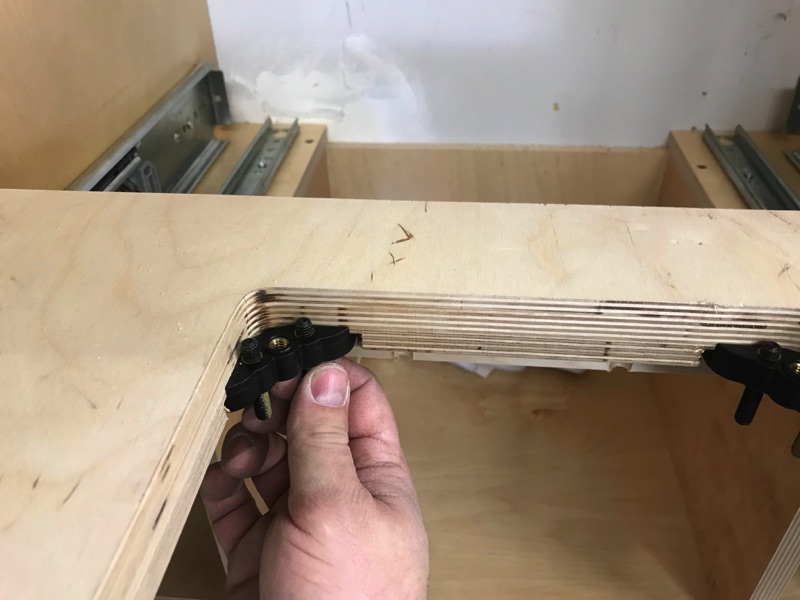
I can't in this case though. Because of the close quarters inside the cabinet, the cut-out is nearly the same time by the light weight frame I made to support the top which will force me to recess the leveling feet. To accomplish this I cut out a pattern of the feet and glued some guides so that I could easily locate in each of the corners.

IMG_3747.jpg


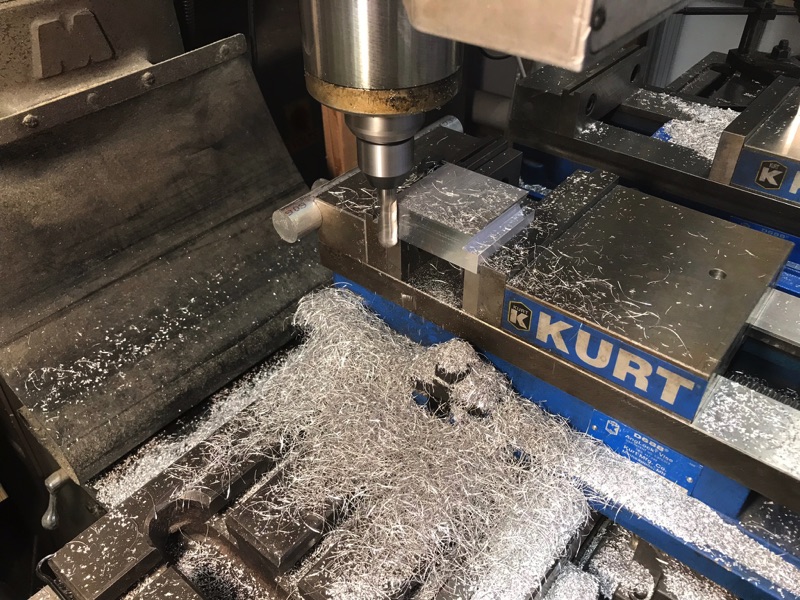
A few passes with the router and the corners are prepped.

IMG_3752.jpg


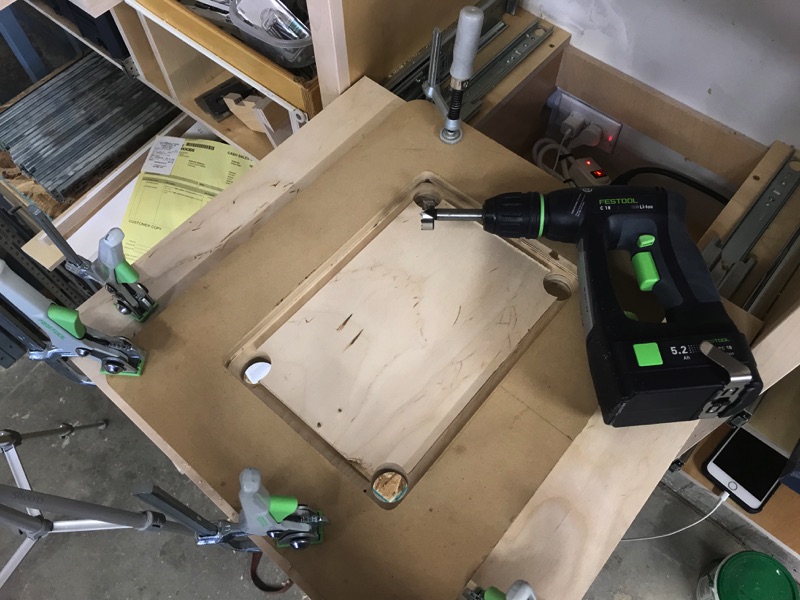
I was a little too perfect with the depth so I actually had to countersink the leveling feet so that the screws would sit flush.

IMG_3754.jpg


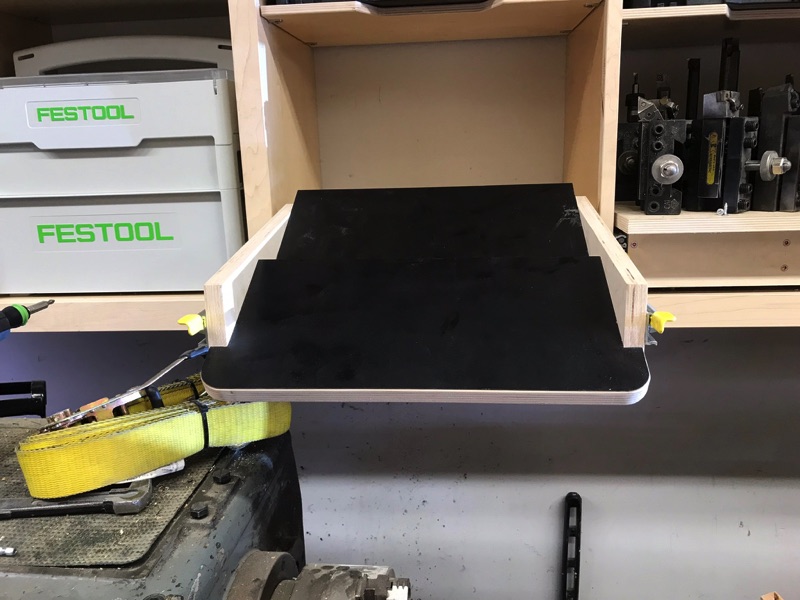
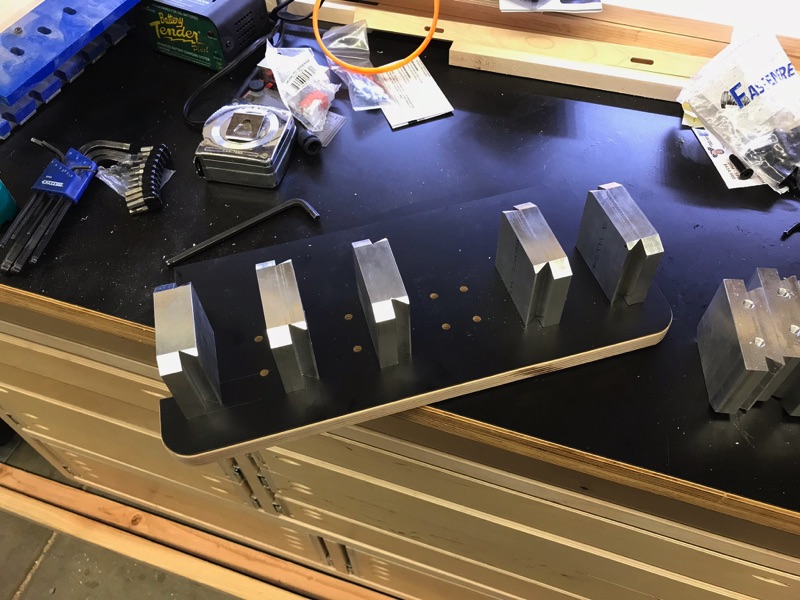
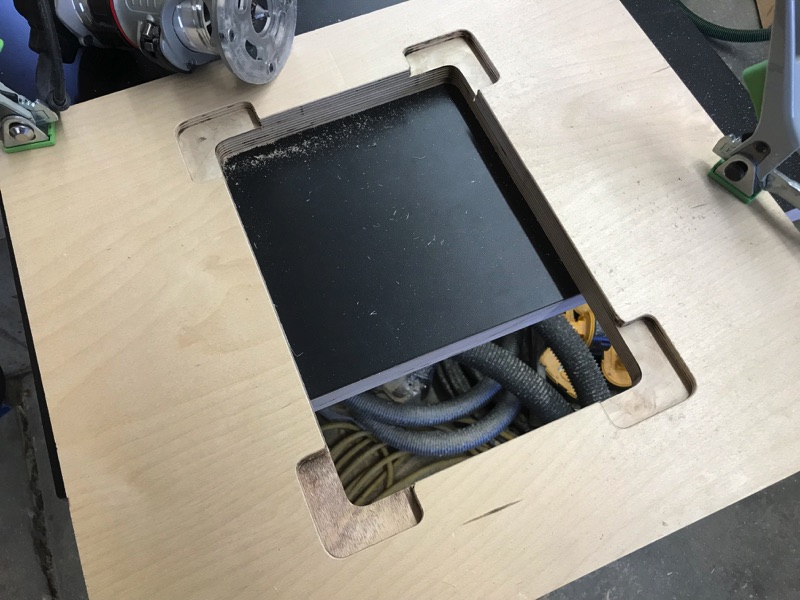
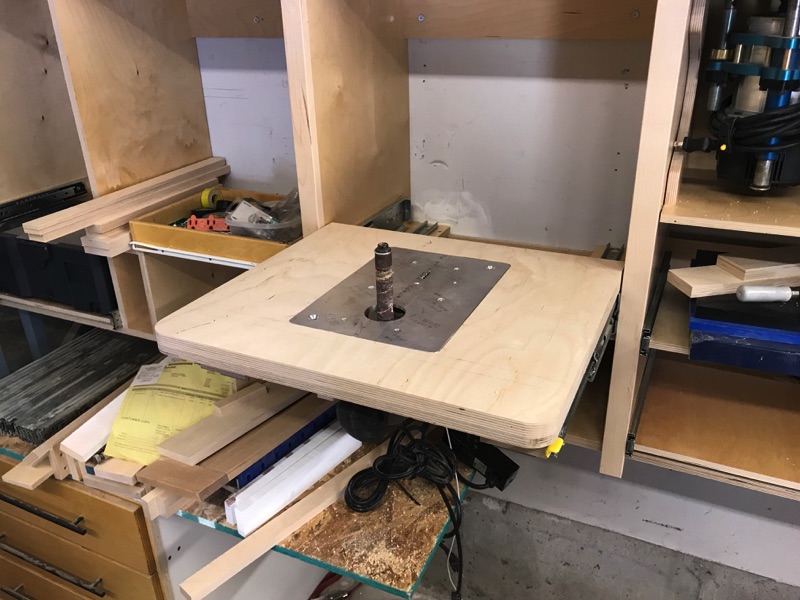
Installed and ready to be attached to the frame.

IMG_3755.jpg


The top will be attached by pocket screws through the frame.

IMG_3756.jpg


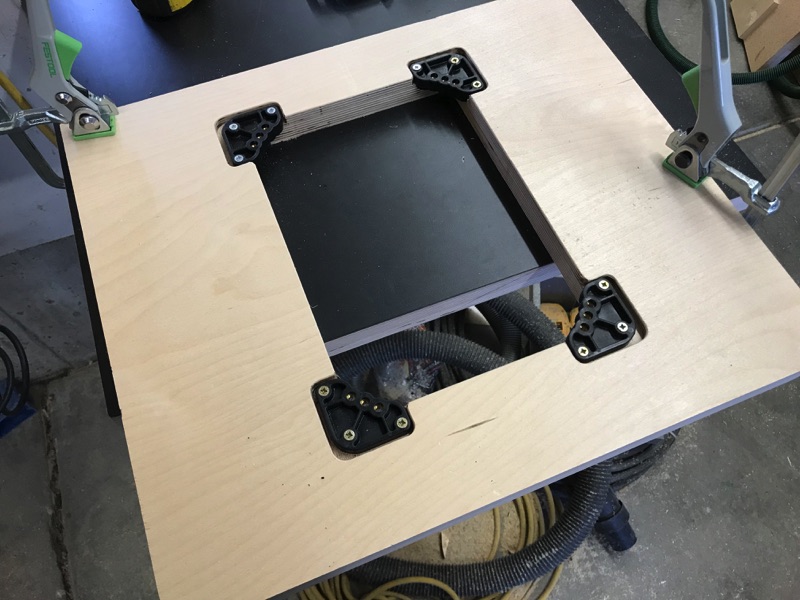
With the levelers in place, a little pre-adjustment (guessing) makes final adjustments go a little faster.

IMG_3760.jpg


After some tweaking, the plate sits in the hole nice and level. Took longer than it should have to get #2 to this point even though I already had the measurements and plan.

IMG_3763.jpg


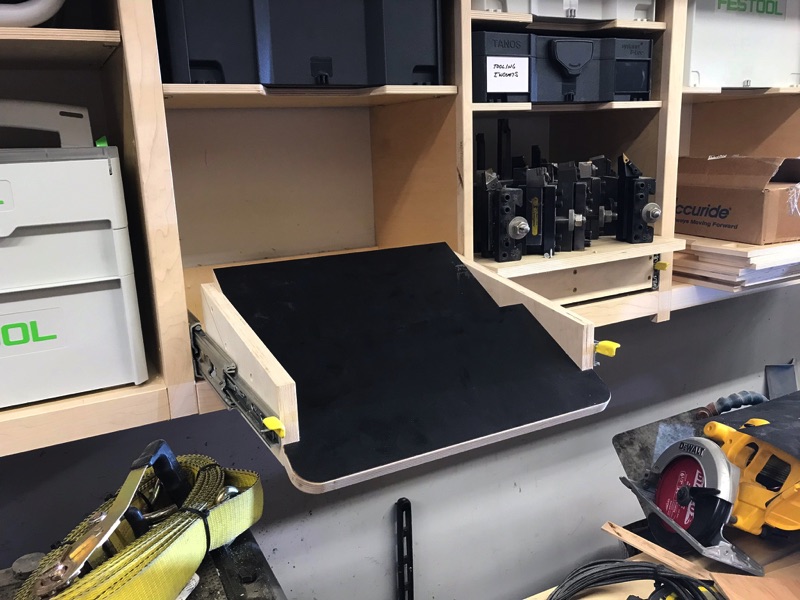
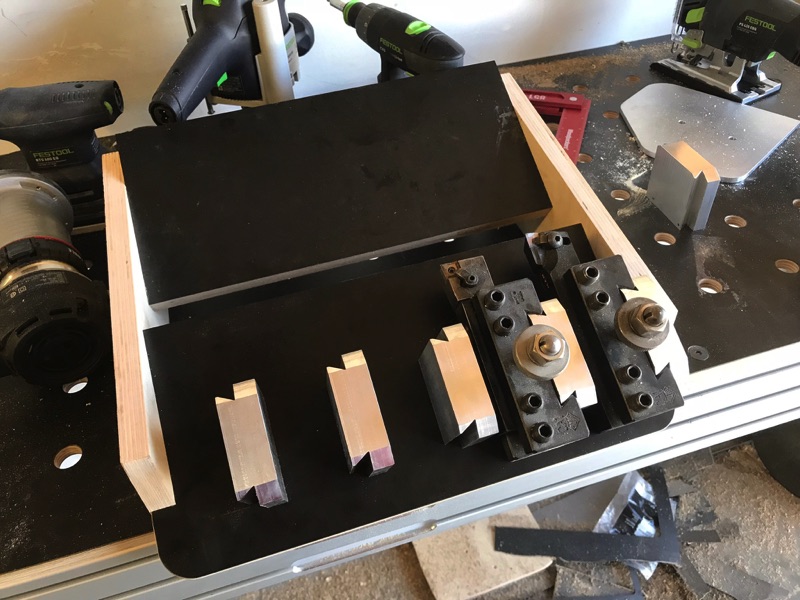
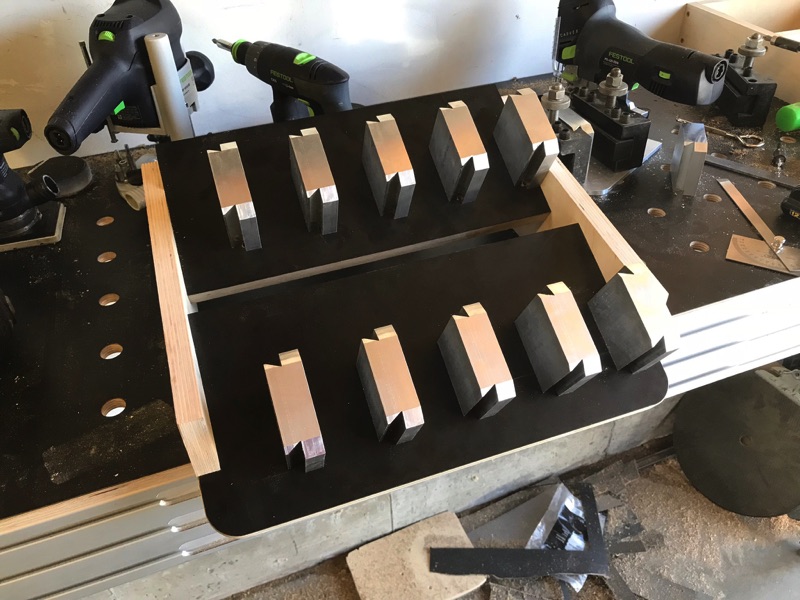
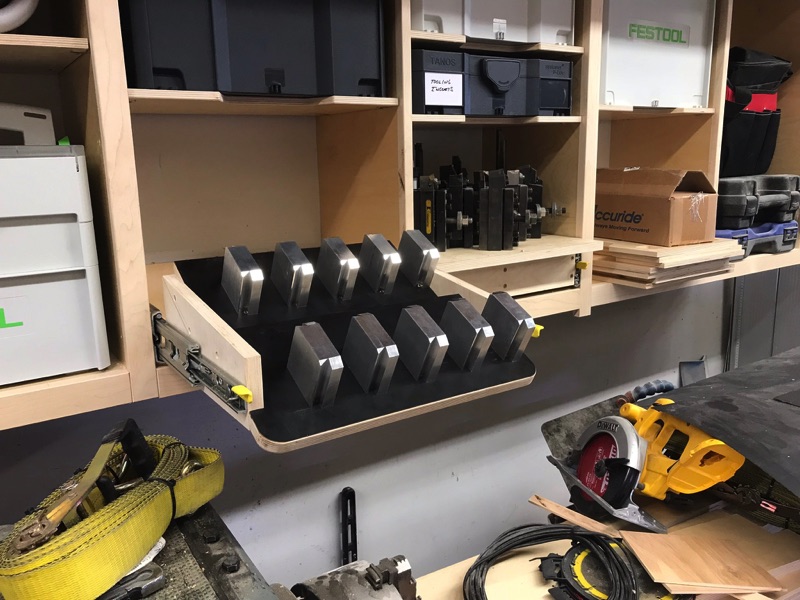
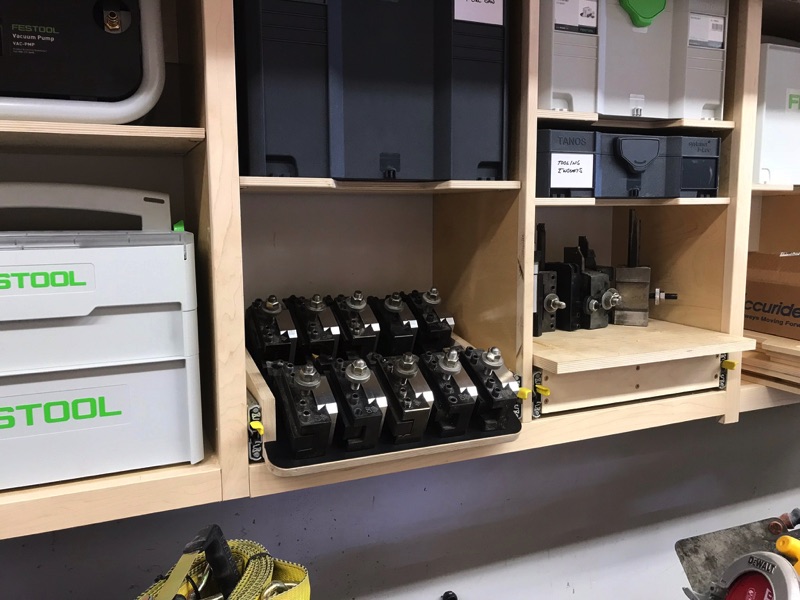
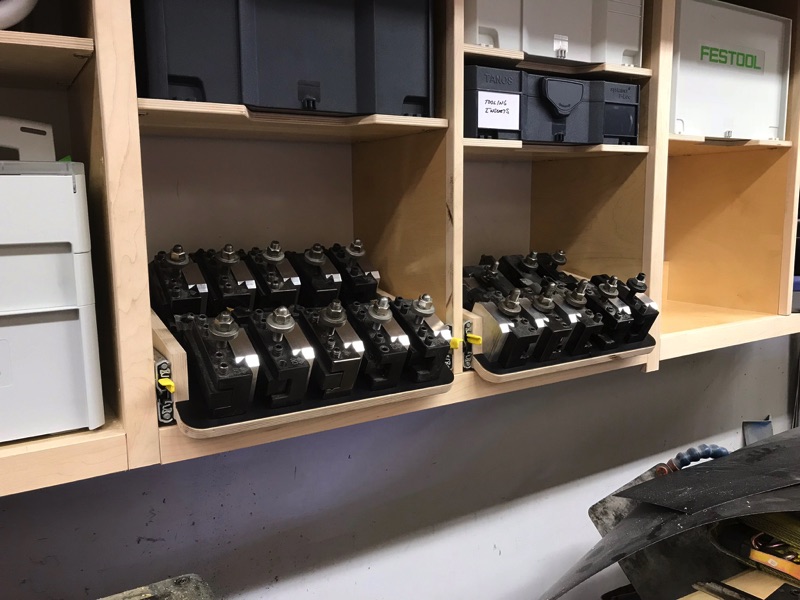
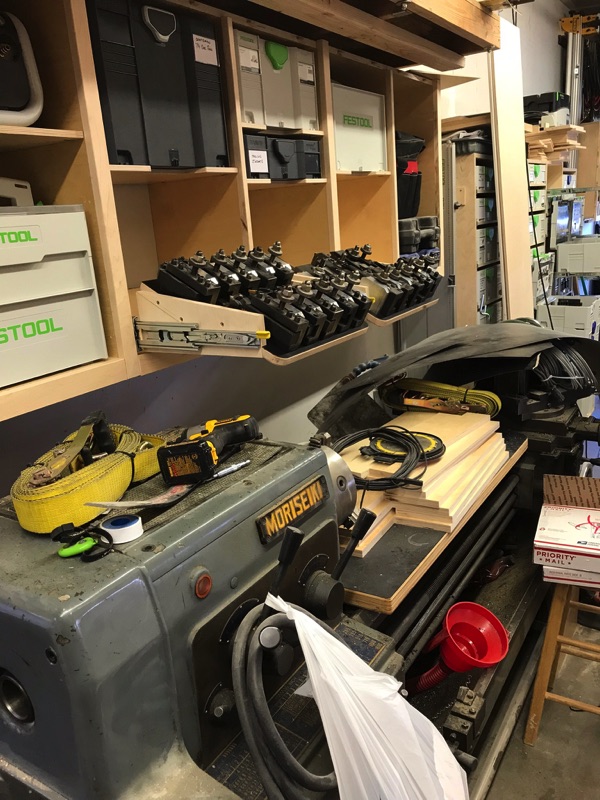
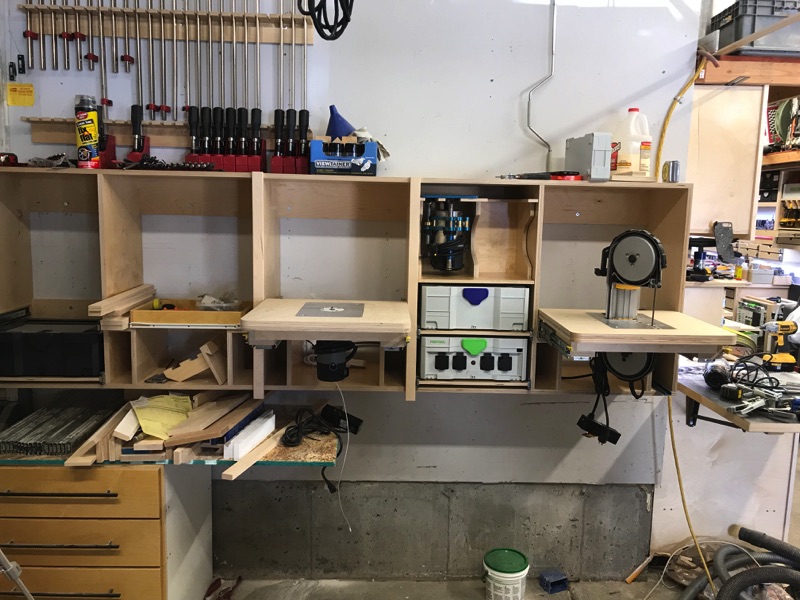
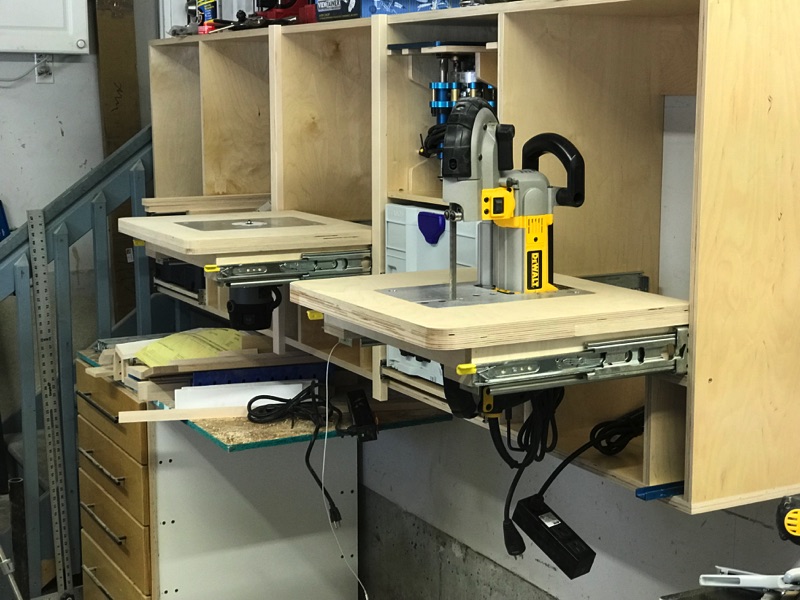
After getting the table assembled, I spent a little time getting the router plate module and systainers in place between the tables and swapped the tools out a few times to get an idea of how easy it will be. Now it's a breeze. Not sure if I'll feel the same way when I add dust collection. Last step was running the wires to the two switches so the tables are operational.

IMG_3770.jpg


This picture gives a little perspective at how the stations will work. With both of them out at the same time, I have much more access to the full tables than I did with the old router buddies.

IMG_3773.jpg


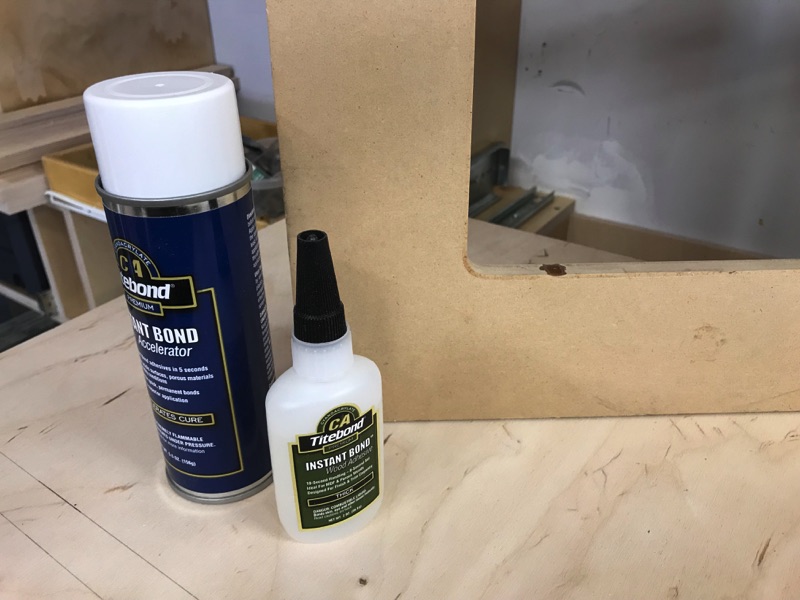
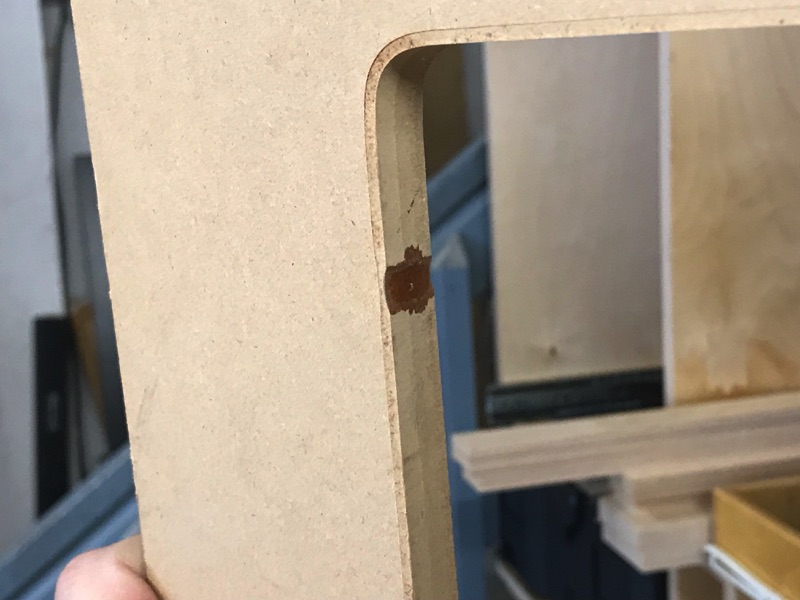
It didn't take me long to come up with a project to try them out on. During routing the plate opening in the second top I inadvertently nicked the side of the template with the router after my last cut. I've learned to fix these mistakes with CA glue.

IMG_3733.jpg


You can apply a few drops in the cut out and the glue soaks in and then builds up to the point where you can smooth it out again.

IMG_3734.jpg


then a little touchup and it's good as (or better than) new.

IMG_3809.jpg


Table works extremely well. Plywood surface doesn't work very well but once this top is lamented, it'll be the sizzle. Now back to waiting on parts...
 

Strouty

Well-known member
Joined
Mar 21, 2010
Messages
38,208
Location
Southern Maine
You are giving me all kinds of ideas, I have an old office/construction site trailer that I want to make into my wood shop and some of this stuff would be perfect for it. How do the tables feel when you slide them out? I was thinking worst case you could add a fold out brace or leg and then it would act like a tripod of sorts.
 
To avoid these ads, REGISTER NOW!
OP
L

lilscorpion

Well-known member
Joined
Mar 15, 2010
Messages
3,599
Location
Colorado
You are giving me all kinds of ideas, I have an old office/construction site trailer that I want to make into my wood shop and some of this stuff would be perfect for it. How do the tables feel when you slide them out? I was thinking worst case you could add a fold out brace or leg and then it would act like a tripod of sorts.


I could totally see this kind of system in a container. Using one for a shop is a neat idea.

They’re very stout slides and barely flex when I push down hard down on them. I really don’t think you’d need to add any additional support. Their 500lb rating is believable.
 

Strouty

Well-known member
Joined
Mar 21, 2010
Messages
38,208
Location
Southern Maine
Thanks for the input, it looks like the best way to have useful floor space, but still be able to access the tools without a big deal.
 
OP
L

lilscorpion

Well-known member
Joined
Mar 15, 2010
Messages
3,599
Location
Colorado
Thanks for the input, it looks like the best way to have useful floor space, but still be able to access the tools without a big deal.


I think the next steps will also show my ideas come together on how the system creates usage efficiencies when swapping tools and consumables. They’ll be stored immediately above the tools they belong with. Previously I had them stored distal to the tools which required me to either bring them to the tools as a part of setup or leave the tools during operation in order to fetch them. The old way was highly inefficient and frequently I’d leave those consumables laying about because it wasn’t easy to put them away. Hopefully my idea will solve for that.
 

Strouty

Well-known member
Joined
Mar 21, 2010
Messages
38,208
Location
Southern Maine
I have the same issue with my things being stored awkwardly, walking across the shop to fetch or put away something just doesn’t work well for me. I don’t think I am too lazy, it is just the internal fight that it mentally makes no sense to put them away if I am going to need them again. I am trying to get things into processes, unfortunately (not) I will most likely have to buy duplicates of tools to make this work for me.
 
OP
L

lilscorpion

Well-known member
Joined
Mar 15, 2010
Messages
3,599
Location
Colorado
I have the same issue with my things being stored awkwardly, walking across the shop to fetch or put away something just doesn’t work well for me. I don’t think I am too lazy, it is just the internal fight that it mentally makes no sense to put them away if I am going to need them again. I am trying to get things into processes, unfortunately (not) I will most likely have to buy duplicates of tools to make this work for me.


One of my most significant learning moments happened about a year in on the business. I had a 3300 square foot shop that was laid out in an L. Machines had to be somewhat scattered so I could access multiple sides of them. For whatever reason, all of the machines required a 3/4” Wrench for setup and I used a craftsman ratcheting Wrench because the speed of it saved time...but I had the tendency to leave it on or near a machine which then sent me looking for it probably a dozen times per day. Maddening. One day I gave up and bought a 3/4” ratcheting Wrench for each machine and an additional one for my pocket. I never had that problem again in the following 2 years. Best $100 I spent.
 

Strouty

Well-known member
Joined
Mar 21, 2010
Messages
38,208
Location
Southern Maine
I used to have a utility truck, I had at least three of everything so that all three guys could be using the same tool at the same time, even my cordless tools. The only things I had just one of were either prohibitively expensive or rarely used. It was definitely the best investment I ever made. I miss my utility truck, I was organized very well with that, once I transitioned to the shop, I have never been able to make things work the way I think they should. Ongoing struggle and I have not figured out yet if the GJ makes things better or makes them worse.
 
OP
L

lilscorpion

Well-known member
Joined
Mar 15, 2010
Messages
3,599
Location
Colorado
I miss my utility truck, I was organized very well with that, once I transitioned to the shop, I have never been able to make things work the way I think they should.
The truck is one concentrated place for everything. It’s where you always start and where you finish...for all 4 of you.

Ongoing struggle and I have not figured out yet if the GJ makes things better or makes them worse.


I get it. Sometimes I feel like what really makes sense on GJ sometimes doesn’t when implemented in my shop. I recall someone saying they can’t get their head around drawers and they’d instead prefer all cabinets. That’s damn crazy talk to me..


Sent from my iPhone using Tapatalk Pro
 

Strouty

Well-known member
Joined
Mar 21, 2010
Messages
38,208
Location
Southern Maine
For me, I have had the biggest issue with committing to drawer space and labeling them. It makes for an awkward time looking for things in the "blue drawer".

IMG_0791.jpg
 
Last edited:
OP
L

lilscorpion

Well-known member
Joined
Mar 15, 2010
Messages
3,599
Location
Colorado
For me, I have had the biggest issue with committing to drawer space and labeling them. It makes for an awkward time looking for things in the "blue drawer".

IMG_0791.jpg


Most GJers would have absolutely no issue having such a problem. Most would be content to just gaze out at that sea of cabinets in disbelief that such a place even exists.
 

Strouty

Well-known member
Joined
Mar 21, 2010
Messages
38,208
Location
Southern Maine
I described that situation as the best nightmare I ever had. It was and probably still is stressful as I have not even come close to organizing everything yet.
 

BoilermakerFan

Well-known member
Joined
Apr 17, 2006
Messages
2,188
Location
Indianapolis, Indiana
I described that situation as the best nightmare I ever had. It was and probably still is stressful as I have not even come close to organizing everything yet.

I'm still in shock that you have enough stuff to fill even one tenth of those cabinets, let alone close to all of them.

I'm not sure I could fill the Milwaukee 46" base chest and the 30" stacked cabinets. The 46" base and 30" top are going in the garage. The 30" bottom is going in the basement shop. I will need 5 wall cabinets for the stuff on the shelving units I'm keeping, mostly spray cans, car wash stuff, Akro bins of fasteners, etc.

The tool chests will be just for tools and I will have unused drawers.
 

Strouty

Well-known member
Joined
Mar 21, 2010
Messages
38,208
Location
Southern Maine
Acquiring things was the easy part, organizing them is the hard part. I do have some leftover drawers, but not because I ran out of stuff, but I ran out of space to put the drawers. I think once I build some storage similar to LS, storage that is purpose built, my need for so many drawers in the shop may decline. I will be able to use some in the conex for my deep storage, things I want to keep, but don’t want in the shop.
 

BoilermakerFan

Well-known member
Joined
Apr 17, 2006
Messages
2,188
Location
Indianapolis, Indiana
Both of you guys have a ton of more stuff than I could ever imagine owning. That's not being said as a negative, it's just that I couldn't imagine dealing with that much stuff and having to store it, then trying to remember where it is like you said. That would cause me a lot of stress because I know I'm not a neat, well organized person. I try, but that's just not me.

I know LS is reorganizing his storage and work areas to make it easier for him, and both of you guys have been a great inspiration to me. You've helped me really look at my stuff and decide what my true wants and needs are. My wife has been on me to purge for years (and I have done so over the years), but now it's kicked up a level. I'm getting rid of a lot of stuff that even a year ago I probably would have held on to it.

One question my wife asks me is, "would you really want to move this _____ to a new house, or would you rather get rid of it now and buy a nicer version of it years from now when you might actually be ready to use it?" Well, when it's viewed from that perspective... heck yeah I'd like a nicer version in the future! I think I need to pick up the cheapest, ugliest, used mill I can find, then donate it away so I can justify a Tormach CNC mill at the next house. :bounce:
 

Grumblebum

Well-known member
Joined
Aug 10, 2015
Messages
1,940
Location
Wollongong Australia
I think the next steps will also show my ideas come together on how the system creates usage efficiencies when swapping tools and consumables. They’ll be stored immediately above the tools they belong with. Previously I had them stored distal to the tools which required me to either bring them to the tools as a part of setup or leave the tools during operation in order to fetch them. The old way was highly inefficient and frequently I’d leave those consumables laying about because it wasn’t easy to put them away. Hopefully my idea will solve for that.

LS this is a great take away point from this thread. We can get to the "cleaned up" or "everything has a home" stage and feel good about that, but the place quickly clutters up again as like tooling/consumables being displaced from each other is conjusive to not being put away again.

This makes sense to me, for me to use a sander I need to get it from the power tool area (still in the orig blow mold case) then go to a different area and pull out a tote with all the sanding consumables. Each time I need to change paper grades it's a trip back to the storage tote etc etc. Tooling and consumables together makes so much sence, it's like phase 2.

Great thread (I thought the orig thread was fantastic) looking forward to it all come together in the reorg.

Cheers GB
 
OP
L

lilscorpion

Well-known member
Joined
Mar 15, 2010
Messages
3,599
Location
Colorado
Is this template plate one you made or purchased?


I purchased it from Rockler maybe a dozen years ago. You can get them on amazon for most major brands of router plates for $15-$25. Make sure you check the dimensions of your plate before ordering one, not all have the same dimensions. Depending on the brand, they’re slightly different -

Rockler/Bench Dog - 8 1/4 x 11 3/4
Kreg/JessEm/Woodpeckers - 9 1/4 x 11 3/4
MCLS/Rousseau - 9” x 12”

You could make a really nice template yourself using scrap from around the shop. The only real trick is to get a router bit with a diameter 2x the radius of your router plates corners. Mine are 1/2 so I’d need a 1-inch bit.

If you have the bit or choose the make vs buy route, here’s a vid showing how to do it. Note - I don’t use double sided table like the guy in the video, I use clamps. I don’t trust tape).
 
OP
L

lilscorpion

Well-known member
Joined
Mar 15, 2010
Messages
3,599
Location
Colorado
...I couldn't imagine dealing with that much stuff and having to store it, then trying to remember where it is like you said. That would cause me a lot of stress because I know I'm not a neat, well organized person. I try, but that's just not me.

Regarding my stuff count - it’s acquired capability. Lathe Tooling as an example - nearly 2 dozen tools but they all have a purpose. I usually don’t just buy tools...I says to my wife.

Regarding being organized - LOL. I was not always, I just realized one day that I had a choice - the space can work for me or it can work against me. Having spent years moving things to make just enough space to do something on the bench, or dig in a pile of tools only to still not find the one I’m looking for, or to make a trip to the store to buy a tool only to find 3 of them here and there a year later...shop time doesn’t have to be painful but to get there requires effort. As a rule of thumb, I spend 1/2 my shop time on the shop.


I'm getting rid of a lot of stuff that even a year ago I probably would have held on to it.

I think this is more key than most realize. Inspect the reason you’re holding on to a specific item. I used to justify the retention of most stuff with nothing more than “just in case”. I had on to ~200 lbs of junk nuts and bolts just in case. Know how many times that bolts bin has saved me? Maybe a dozen. Now would I trade the space of that huge *** drawer, to store and organize other things, for 12 trips to the store? Yes.


"would you really want to move this _____ to a new house, or would you rather get... a Tormach CNC mill at the next house. :bounce:


I’ve had this conversation almost exactly. Unfair to use hopes and dreams of the future to negotiate the outcome of the present. Get it in writing. [emoji6]

If it’s real, you gotta look within - hey me, could I really sell my CNC knee and my Mori lathe for a CNC tormach mill and lathe?!


Sent from my iPhone using Tapatalk Pro
 
Last edited:

cheechi

Well-known member
Joined
Feb 29, 2012
Messages
4,384
Location
Triad, NC
I was referring to the corner radius template you're using in that particular photo. Sorry for the confusion.
 
To avoid these ads, REGISTER NOW!
Top Bottom