Customizing a small ax.There are 2 ways to fit logs on the walls of a log house. One is to chink the spaces between the logs (caused by knots and bumps in their shape) with moss etc. to make them air tight and the other is to scribe the exact shape of the bottom log onto the log above it on both sides and then come along and cut out the “V” of wood between the scribe lines on the bottom of the top log. This way the top log fits exactly airtight atop the lower log. When cutting the “V” a chainsaw is usually the go to tool but you don’t cut to the scribe line. You use a hand ax to shave the last bit of wood out to the line.
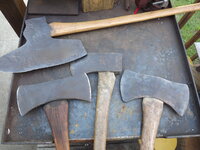
I decided I wanted to create a special carving ax from one of my ax heads. I’ll point out now that a carving ax is not meant for chopping. The blade is held with one hand while the handle is held usually right next to the blade except for sometimes when you might hold the handle near it’s far end for some leverage and control. I should also mention I spent about 10 or more years building log homes so this experience is where these design ideas come from. I hadn’t planned to document the process so I don’t have any “before” photos but this one is close. I’ve drawn in some black lines along the top where I have started cutting into the head to give an idea of the original shape.
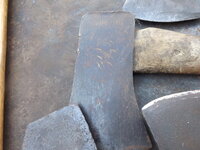
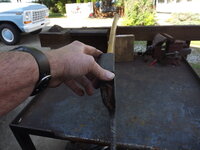
I used a horizontal bandsaw (in the vertical position, think metal bandsaw) and a zip disc on an angle grinder for most of the cutting. The ax head was about 2.5lbs to start with. There were no markings at all on this ax which is another reason I chose it. I didn’t want to cut up a cool old ax. However it’s not to say this ax was low quality, on the contrary I soon discovered it was really nice steel. If you look closely you can see the line that runs along from the bottom where I have cut up to the top. This is the generous amount of tool steel that was forged to the front edge for the cutting surface.
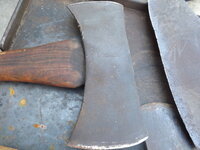
I sketched out a rough design on the ax with a felt pen. This was an evolutionary process that developed as I went about drawing it out. Originally I’d thought along the lines of a Hudson Bay ax for the back end but about here I got the bright idea to make a small adze head along the back side.
The other thing you often do with a hand ax is shave little scallops of wood off a surface of maybe a window sill to create a bit of a slope for rain water to run off. Think of this like machinists used to do on cast surfaces with bearing scrapers (but a lot cruder).
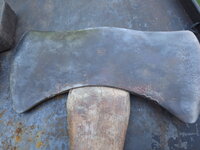
When you are axing in this way and run into a knot it’s hard to get past the knot by shaving with the blade of the ax and this is why I put the tiny adze in the back of the head. You can carefully chip out knots in surfaces you are hand axing. Hand axed surfaces look gorgeous and are pretty much smooth and free of slivers.
I can be a bit of a cheapskate sometimes so when it came time to think about the haft I didn’t want to go buy the ideal piece of hardwood somewhere. I hate leaving the garage to go buy something so I thought about the piece of Gary Oak I’d scrounged from a landscaper. I know it’s not the same caliber of oak you find in the prairie provinces or central USA but worth a try and the price is right.
I needed a special bend so the head would be canted downward to expose the adze more.
After slabbing the log with a chainsaw, bandsawing out the stave and rough fitting the head:
the final smoothing was done with an abrasive disc on and angle grinder, wood rasps and then sand paper.


AWESOME!
")


.JPG")
.JPG")
.JPG")
.JPG")
.JPG")
.JPG")
.JPG")
.JPG")
.JPG")